
How to add Google Analytics in WordPress: step by step guide
• 6 min read
Knowing specific details about the audience coming to your website is very important for your business success. Google Analytics is a free tool that provides comprehensive stats about your website’s traffic. Another way is using Google Tag Manager.
Why tracking analytics is important
Tracking your website’s analytics is crucial for your website’s success. These analytics provide you the actual reports about the visitor’s interaction with your website, such as who they are, their age, gender, geographical location, how they landed on your website and stats about the most requested content.
Considering all this information, you can plan future strategies to boost your business or even target specific user groups. You can know the audience’s interest and should provide them with the content they are looking for.
What are the available options for tracking analytics
There are various tools to track your website’s analytics, but the most commonly used tool is Google Analytics. This free tool provides extensive tracking reports of your website. This tool can easily integrate with your website and keep an eye on each action to track the stats.
How to setup Google Analytics in WordPress
You can easily set up Google Analytics for a WordPress website. All you need to do is simply add tracking code, that comes in the form of JavaScript code, that you must paste into your website’s head section.
There are two easy ways to add Google Analytics to your website:
- Manually paste the Google Analytics code to the head section of your website. This method is great if you prefer not to use any third-party tools and/or are developing your own theme.
- Use a WordPress plugin to add the required code to the website automatically. This is probably the most common method to integrate Google Analytics with your website.
Regardless of the method, you will first need to generate the tracking code.
Signup to Google Analytics and generate the code
The signup to Google Analytics is very simple. You need a Gmail account for this. Here is a step-by-step guide to signing up and generating the code.
Step 1: Access the Google Analytics website and click on “Get started today”. Now sign in with your Gmail.
Step 2: After signing in, a welcome screen will appear. Sign up for Google Analytics with your Gmail account. Click on “Start measuring”.
Step 3: Account setup. In this step, you have to set up your account. Put your name in the account detail; you can insert any name. It is not mandatory to put the name of the website. You can also change the the preselected options below according to your preferences. Click on “Next”, when you are ready for the next step.

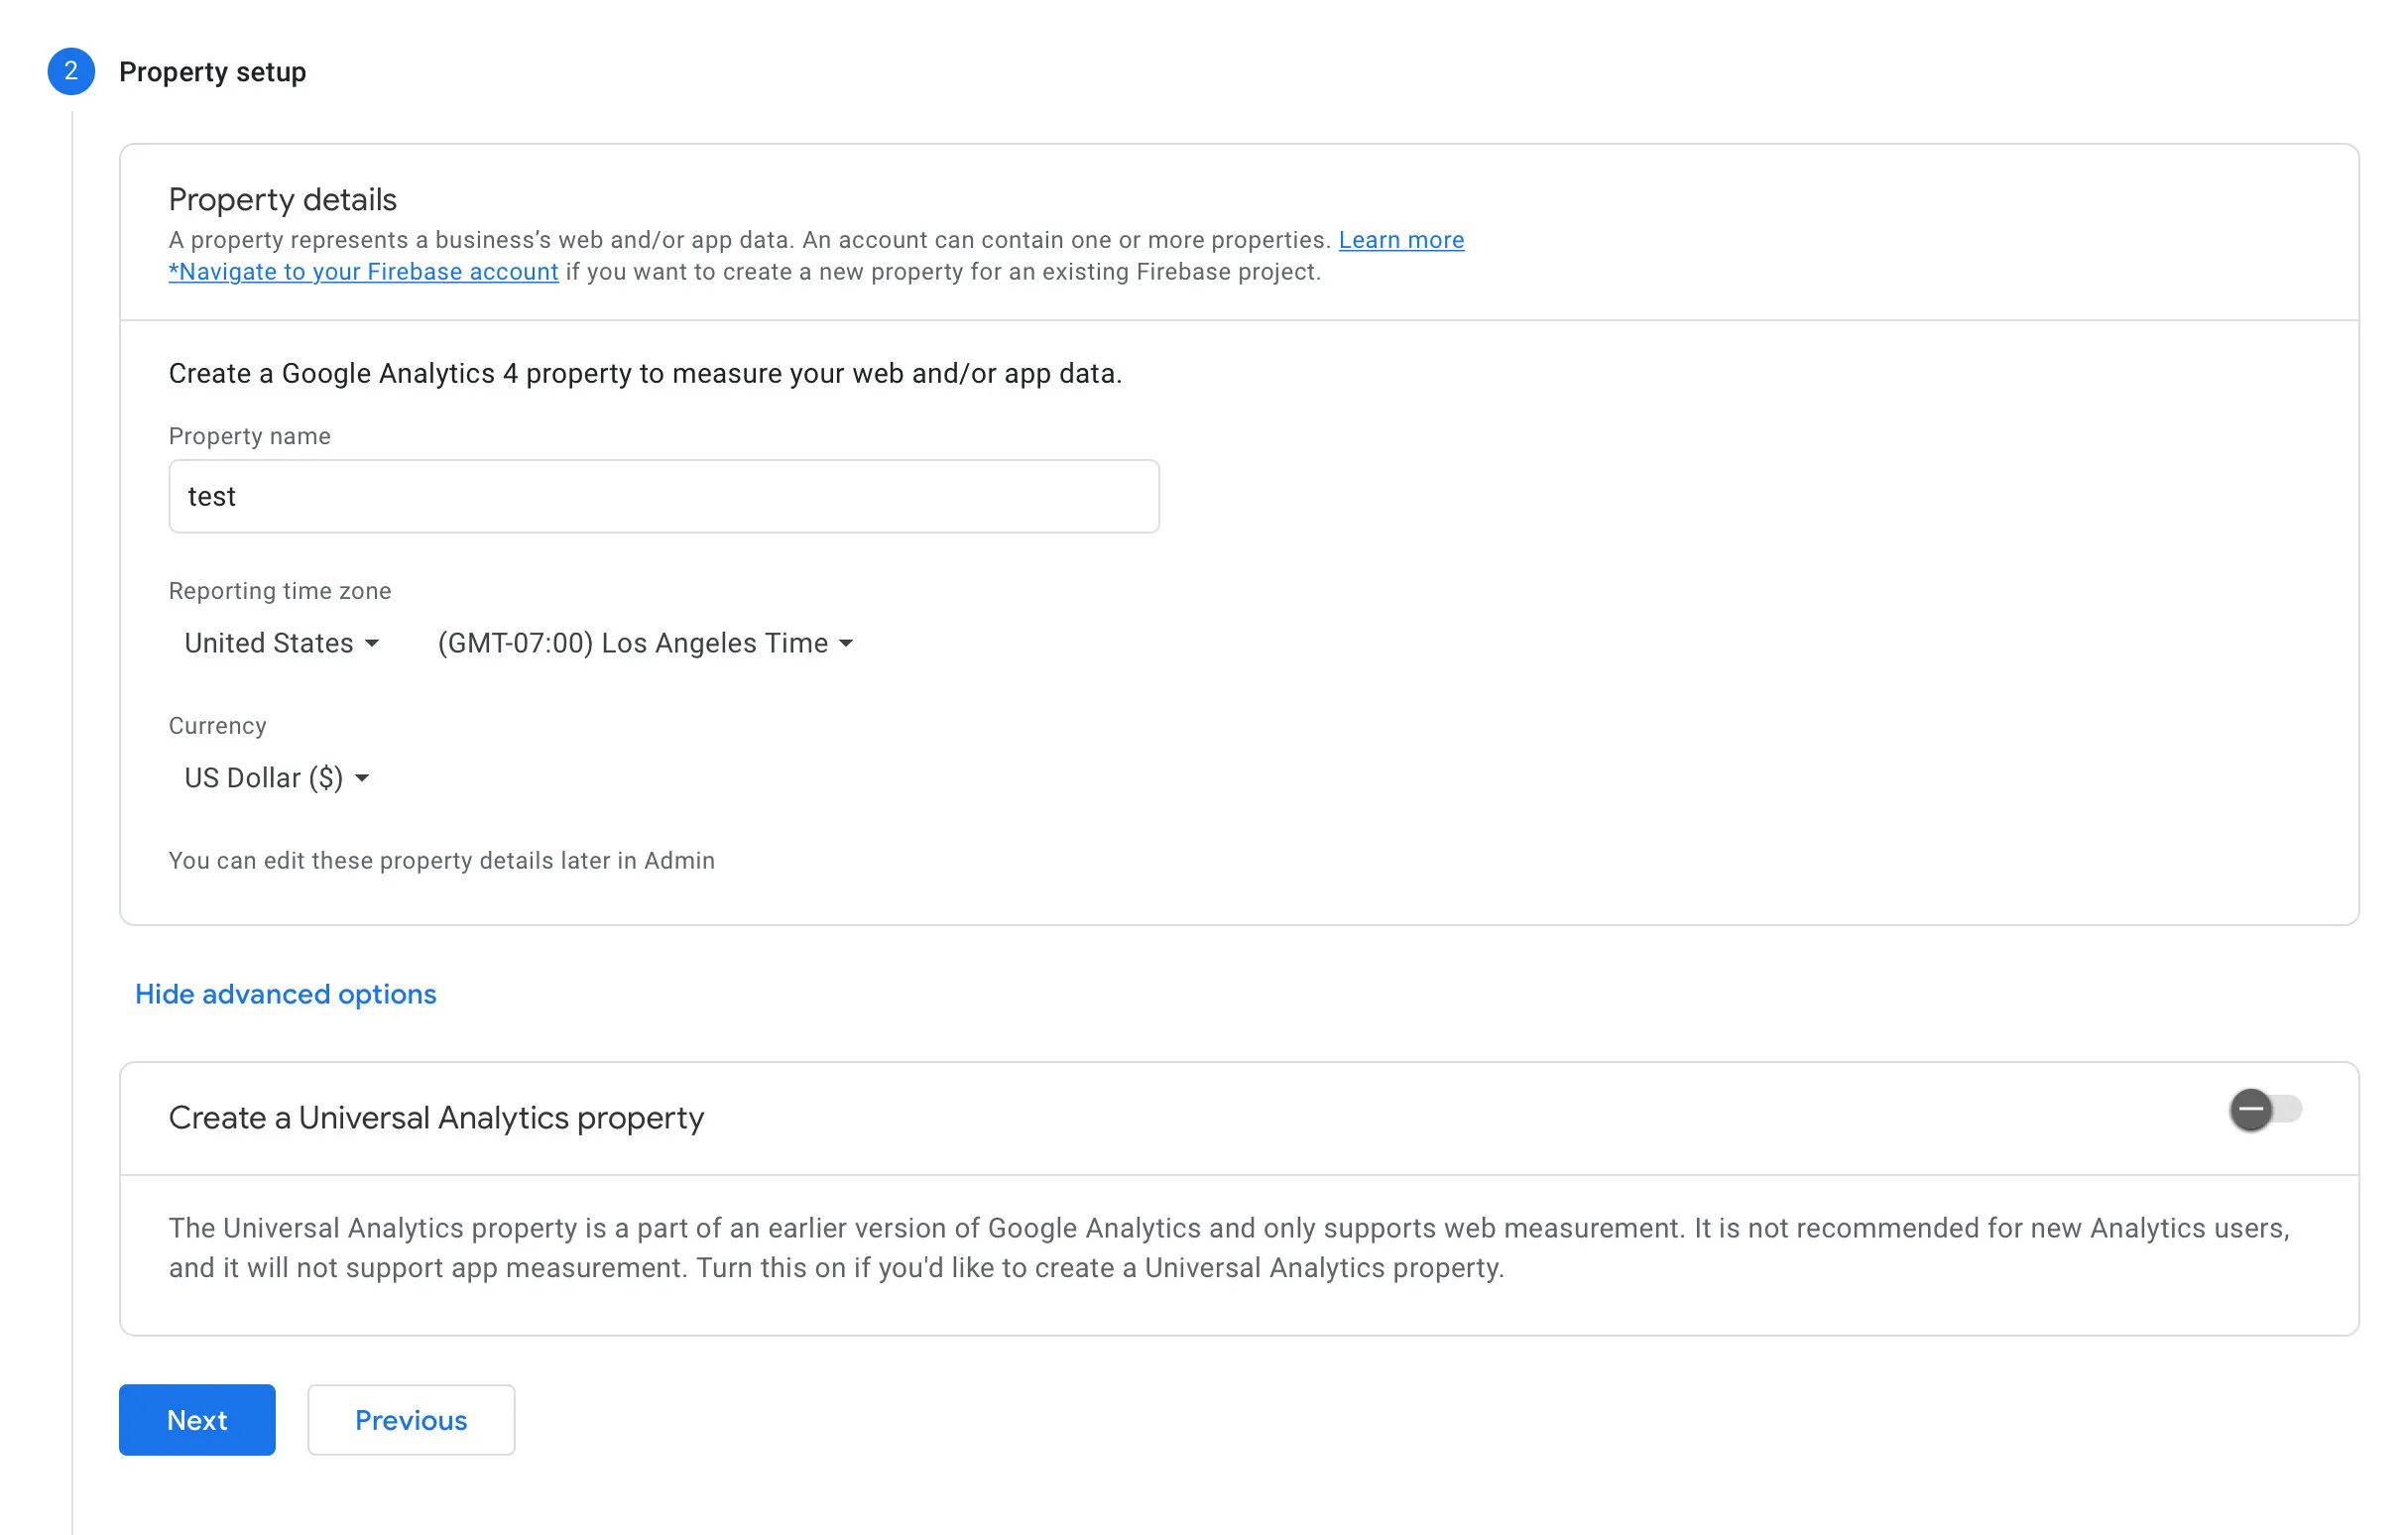
Step 4: Property setup. In this step, you have to put the name of the website you want to track in the “Property name” field. Select the country and currency, click on “Next”.
There is an important setting you will find if you click on the “Show advanced options” link at the bottom of the form. If you skip this options and click on Next, then Your Google Analytics 4 (GA4) account will be created. But, if you click on this option, there is an option “Create a Universal Analytics property”.
If you already have a universal analytics account, then it’s mandatory to start tracking data in Google Analytics 4. Because the universal analytics account will not work after 1st July 2023, if you start using GA4 before, you will still have the data even if the universal analytics account is closed.
Step 5: About your business. In this step, you can select information relevant to your business: industry category and choose business size from the options. Next, you must select how to use Google Analytics with your business. You can tick on multiple options that meet your requirements.
After you are done setting everything up, click on “Create”. After this step, a popup window will appear showing the terms and conditions. Click on the checkbox and accept button. Now, another popup window will appear that contains some email communications. You can tick them according to your preferences.
Finally, your account has been created successfully, and there is a tracking code in the text box.
Step 6: In this step, you have to copy and then paste this code into the head section. The code should be pasted in the head section of each webpage of your website.
Depending on how your website is setup, it can be time consuming to add the code on every page, especially if your website has a lot of web pages and is not using template files. But the general idea is to paste the code on the head section.
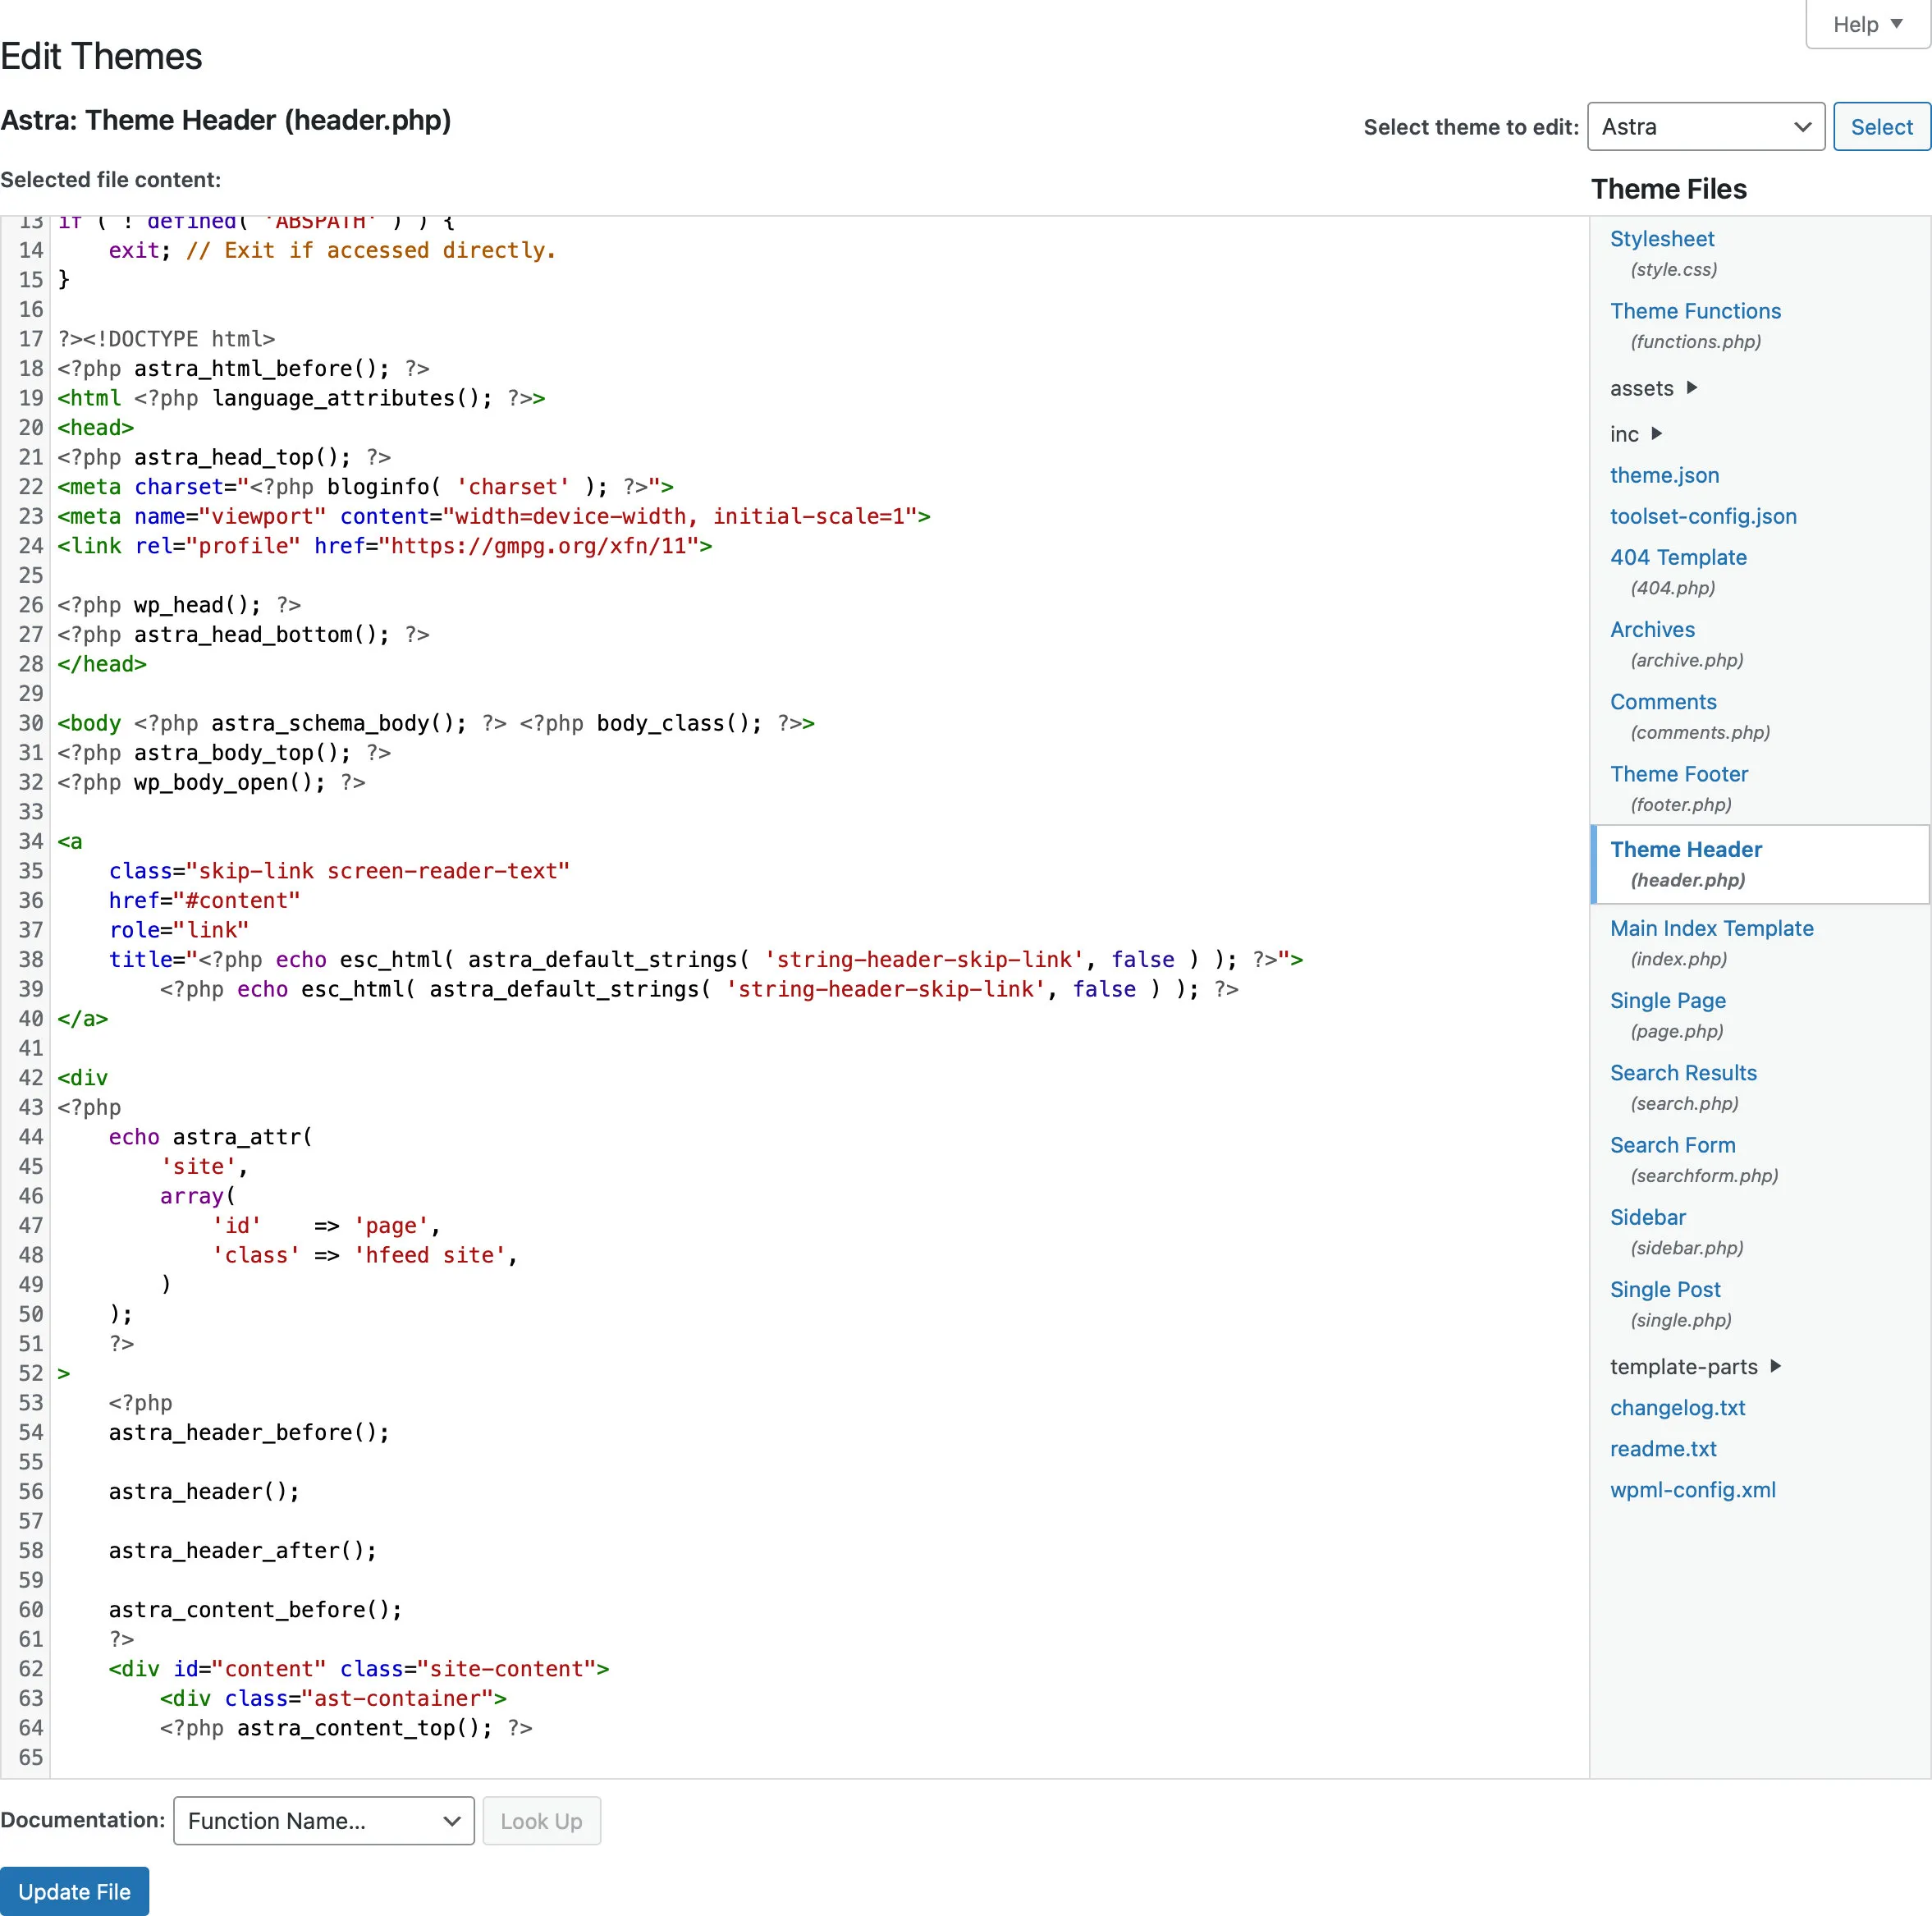
Open your website on WordPress, and go to Dashboard. Click on appearance, then click on “Theme file Editor”. The coding of your site will appear. Find the “header.php” from the Themes files in the right corner. Click on the “header.php” file on the right side, and the header section of your website will appear. Any tags or code we put in this section will be applied to the entire website.
Step 7: Paste the tracking code in the head section (right before the closing </head> tag) and click on the “Update File” button at the bottom of the page.
Your analytics account will be set up within 24 hours. After that, Google Analytics will be able to track and display all the interactions on your site.
Using a plugin
If you find the above method a bit too difficult, then a plugin lets you paste any tag or code in any section of the coding easily. There are a huge number of dedicated plugins that will handle this for, or, even your theme might have this option.
We use Rank Math to setup Google Analytics, because we already use it on all our sites for SEO. And it has the option to link a site to a Google Analytics account. So we don’t even need to install an additional plugin.
Rank Math will allow you to automatically link your site to the Google Analytics service, moreover, it will even create all the required entities in your Google Analytics account, if you haven’t yet already done so.
Back to blog