
How to setup Cloudflare Images plugin
• 12 min read
Instead of an intro
I’ve prepared this detailed article that covers everything from adding a website to Cloudflare, setting up DNS nameservers to pretty much, everything I could think of that is required to setup Cloudflare Images on a WordPress website. I did my best to explain technical parts in laymen’s terms, and I’ve structured this article in the order that I would set everything up. It’s possible to skip sections, if they do not apply to your situation. For example, if a site is already connected to Cloudflare, just scroll to the next section. Let’s begin.
Offloading images? But why…
You’ve probably heard or read that offloading images is an important step in optimizing your website performance. But why should you do it? Offloading images to a CDN (Content Delivery Network), such as Cloudflare Images, can provide several benefits for a website, including:
-
Faster loading times: When you offload your images to a CDN, the images are stored on multiple servers located in different geographic locations. This allows visitors to your website to download images from the server that is closest to them, reducing the distance and time it takes for the images to load.
-
Improved website performance: By offloading images to a CDN, you can reduce the load on your website’s server, allowing it to handle more traffic and requests. This can improve the overall performance and speed of your website.
-
Scalability: A CDN can handle large amounts of traffic and scale to meet the demands of your website as it grows. This can help ensure that your website remains fast and responsive, even during periods of high traffic.
-
Cost savings: By offloading images to a CDN, you can reduce the amount of bandwidth and storage space required on your own server. This can help lower your hosting costs and save you money in the long run.
There’s a bunch of image optimization plugins that will offer proprietary CDN’s, which are often just based off larger CDN providers with an added price margin to make the service profitable. But with Cloudflare not only are you able to avoid such plugins, but make use of one of the cheapest CDN providers on the market.
Images are priced at $5 per 100,000 images stored and $1 per 100,000 images delivered - with no egress costs or additional charges for resizing and optimization.
— Cloudflare
First steps and preparation
Now that we’ve gone over the “Why?”, let’s get to the “How?”. There are several steps that we will need to cover, before the plugin is able to serve images via Cloudflare:
- Make sure Cloudflare Images service is activated.
- Create a Cloudflare API Token.
- Setup the plugin.
- Validate that it’s working.
Cloudflare configuration
As long as you have Cloudflare Image API token set up, having a site that is connected to Cloudflare is not required. However, if you want to serve images from a custom domain, this domain must be added to Cloudflare.
If you do not want custom domains or your site is already connected to Cloudflare, you can skip on to the next step – creating an API token.
To add a site to Cloudflare, you will need to have a free Cloudflare account. If not already, you can sign up at https://dash.cloudflare.com/sign-up.
Connecting a site to Cloudflare
Once you’ve registered for a Cloudflare account, the next step is to connect your website. Log in to Cloudflare dashboard, which should look something like this:
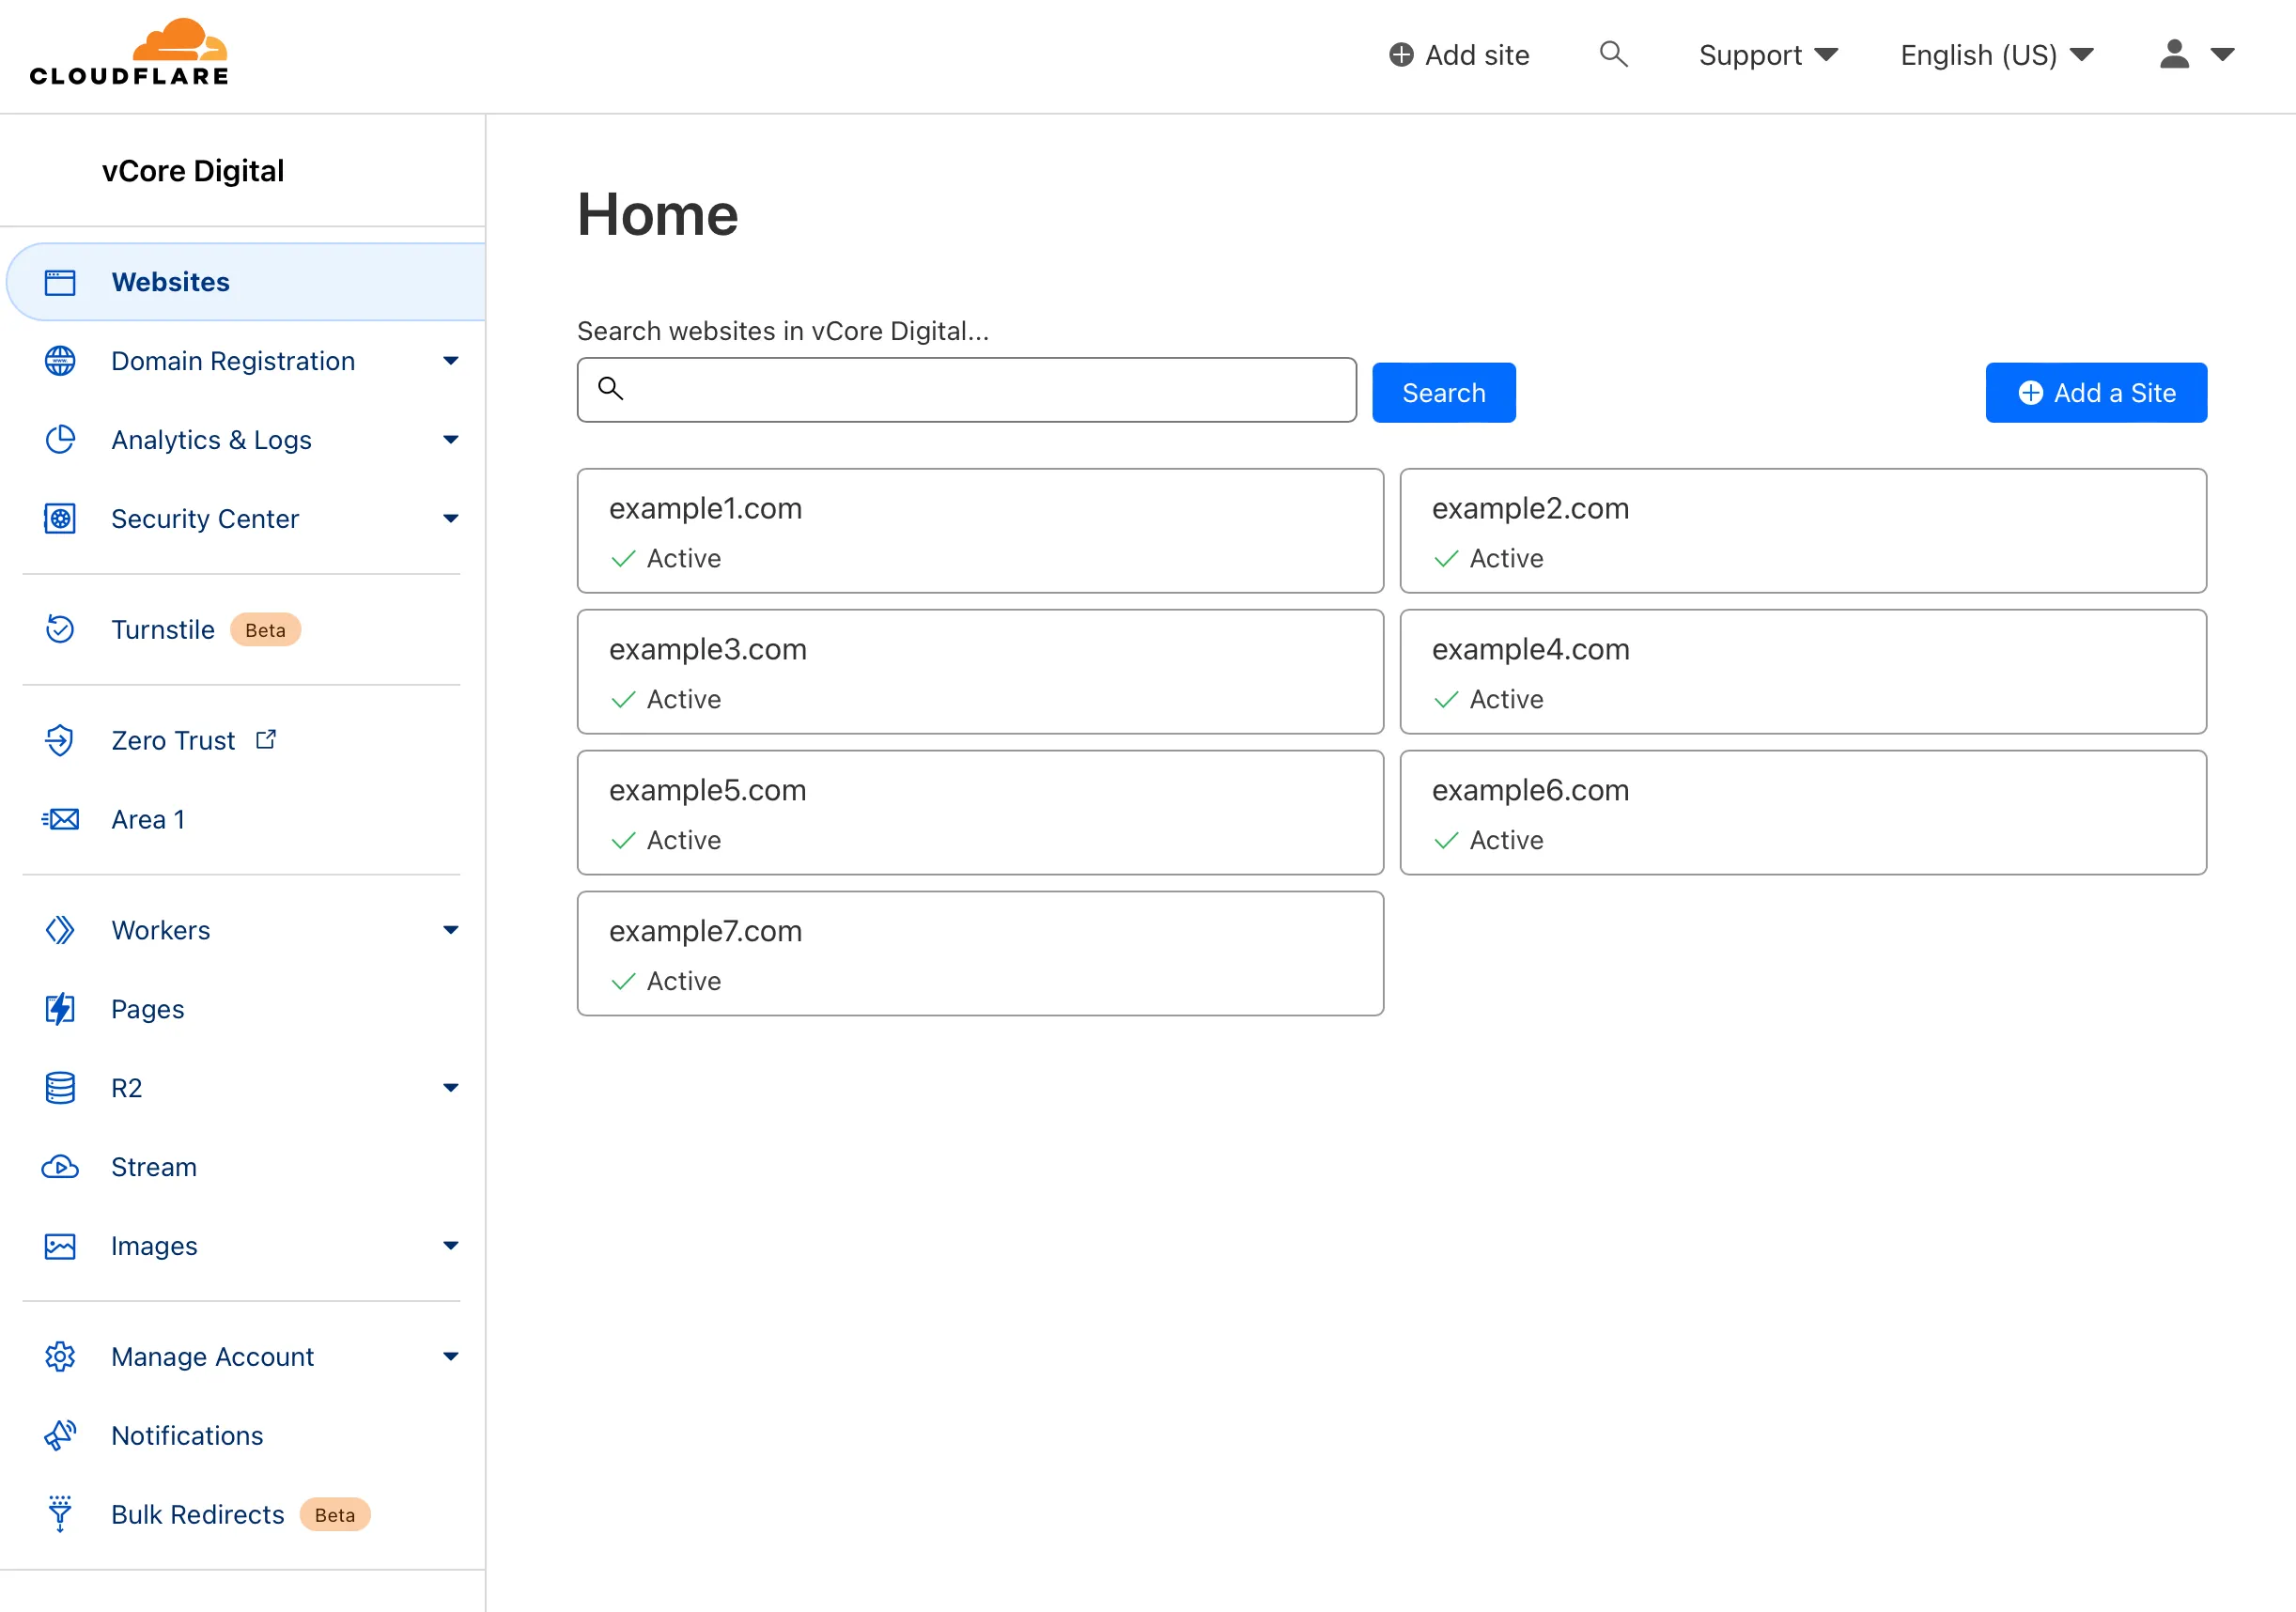
If the site is not in the list above, click on the blue “Add a Site” button:
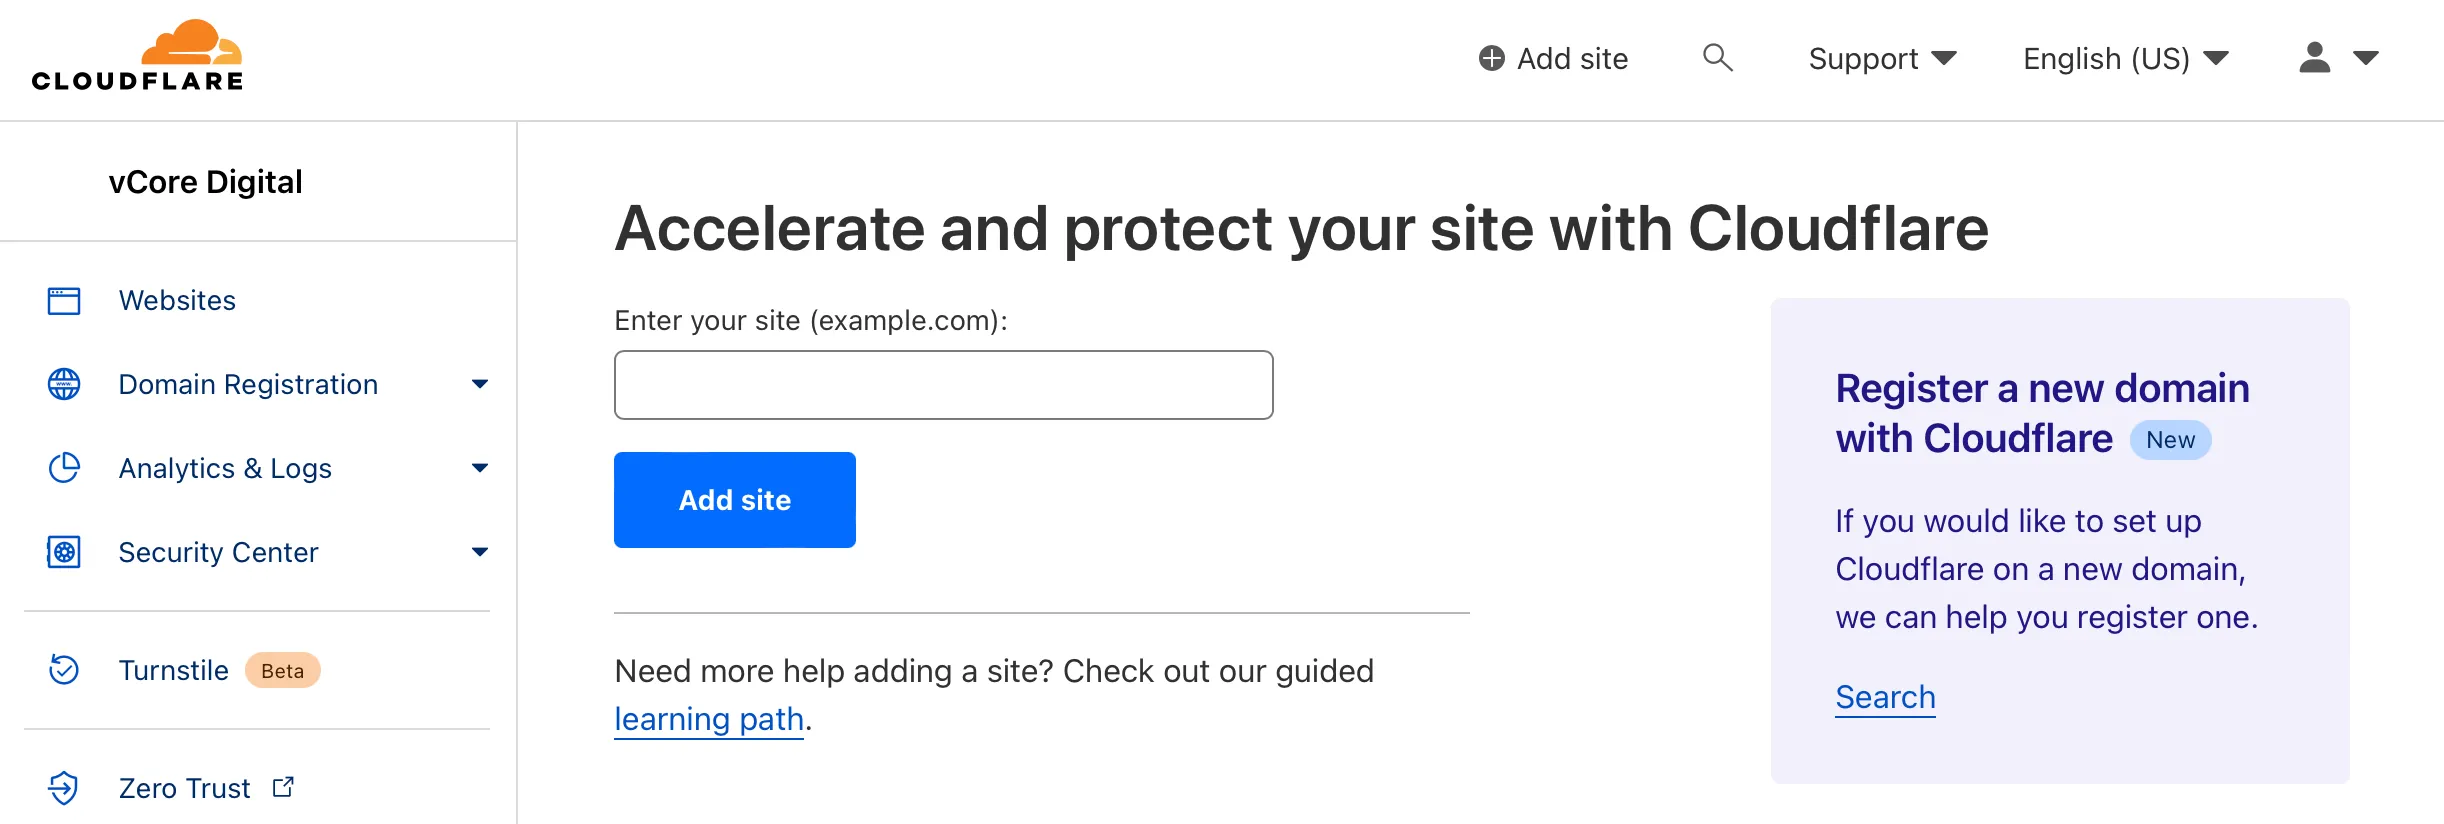
Enter the site domain. Ensure you are providing the 2nd level (root) domain and not any subdomains (e.g., example.com, not subdomain.example.com).
Note: For this example, I’ll be using a fake
cf-images.cfdomain, which doesn’t exist.
Click “Add site”, which should bring you to the next screen:
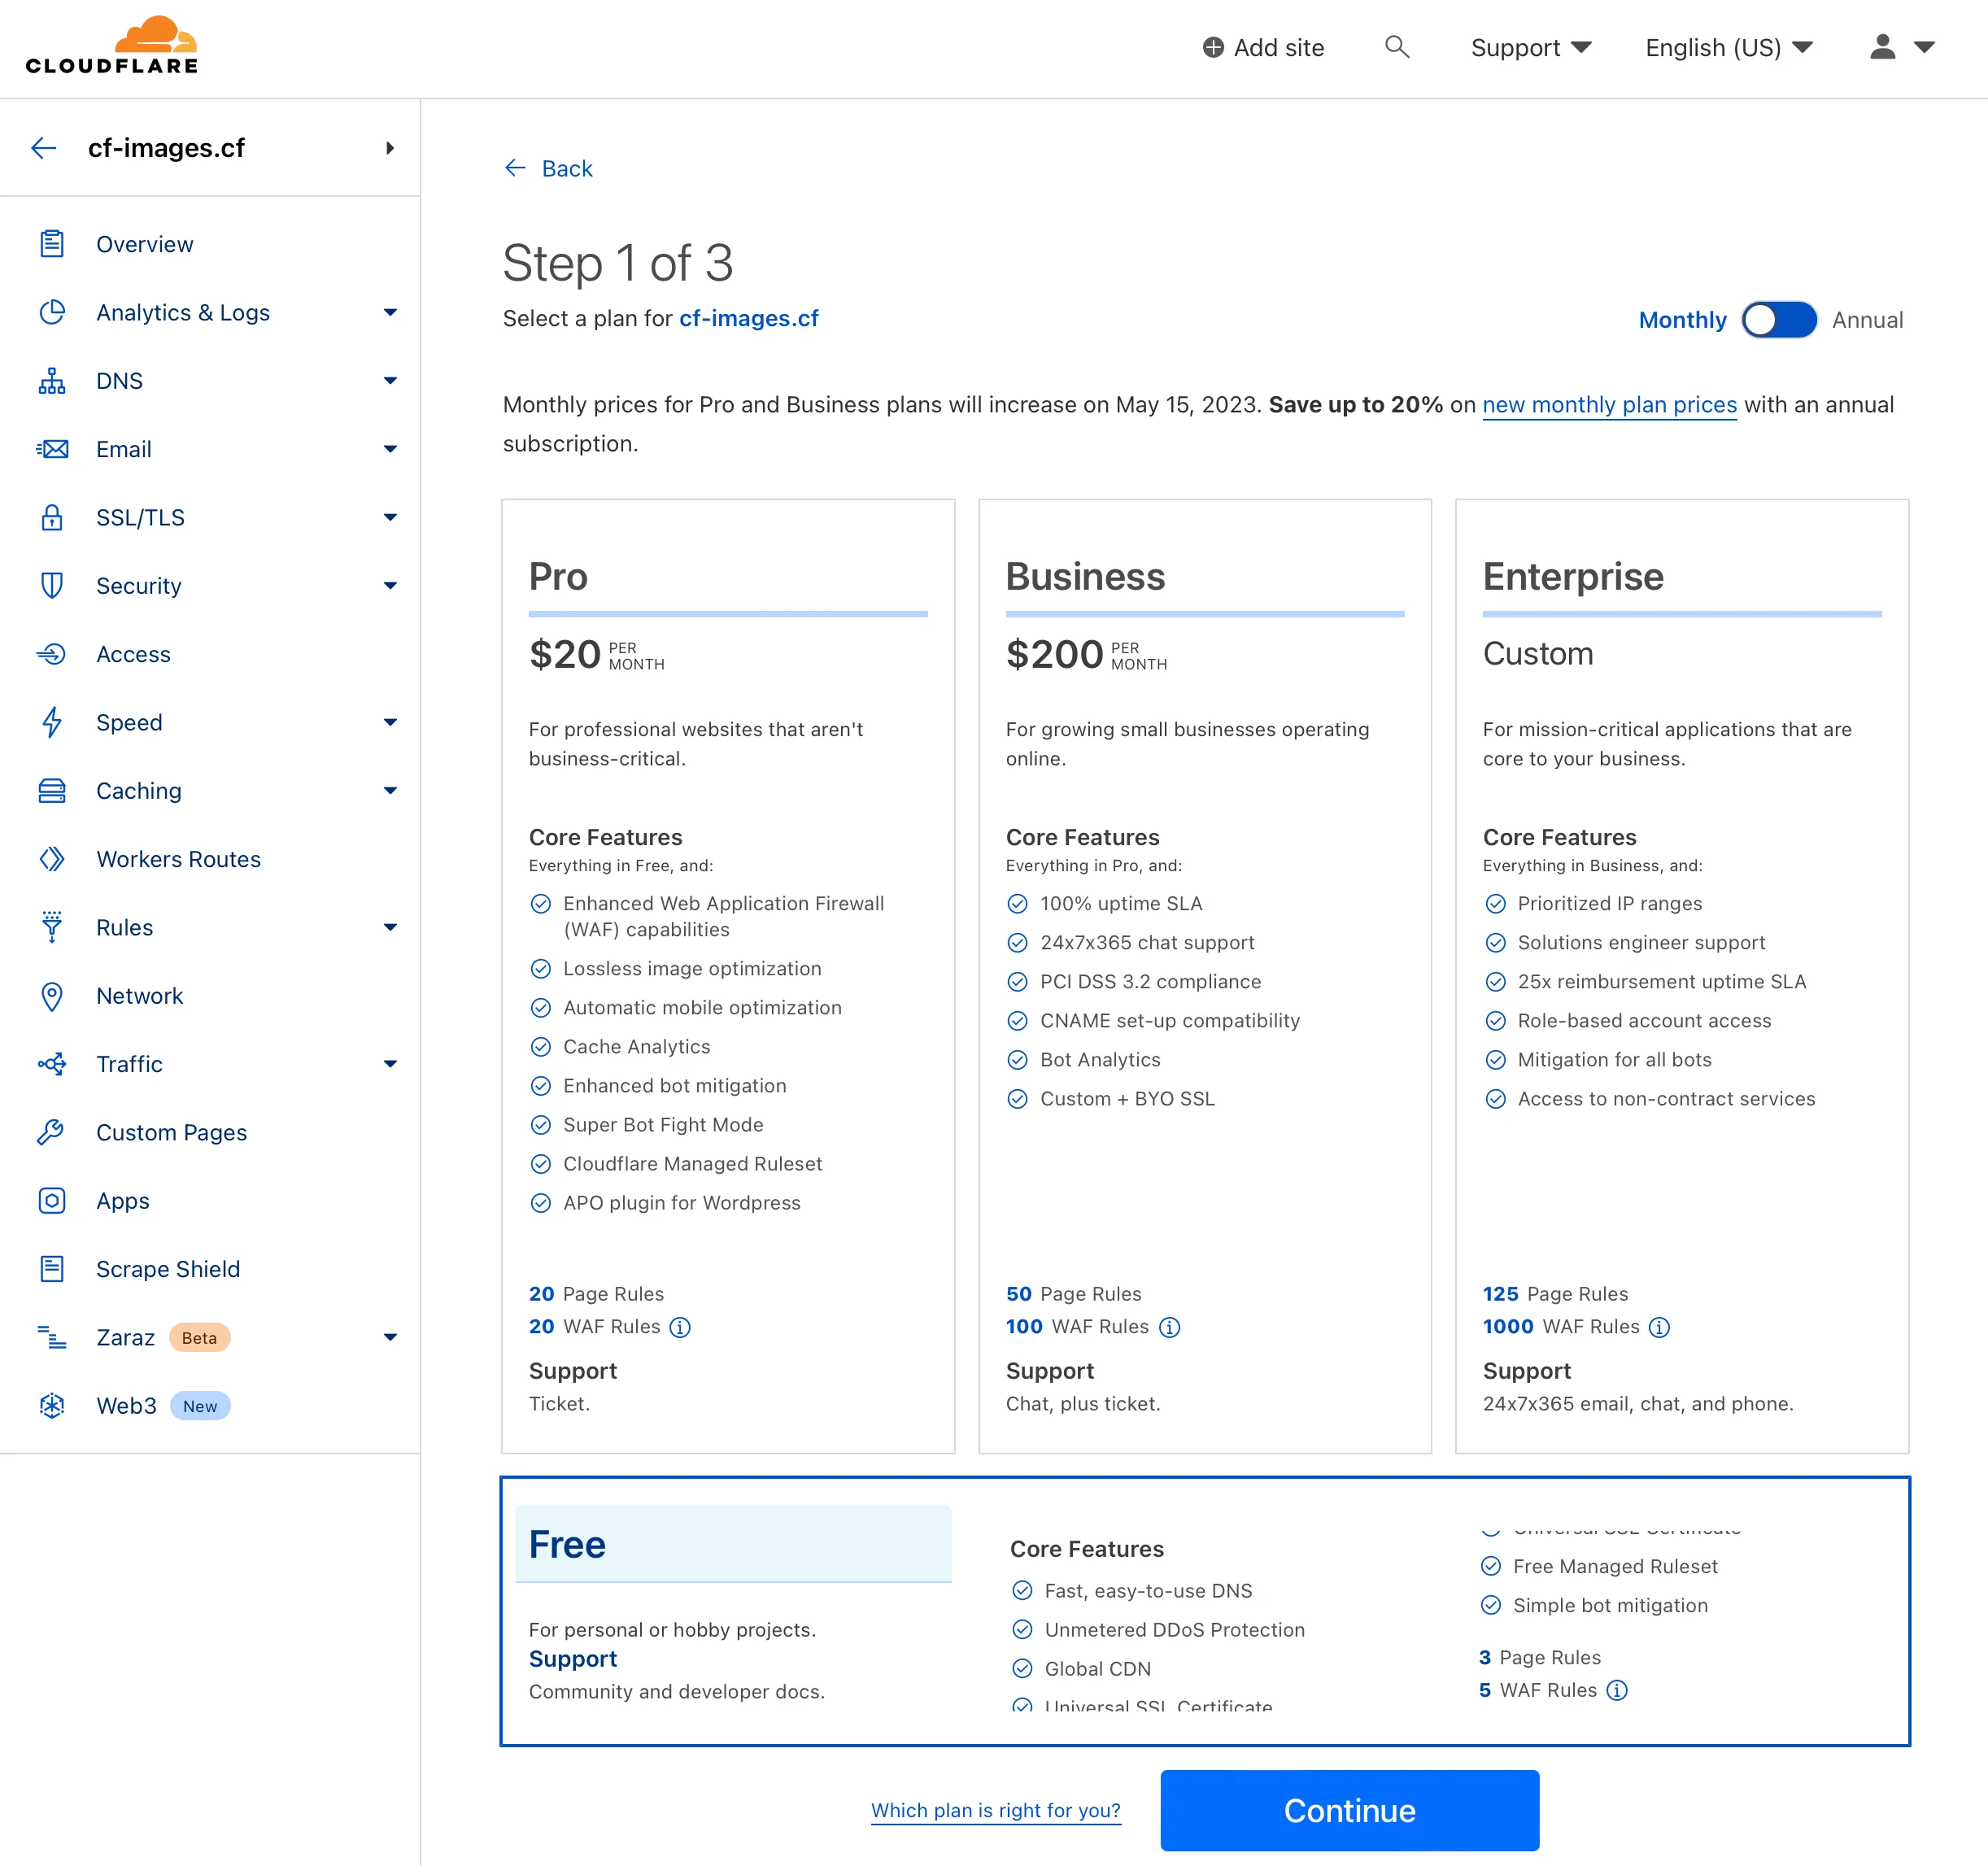
This screen offers a selection of paid plans, but at the very bottom of the list is a Free plan, which I’d recommend for most websites. The core functionality of the free plan is more than enough to cover the needs of the majority of websites.
Click “Continue”.
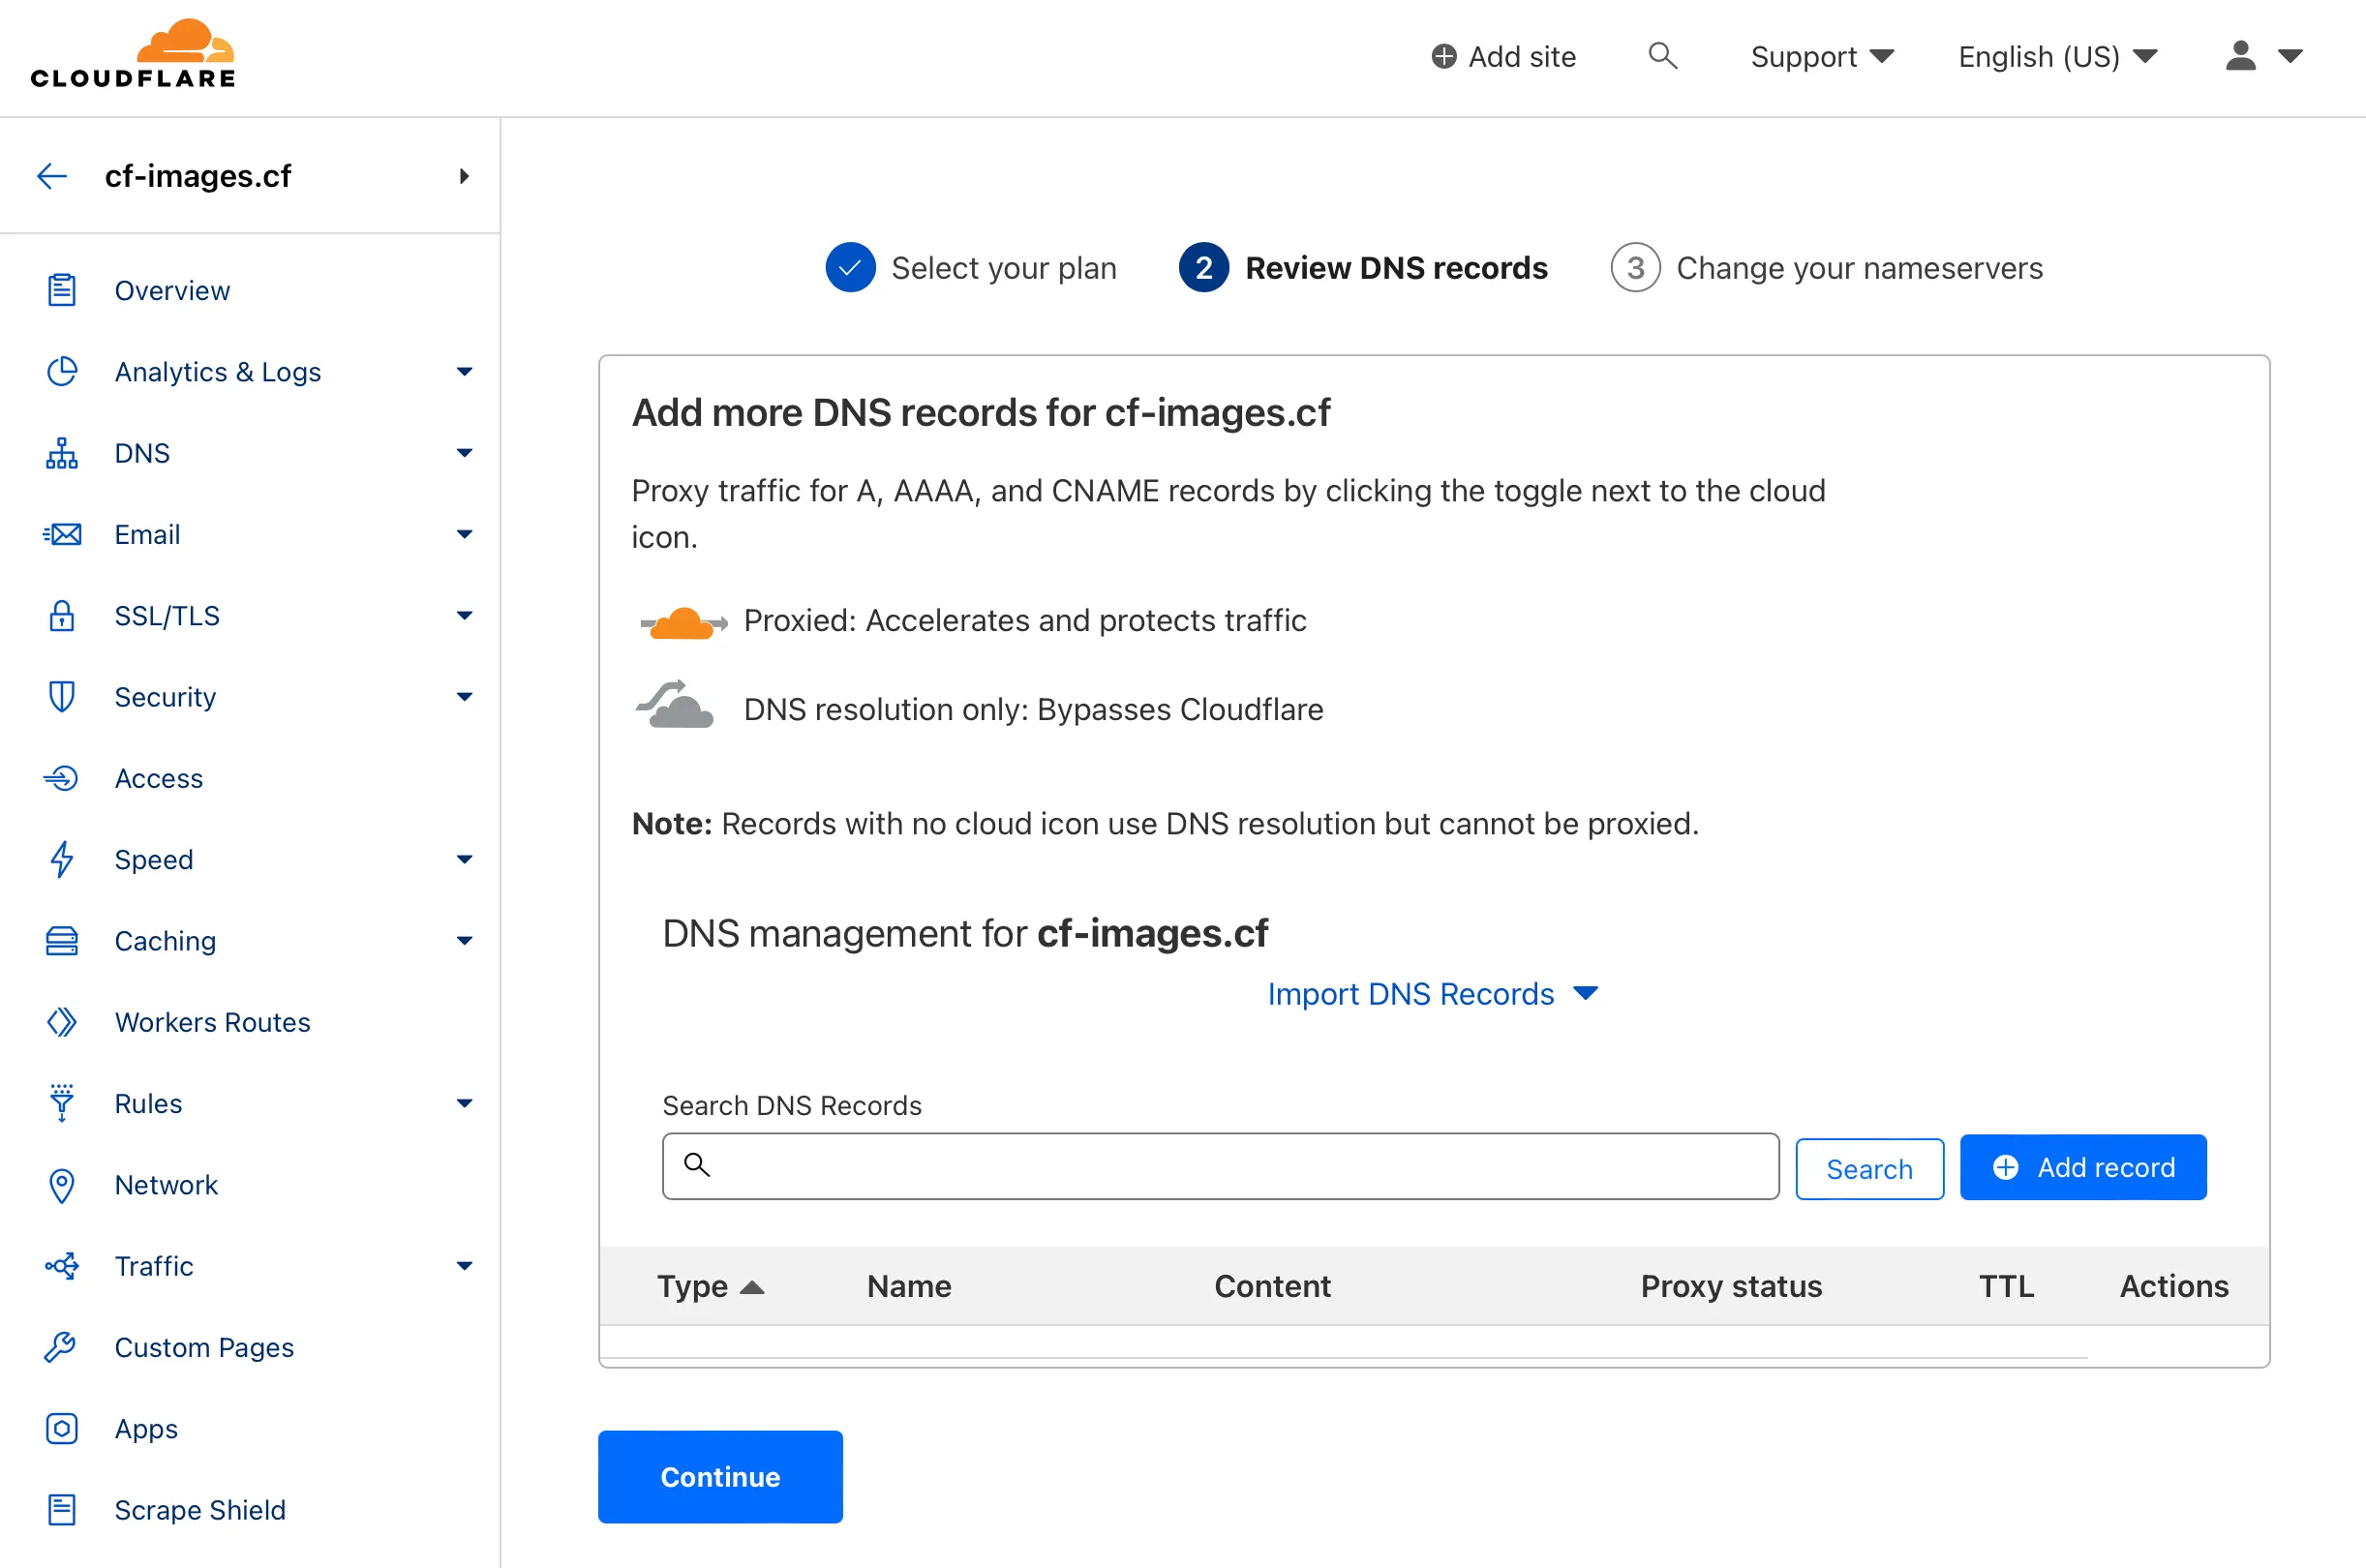
Cloudflare will scan the domain for existing DNS records and port them over to the Cloudflare DNS servers. In the above screenshot I don’t have any domains listed, because I’m using a fake domain name, but a live website will have at least one A type record.
Click “Continue”.
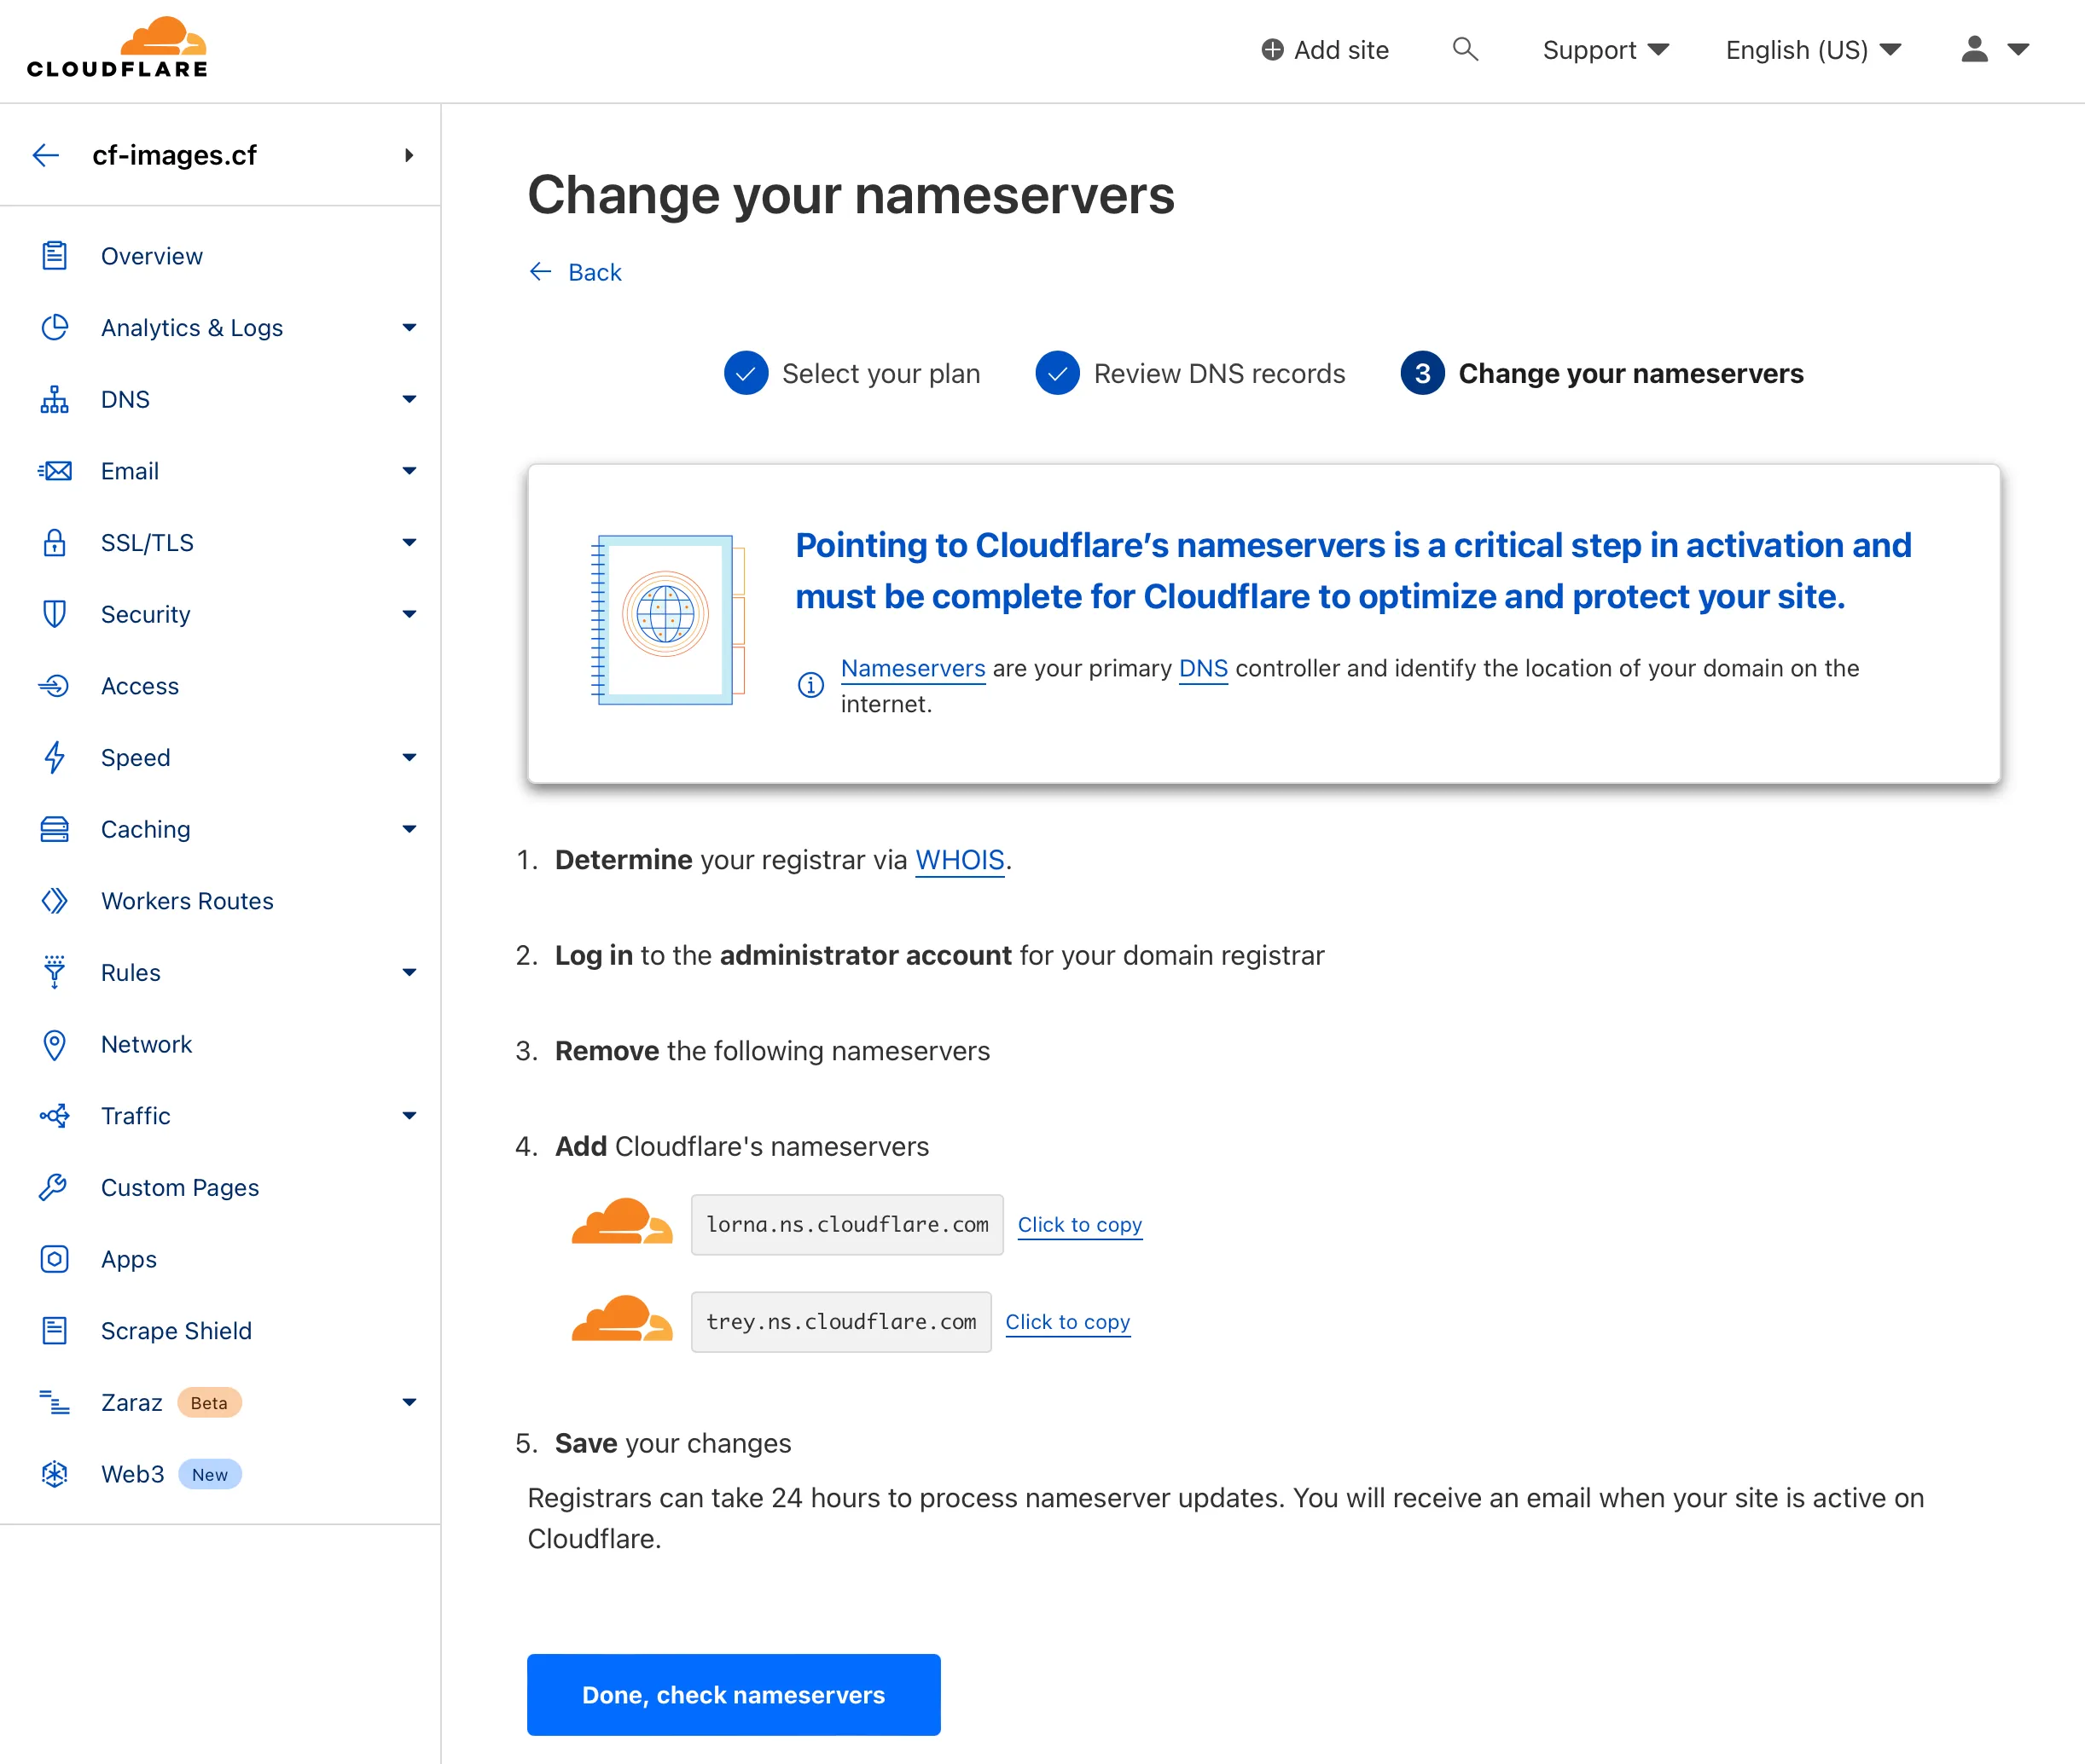
This is the final step in adding your website to Cloudflare (at least on the Cloudflare side). Copy the nameservers from step 4, we will need them in the next step. Don’t yet click on the “Done, check name servers” button.
Note: DNS nameservers may or may not match the ones I have in the screenshot above, it is perfectly fine if they are exactly the same as above.
Adding nameservers to your domain
Just a bit of background, if you don’t understand what’s happening here. Basically, when you purchase a domain, you’re just purchasing that name, which on its own doesn’t do much. For this domain to be available for the end-user, it needs to be mapped to an IP-address. For example, when you buy hosting, the hosting provider will give that IP address to you. And if you buy your domain and hosting package with the same provider, usually, all this will happen automatically in the background without you even knowing what’s happening. All this resolution happens via DNS nameservers.
DNS nameservers are like phone books for the internet. They help your computer find the website you’re looking for when you type in a web address (like example.com). The nameserver takes the web address and looks up the IP address (remember that A type record we’ve seen when adding the site to Cloudflare?) that matches it (which is like a phone number for websites). Once it finds the IP address, it sends it back to your computer, and your computer uses it to connect to the website.
So, what we’re doing here, is telling our domain to use Cloudflare DNS nameservers. This will allow Cloudflare services to work on your site. Without this step, Cloudflare Images and other services won’t work on your website. If you’ve read this far, and thinking – oh, wow, this sounds dangerous and complicated. It’s not. In fact, absolutely all my personal and client websites are using Cloudflare and I would never have it any other way!
Anyways, back to our setup. The next step would be to set the Cloudflare nameservers for your domain. For this example, I will use GoDaddy. By the way, if you are purchasing a new domain – just do it via Cloudflare, they don’t have any markup and their prices are lower than any other provider out there (if we ignore the “first year” offers). The downside, Cloudflare does not yet have support for all zones. So some of my domains are still on GoDaddy. The setup should be similar for any other provider out there.
Login to your GoDaddy account, and you should see a page that looks something like this:
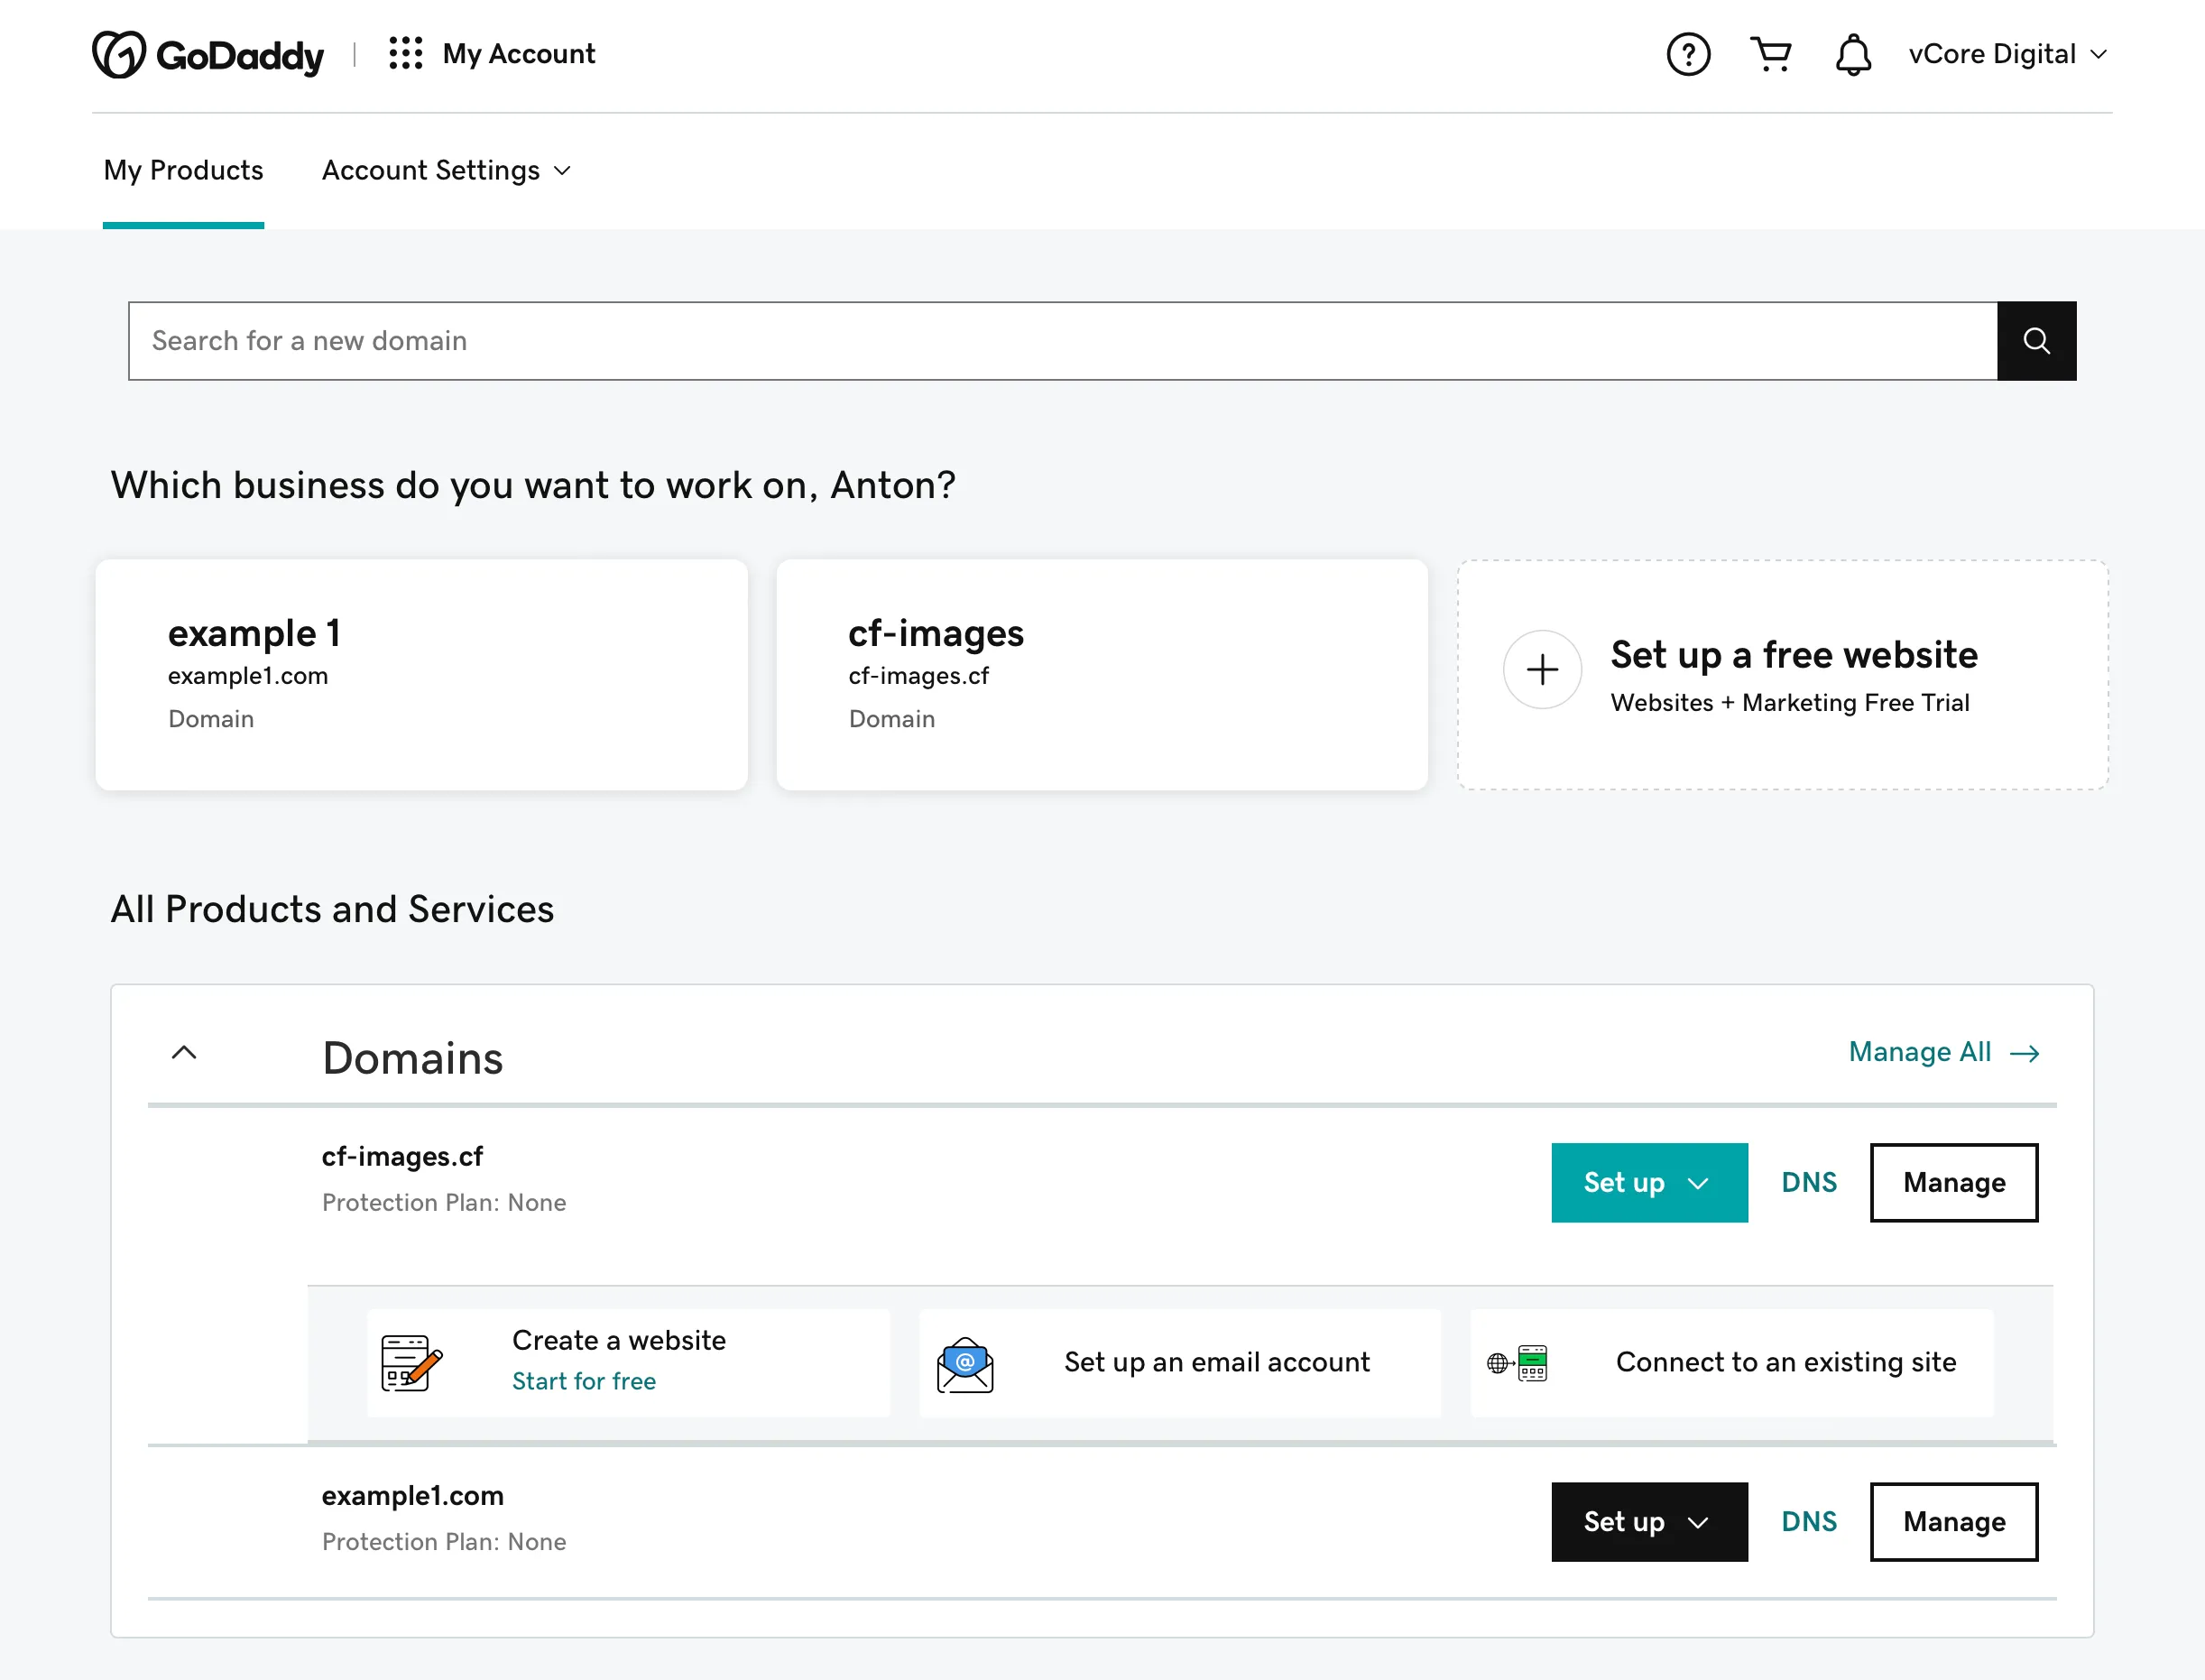
In the “All Products and Services” section, click on the “DNS” link for your domain. In our case, it’s the cf-images.cf domain. Clicking on this link will bring you to the “DNS Management” page, and if you scroll a bit down, you should see the “Nameservers” settings section (I already have this set up, but your nameservers will probably be different):
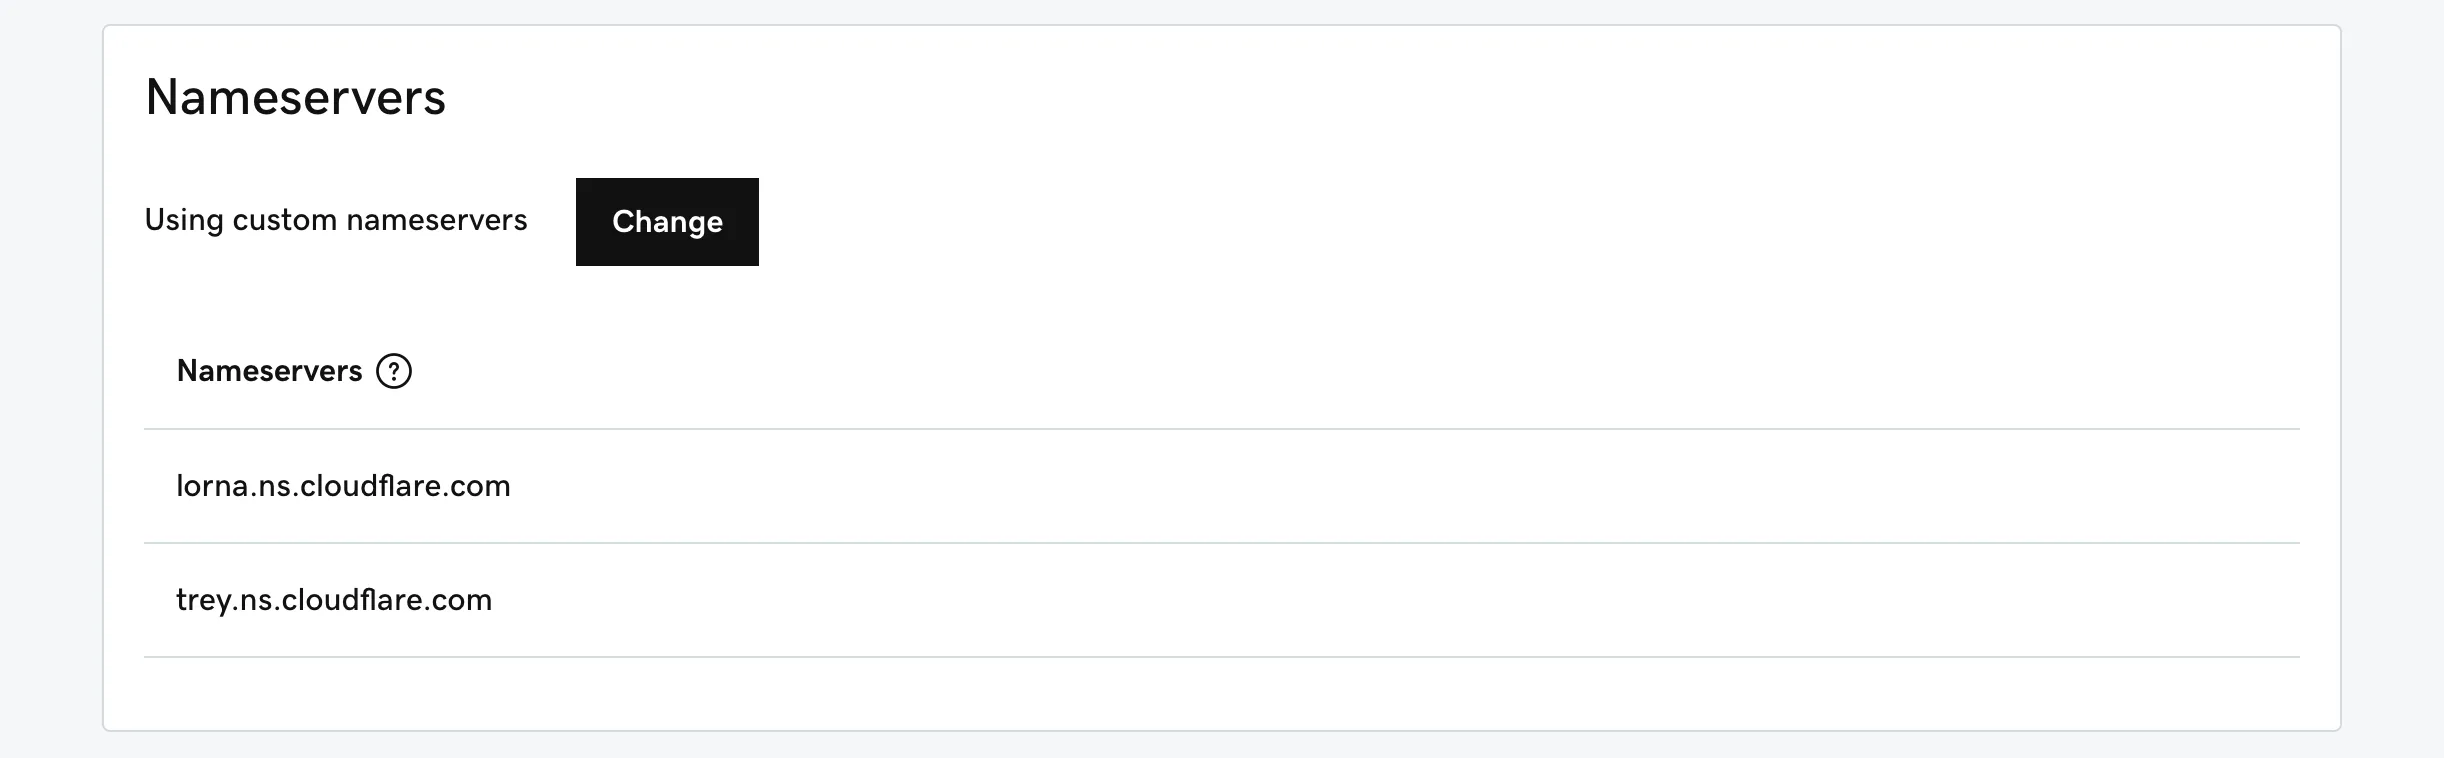
Click on the “Change” button:
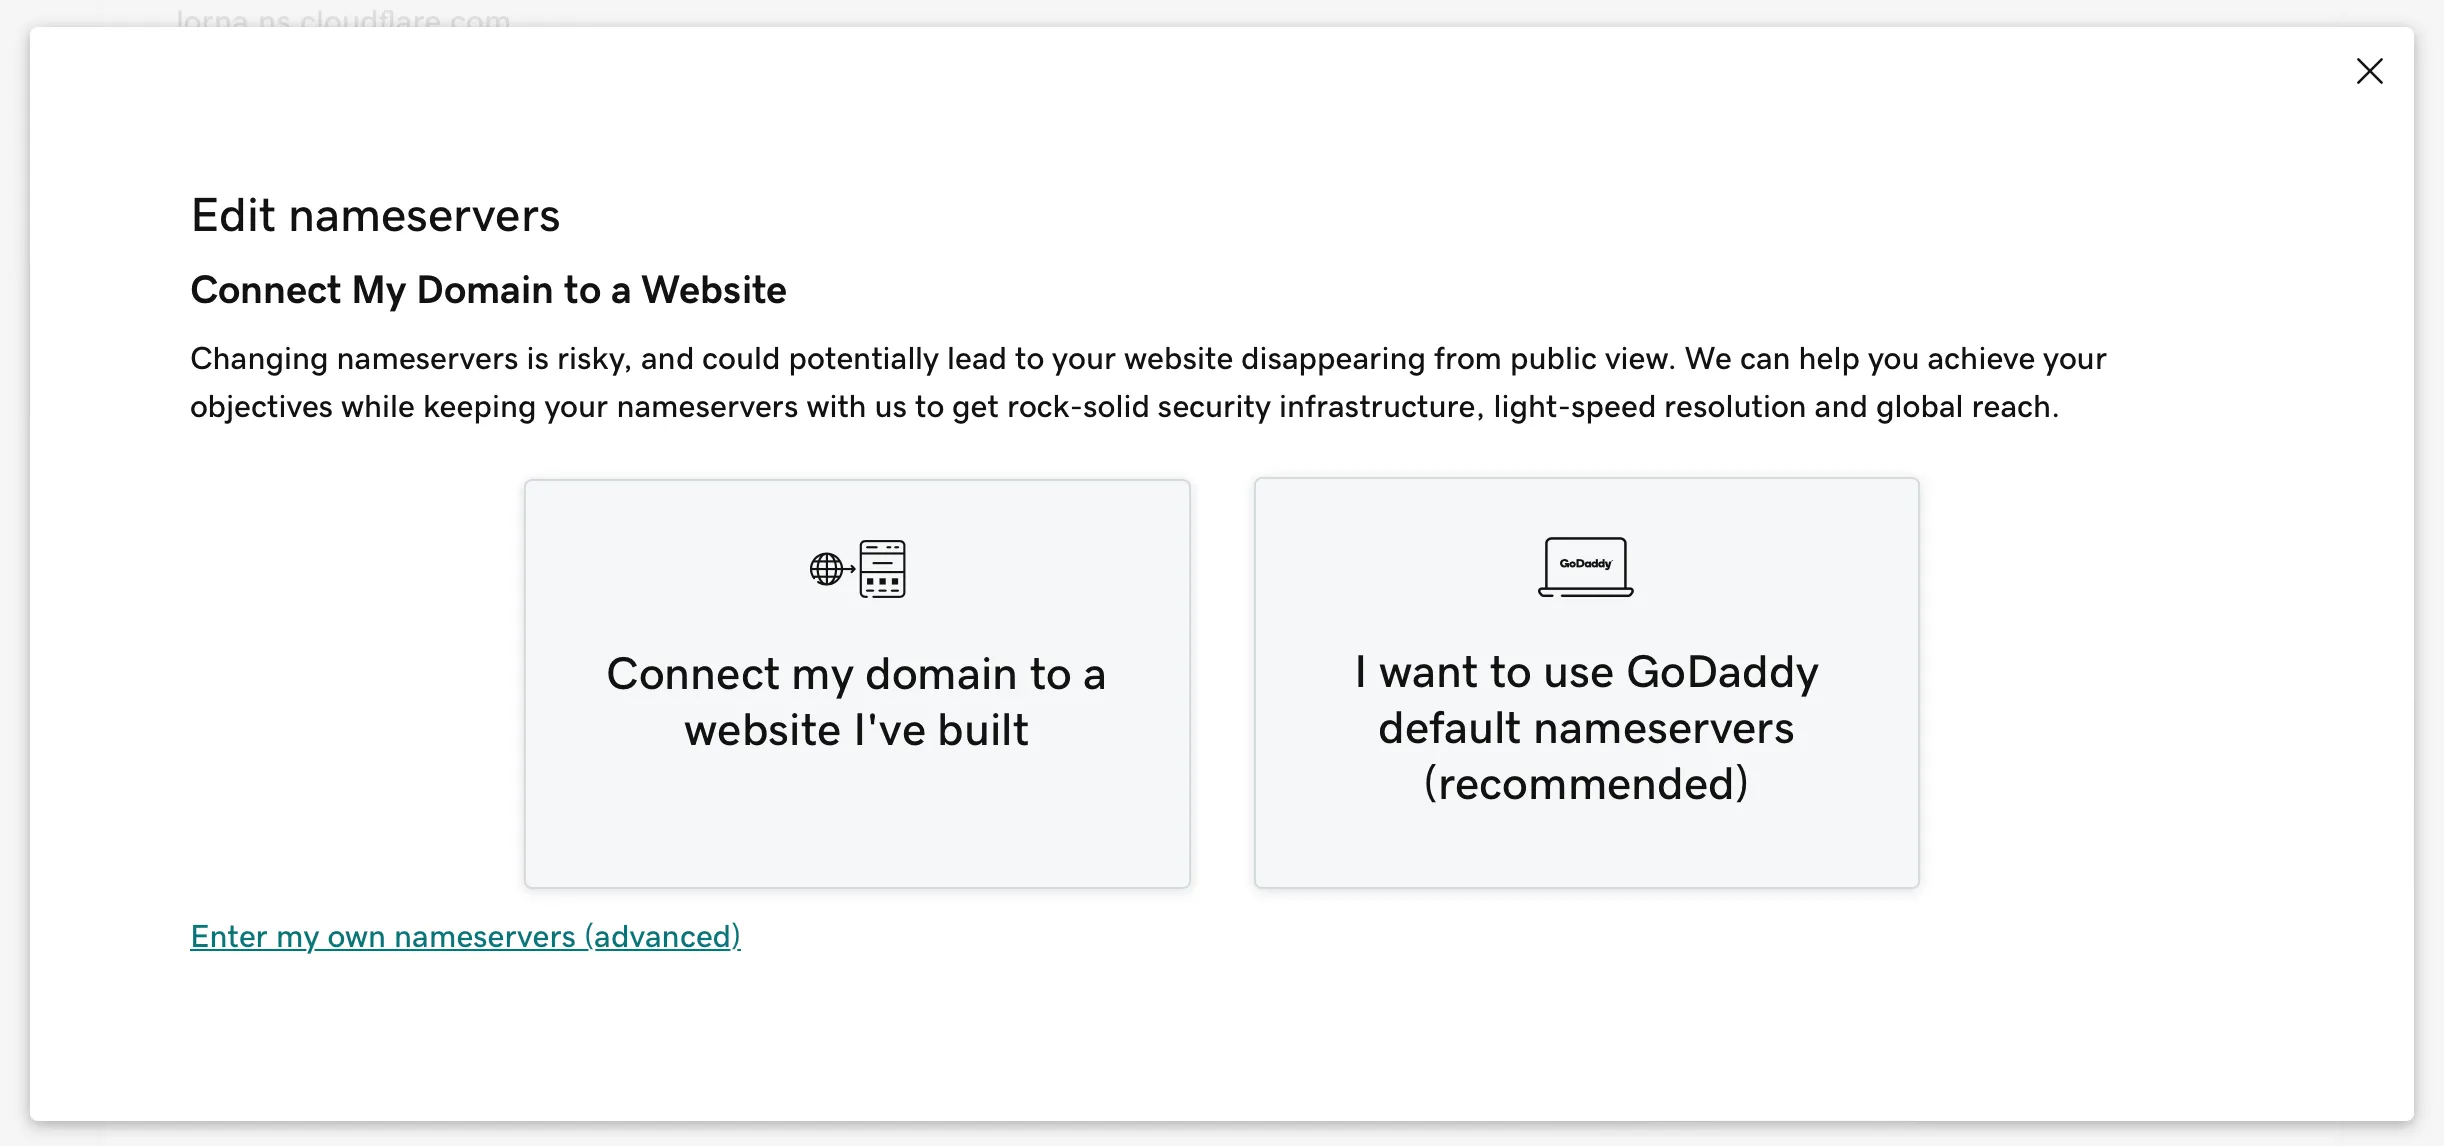
This will show a new wizard to change the nameservers. We want to skip this and click on the “Enter my own nameservers (advanced)” link at the very bottom, which will bring you to the following screen:
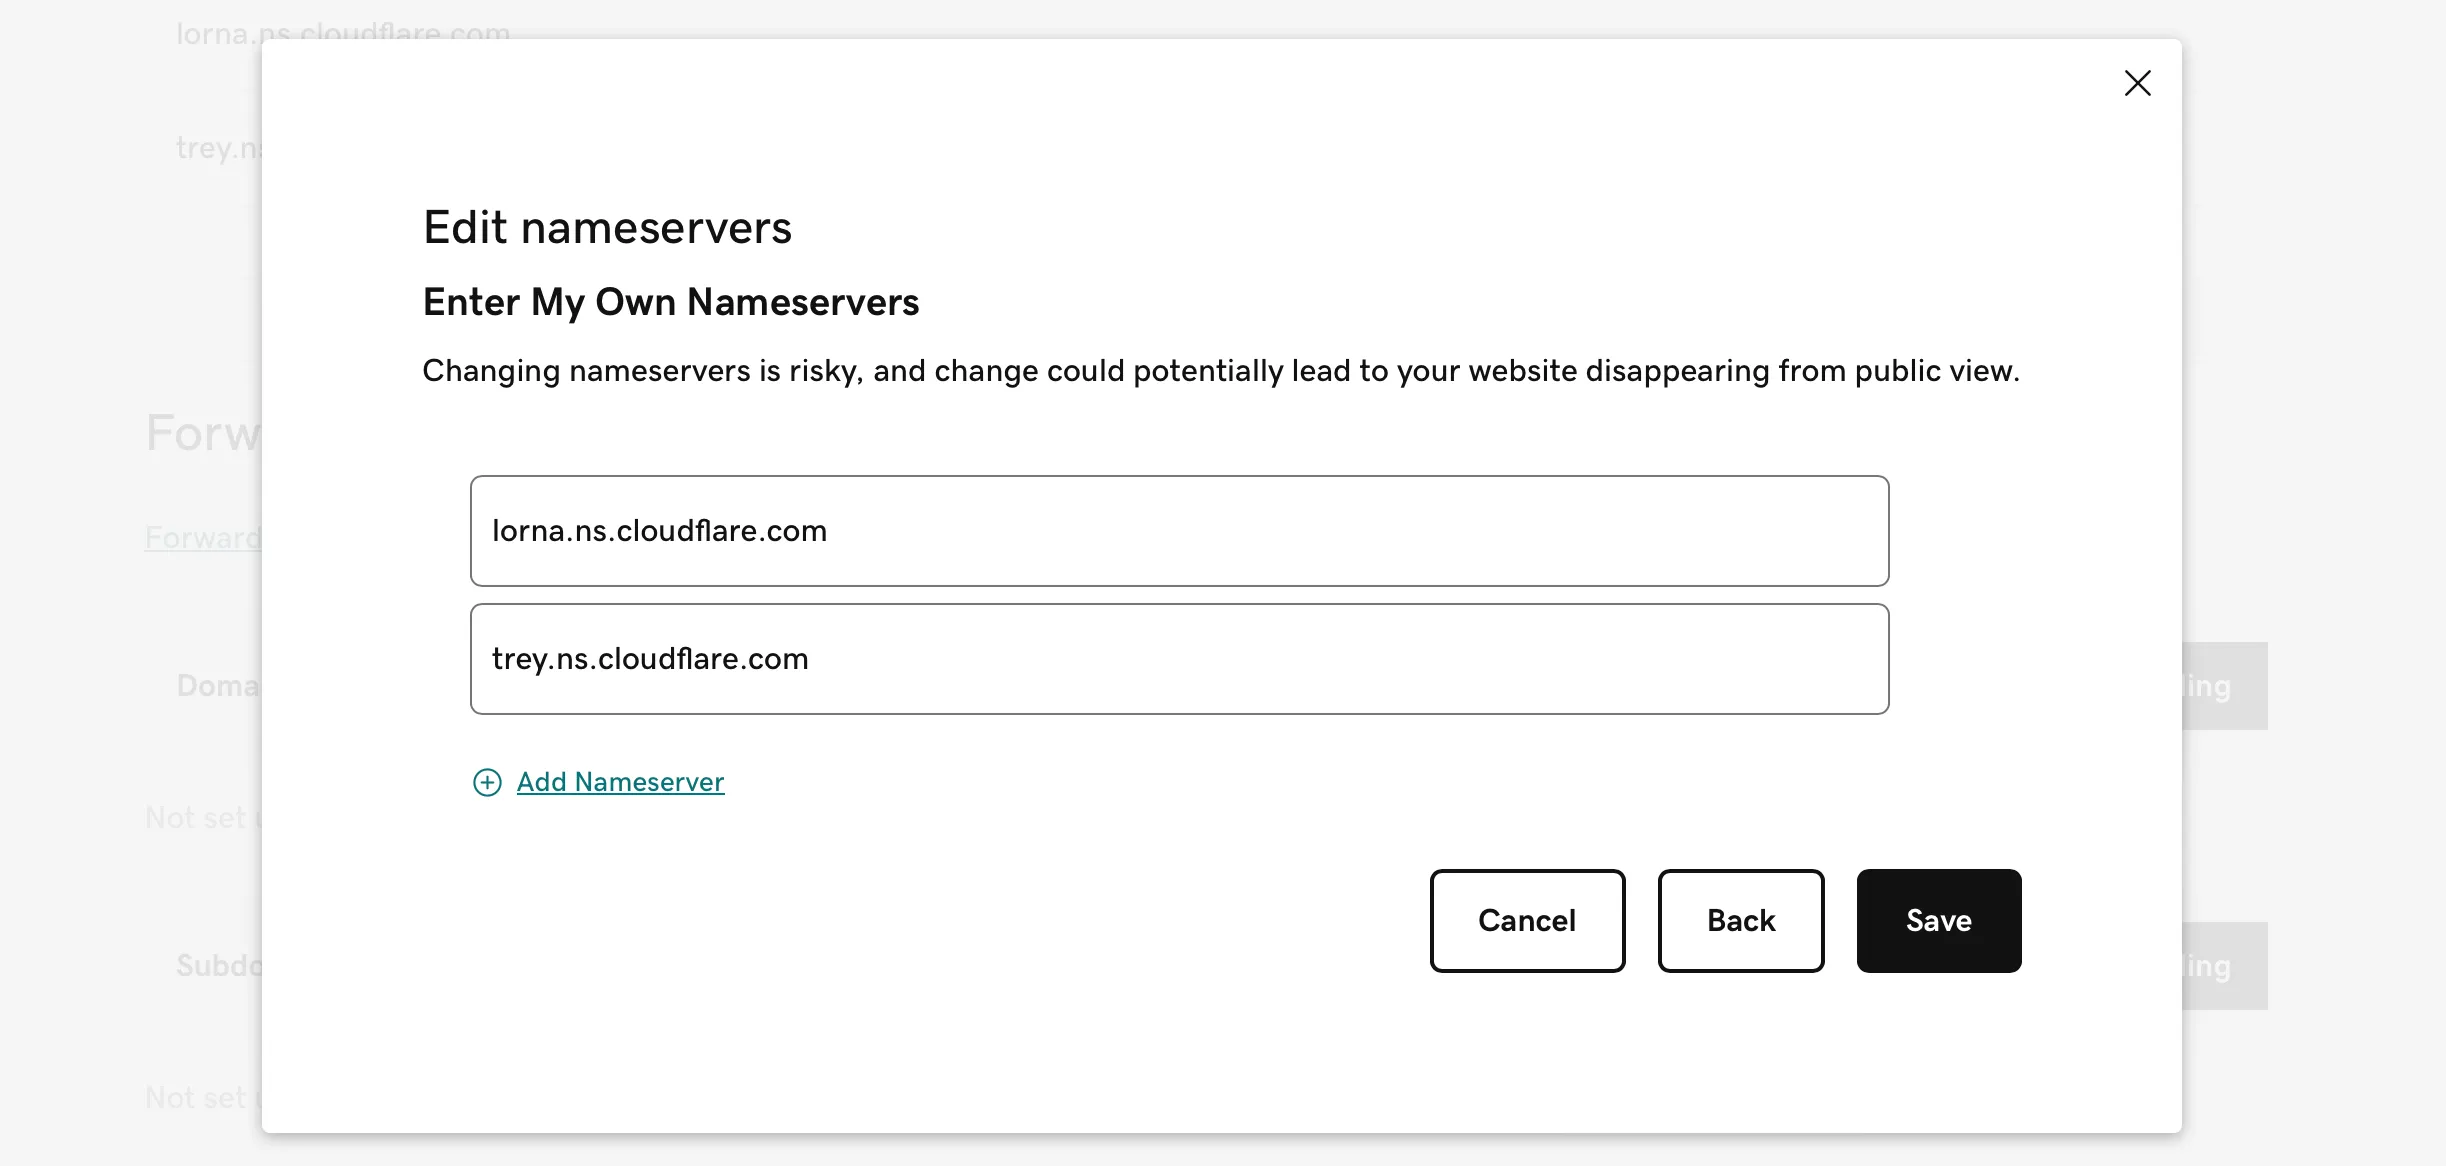
Paste the Cloudflare nameservers, which we obtained in the previous step. Click on “Save” and we’re done on the nameservers part. Let’s go back to Cloudflare, and finish the site setup wizard, by clicking on the “Done, check name servers” button.
Cloudflare Account ID and API token
We’ve done the complicated part of the setup. If you are here, good job, there’s just a few more steps before your website can utilize the full power of Cloudflare Images.
Cloudflare Images is a paid add-on on Cloudflare, the good news it’s cheap and account-wide, meaning you can purchase the subscription on your account and apply it to as many sites as you want, as long as they are connected to the account that has the subscription.
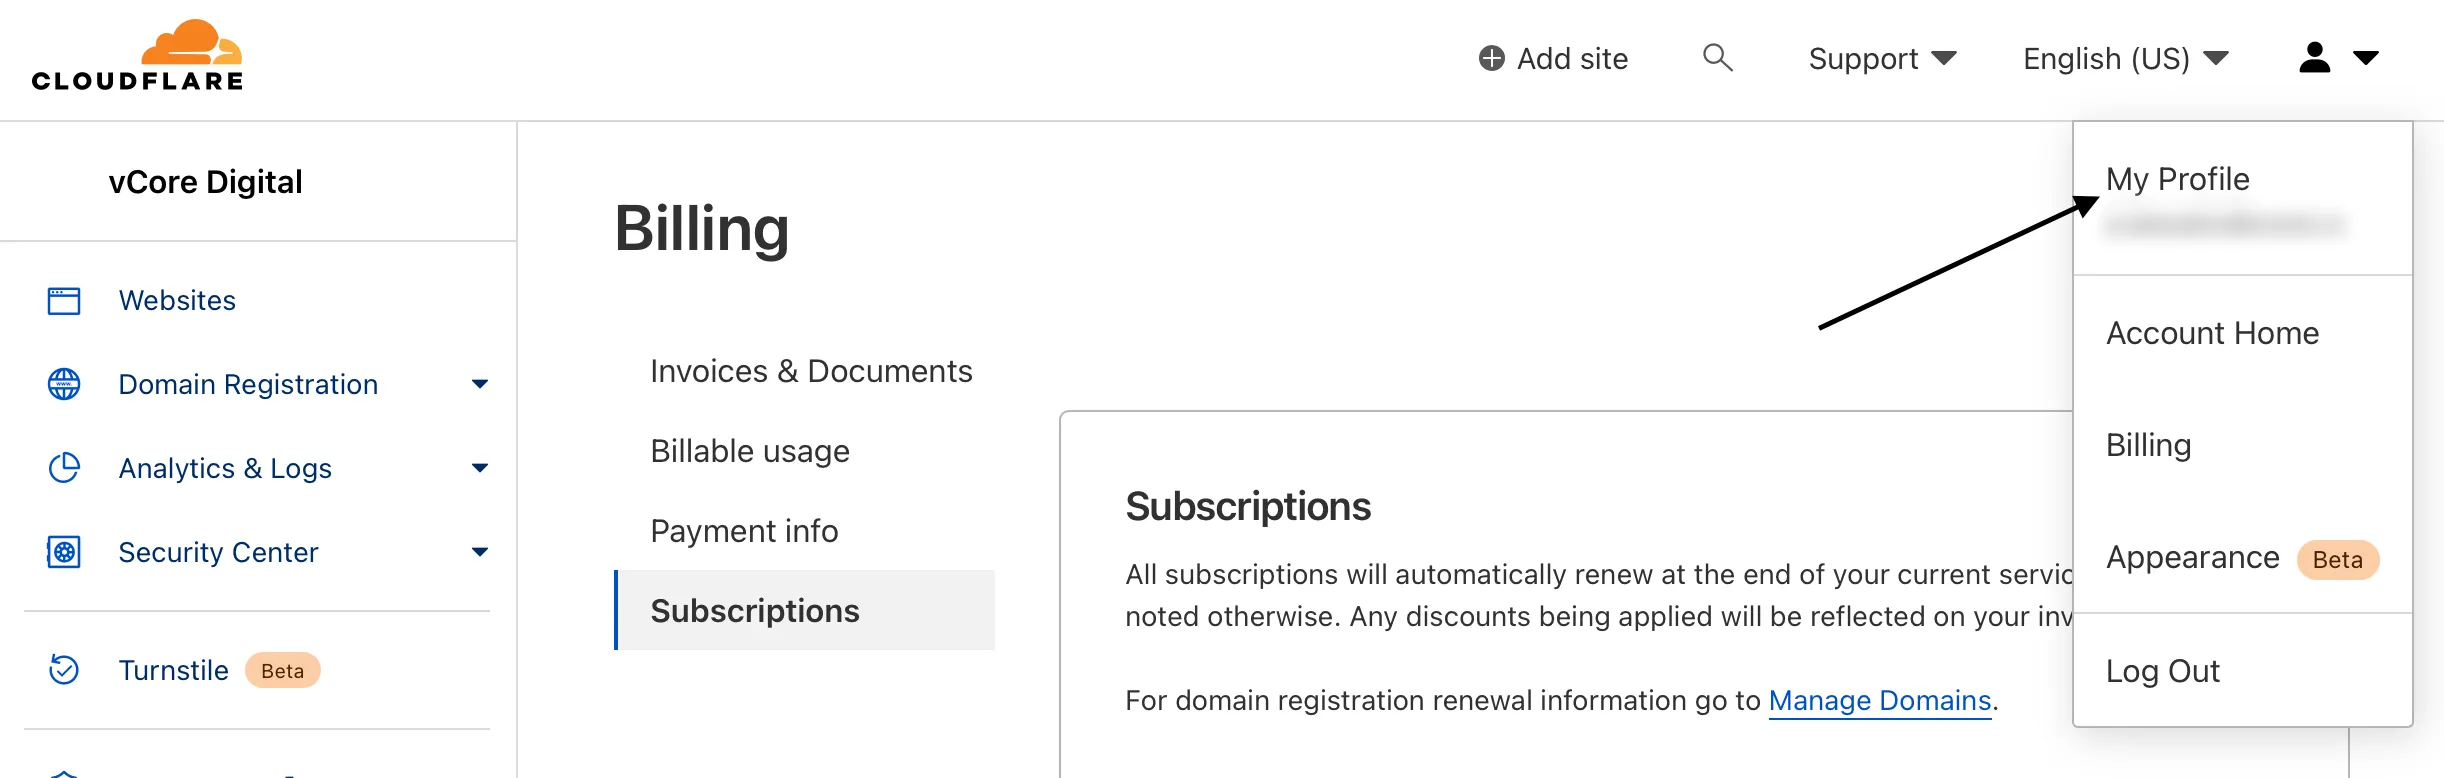
To check if it’s active on your account, go to Manage Account – Billing (1), select “Subscriptions” (2) and make sure the “Cloudflare Images” product is in the Subscriptions list (3):

If it’s not there, you should go to “Images”, on the left side menu, just above “Manage Account” (1) and add it to your account. Unfortunately, I don’t really have an account, where it’s not setup, but if I remember correctly, there should be a big wizard to set it all up.
And while you’re there, make sure to grab the Account ID:
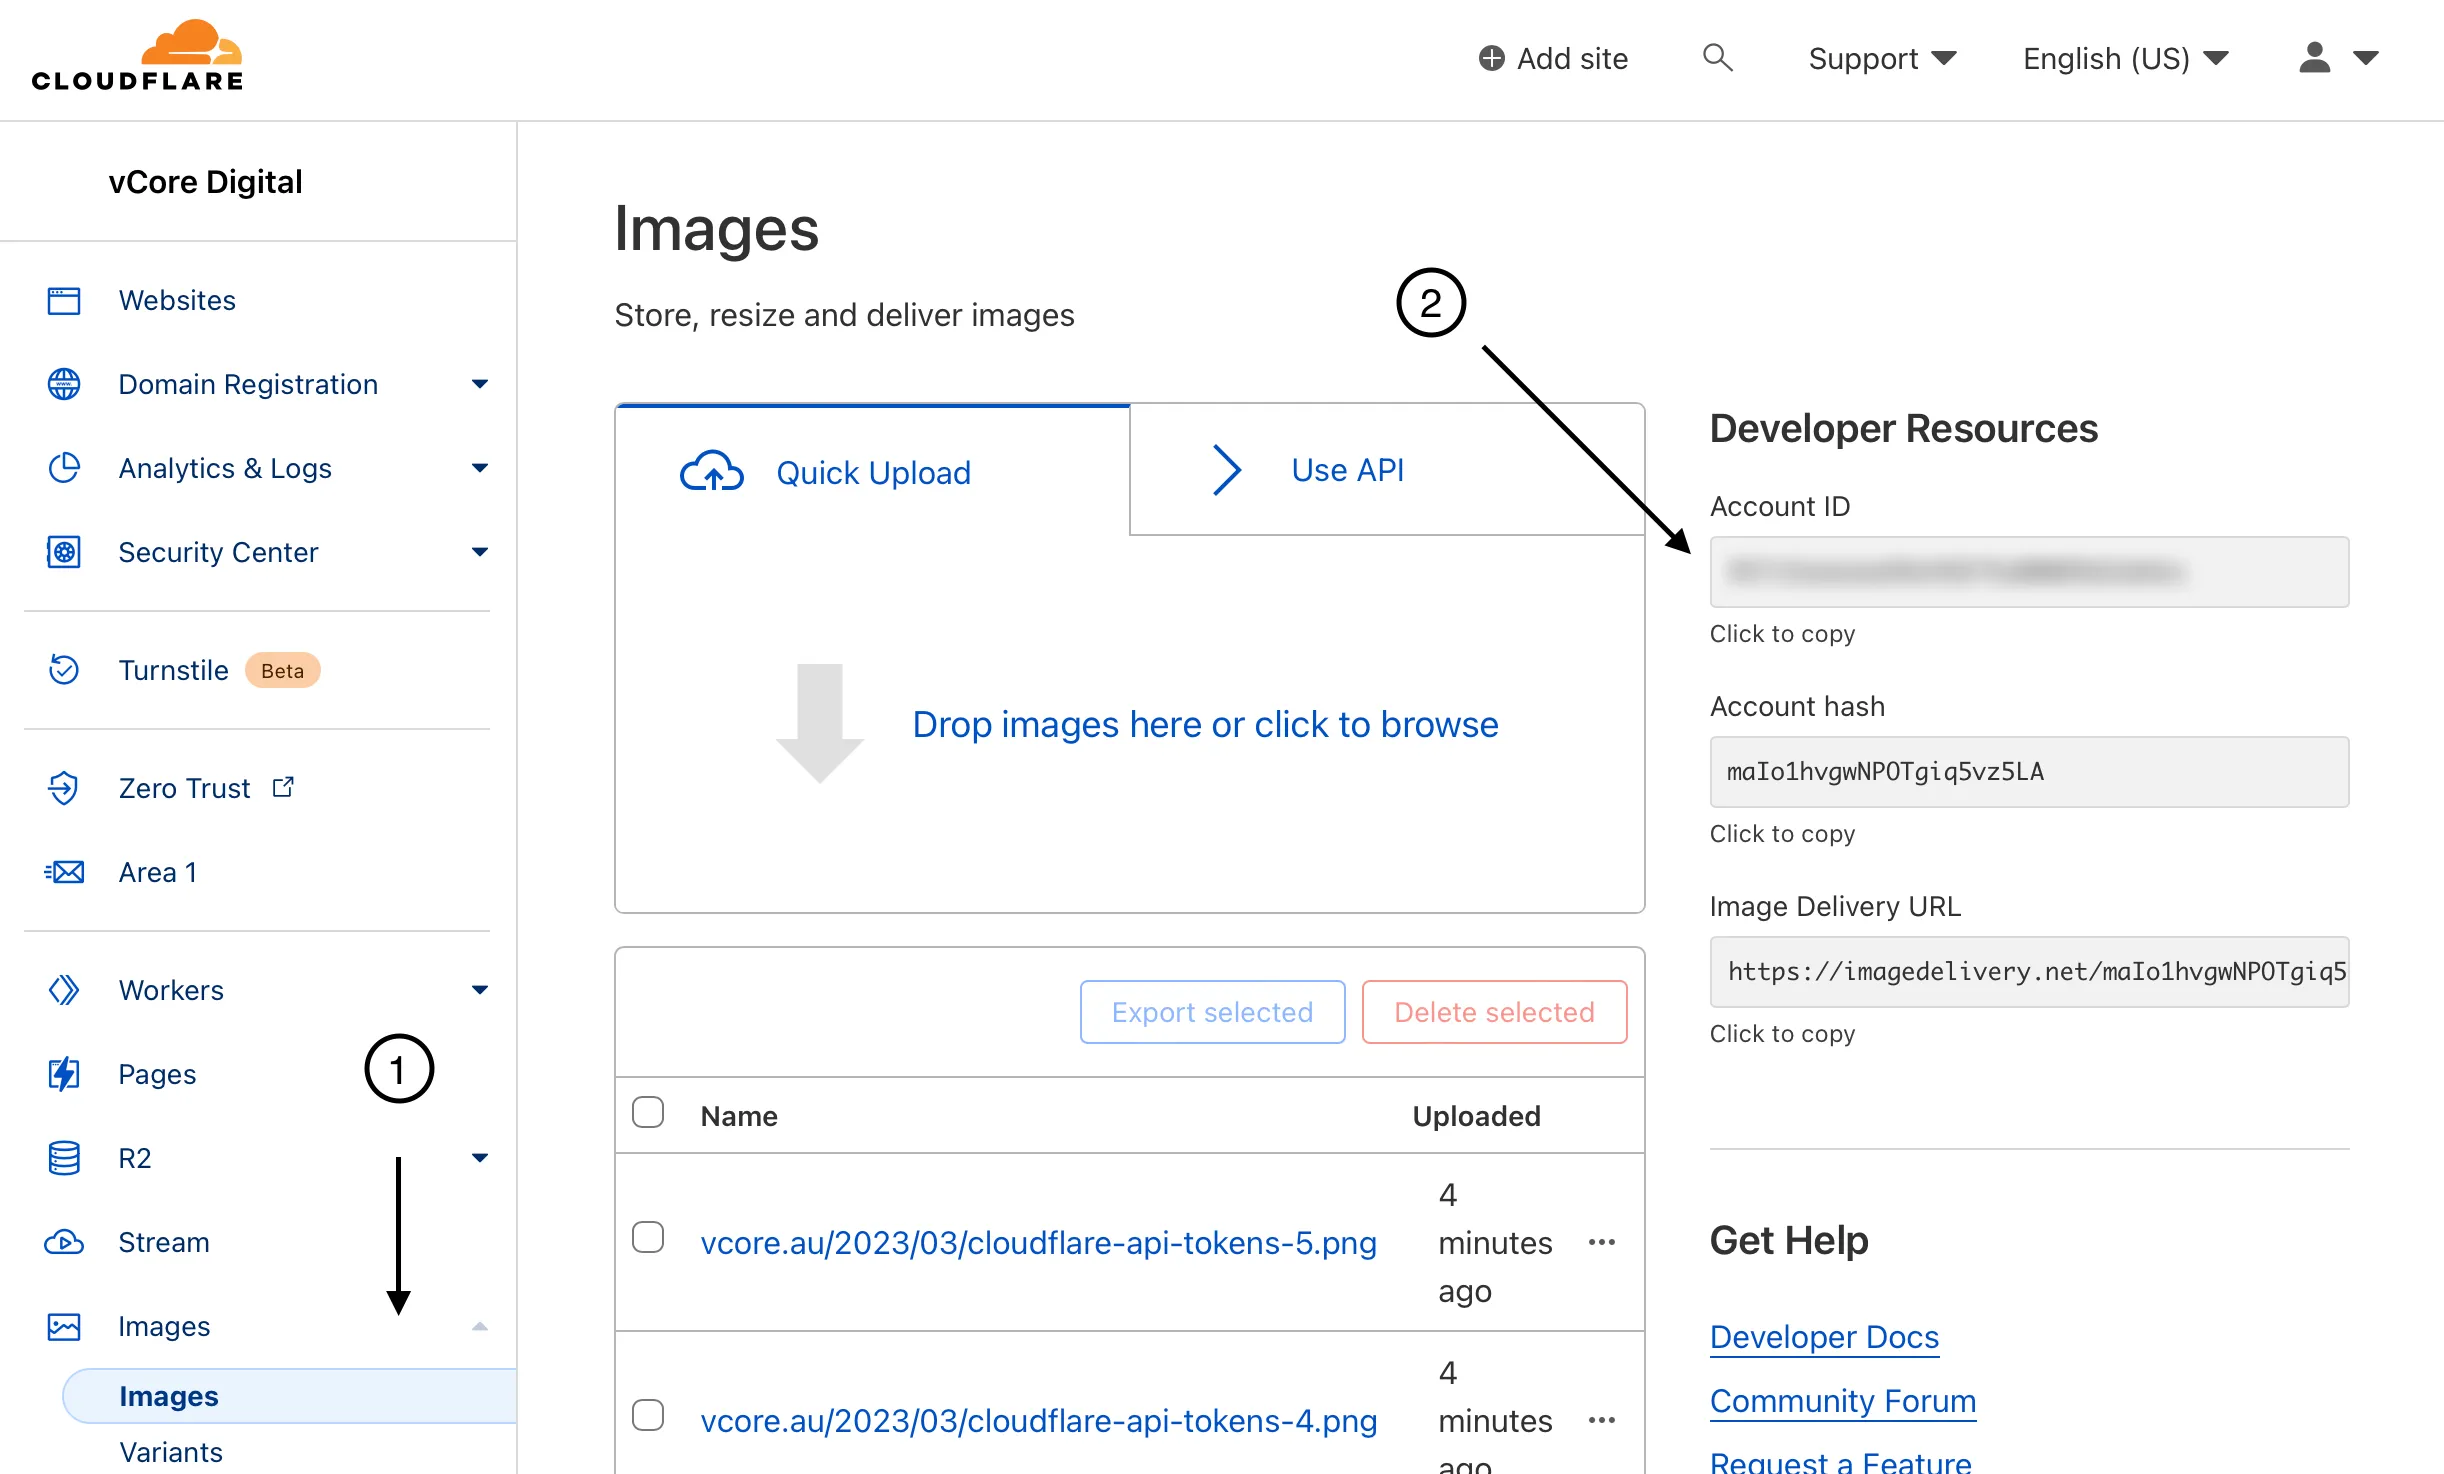
Go to Images (1), copy paste the Account ID (2), somewhere for future use.
Once we’re sure we have Cloudflare Images active on the account and we have the Account ID, it’s time to setup the API token. Click on the profile picture in the top-right corner, and select “My Profile”:
On the Profile page, select “API Tokens” in the left side menu, and it should bring you to a screen that looks something like this:
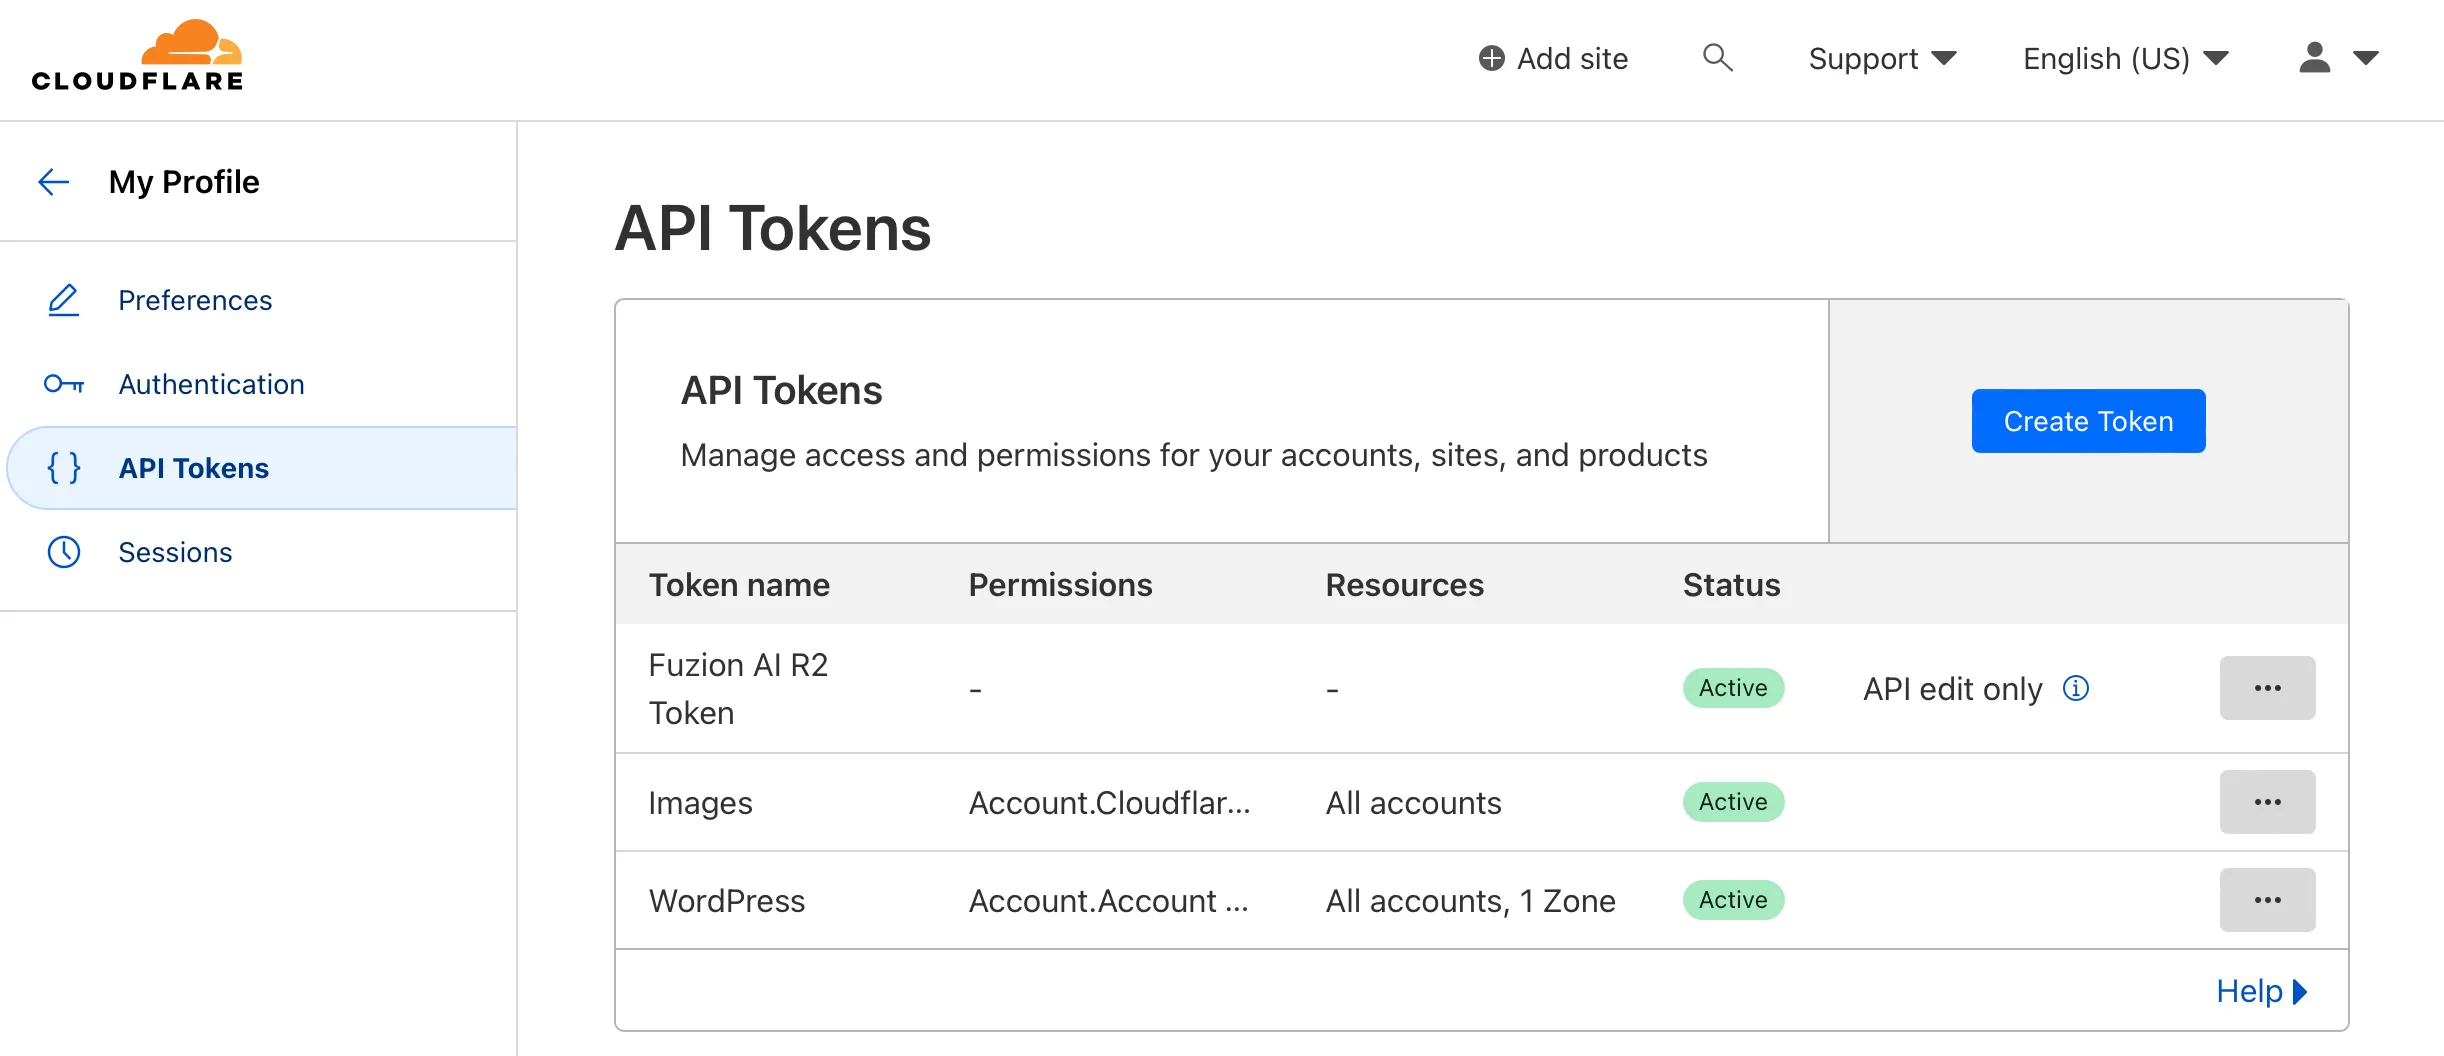
If you’ve just started setting up your Cloudflare account, most likely, the list of API Tokens will be empty, but you might also already have some entries, similar to how I do in the screenshot above.
The first step is to create an API token, which will allow the plugin to store WordPress images in the Cloudflare Images service. Click on the blue “Create Token” button.
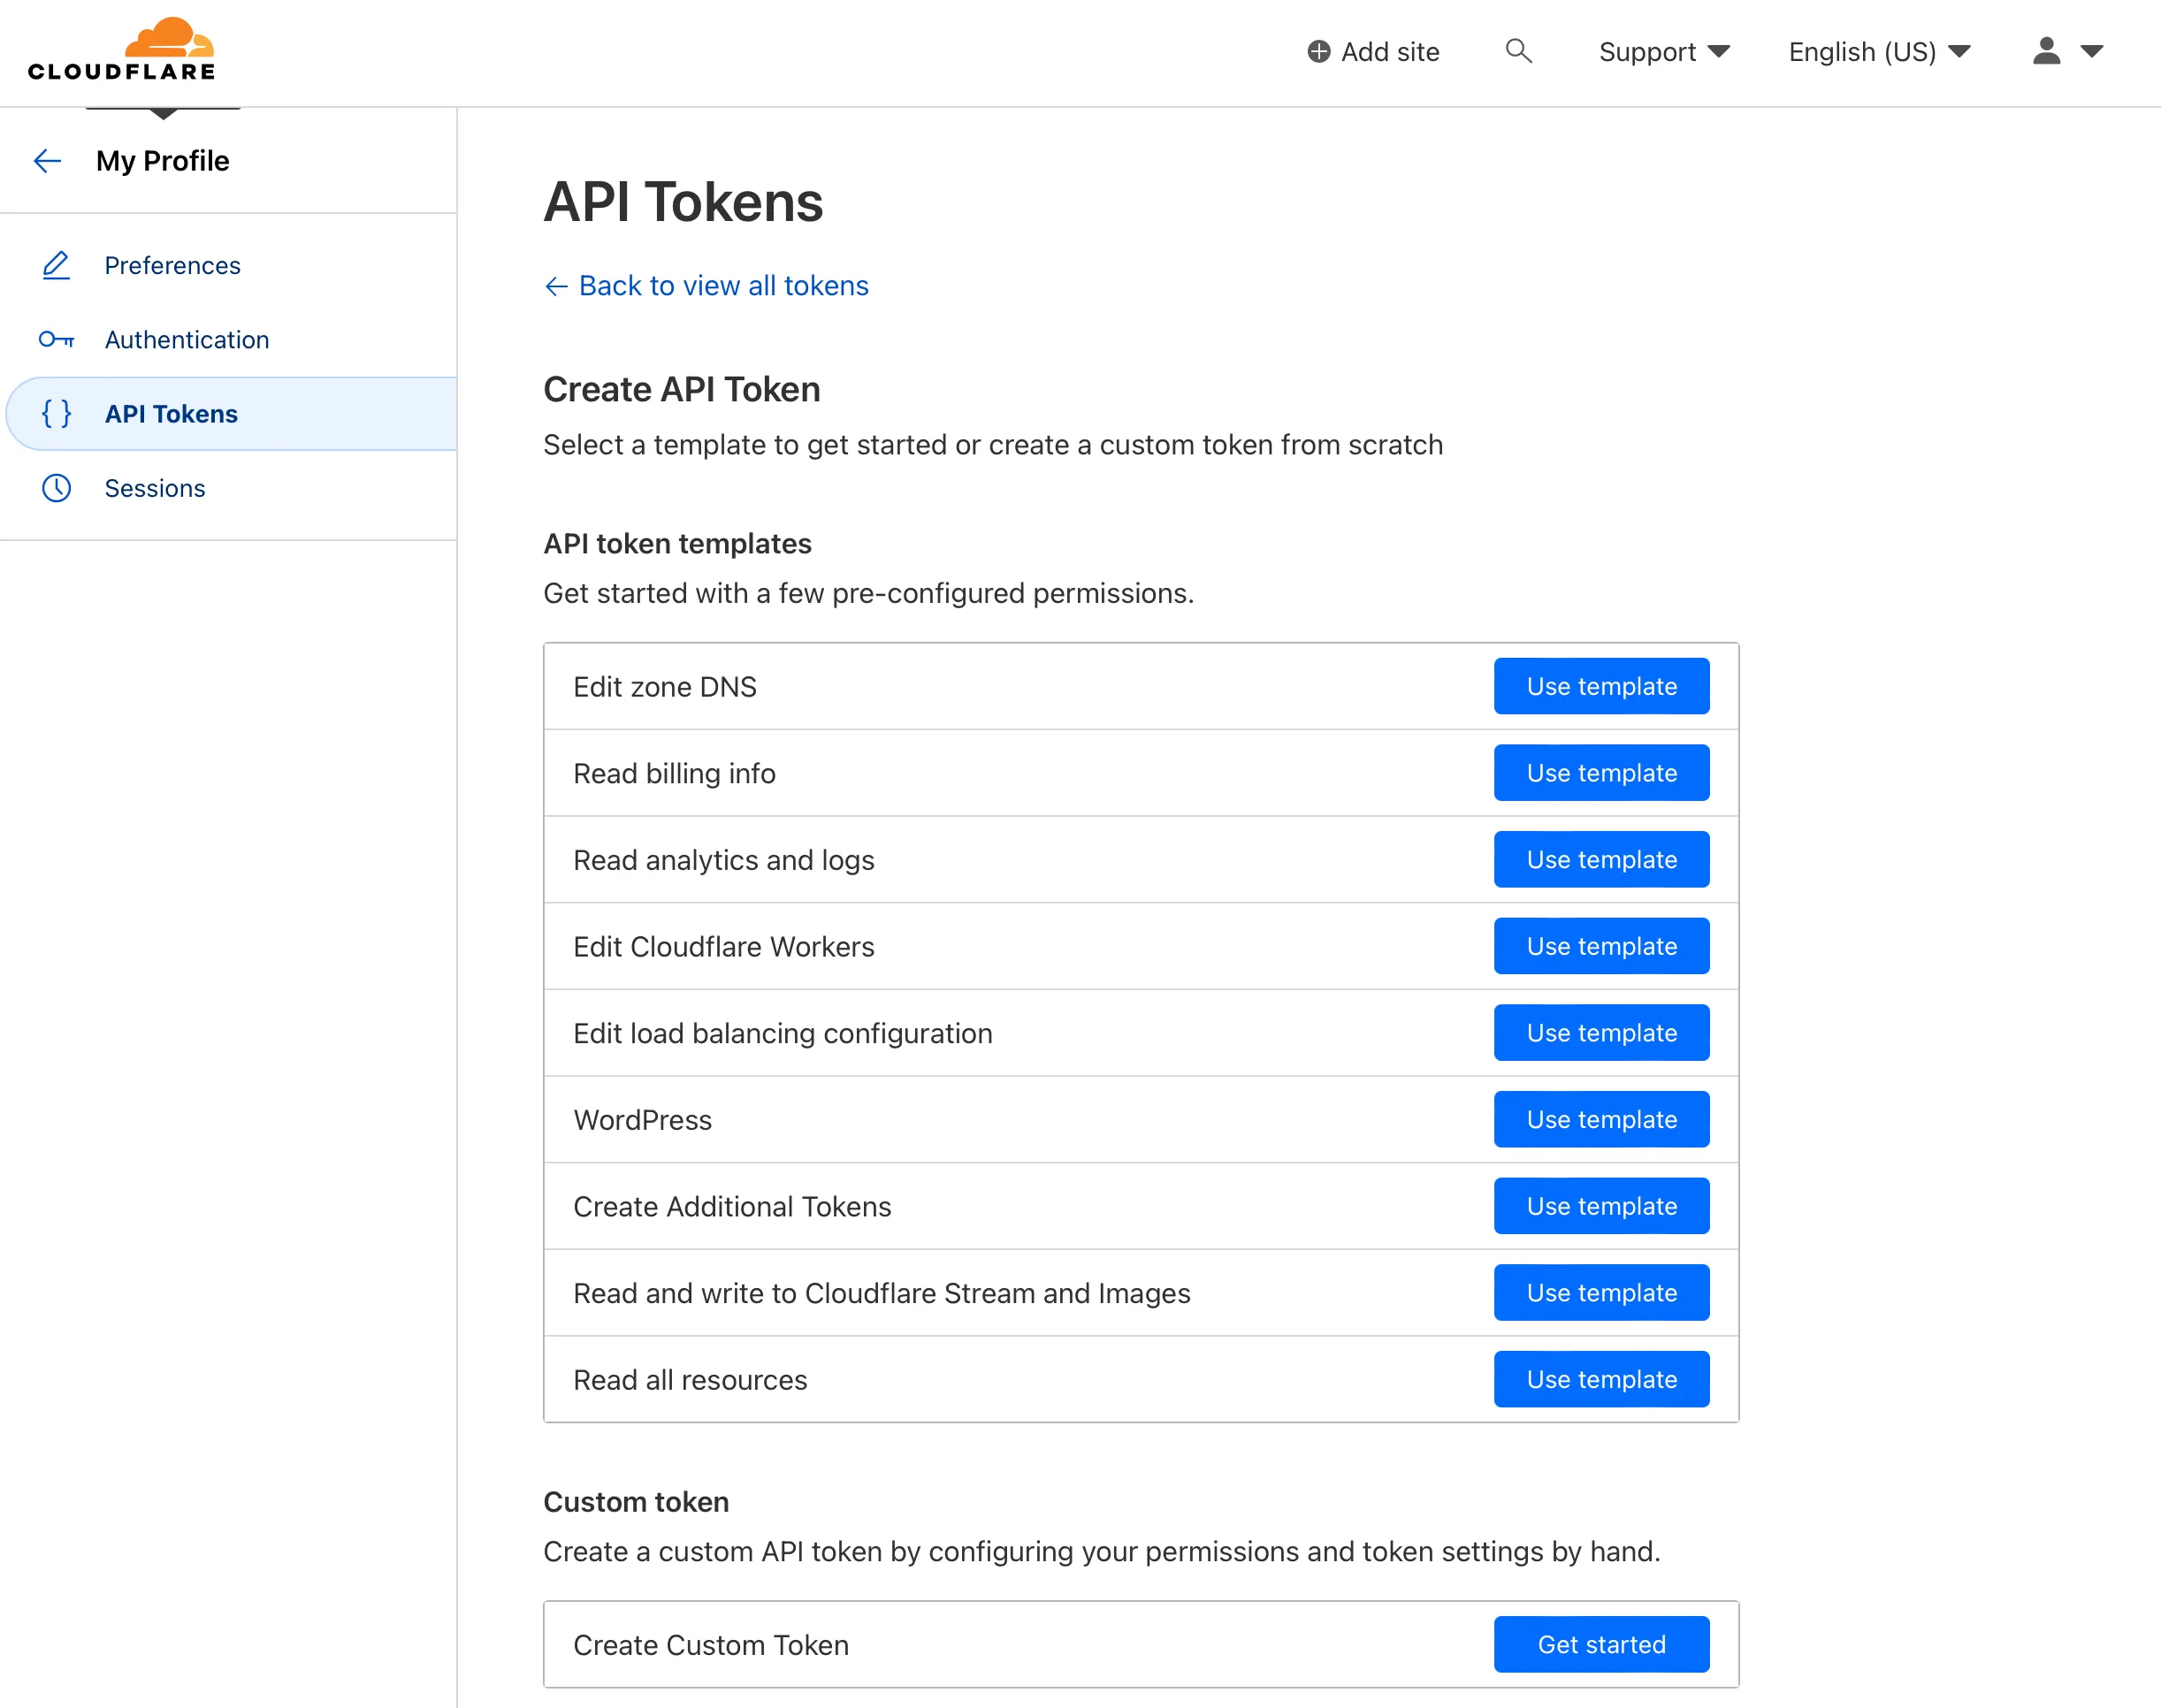
On the very bottom of the page, we will need to select the “Custom token” option, so click on the “Get started” button to create a custom token.
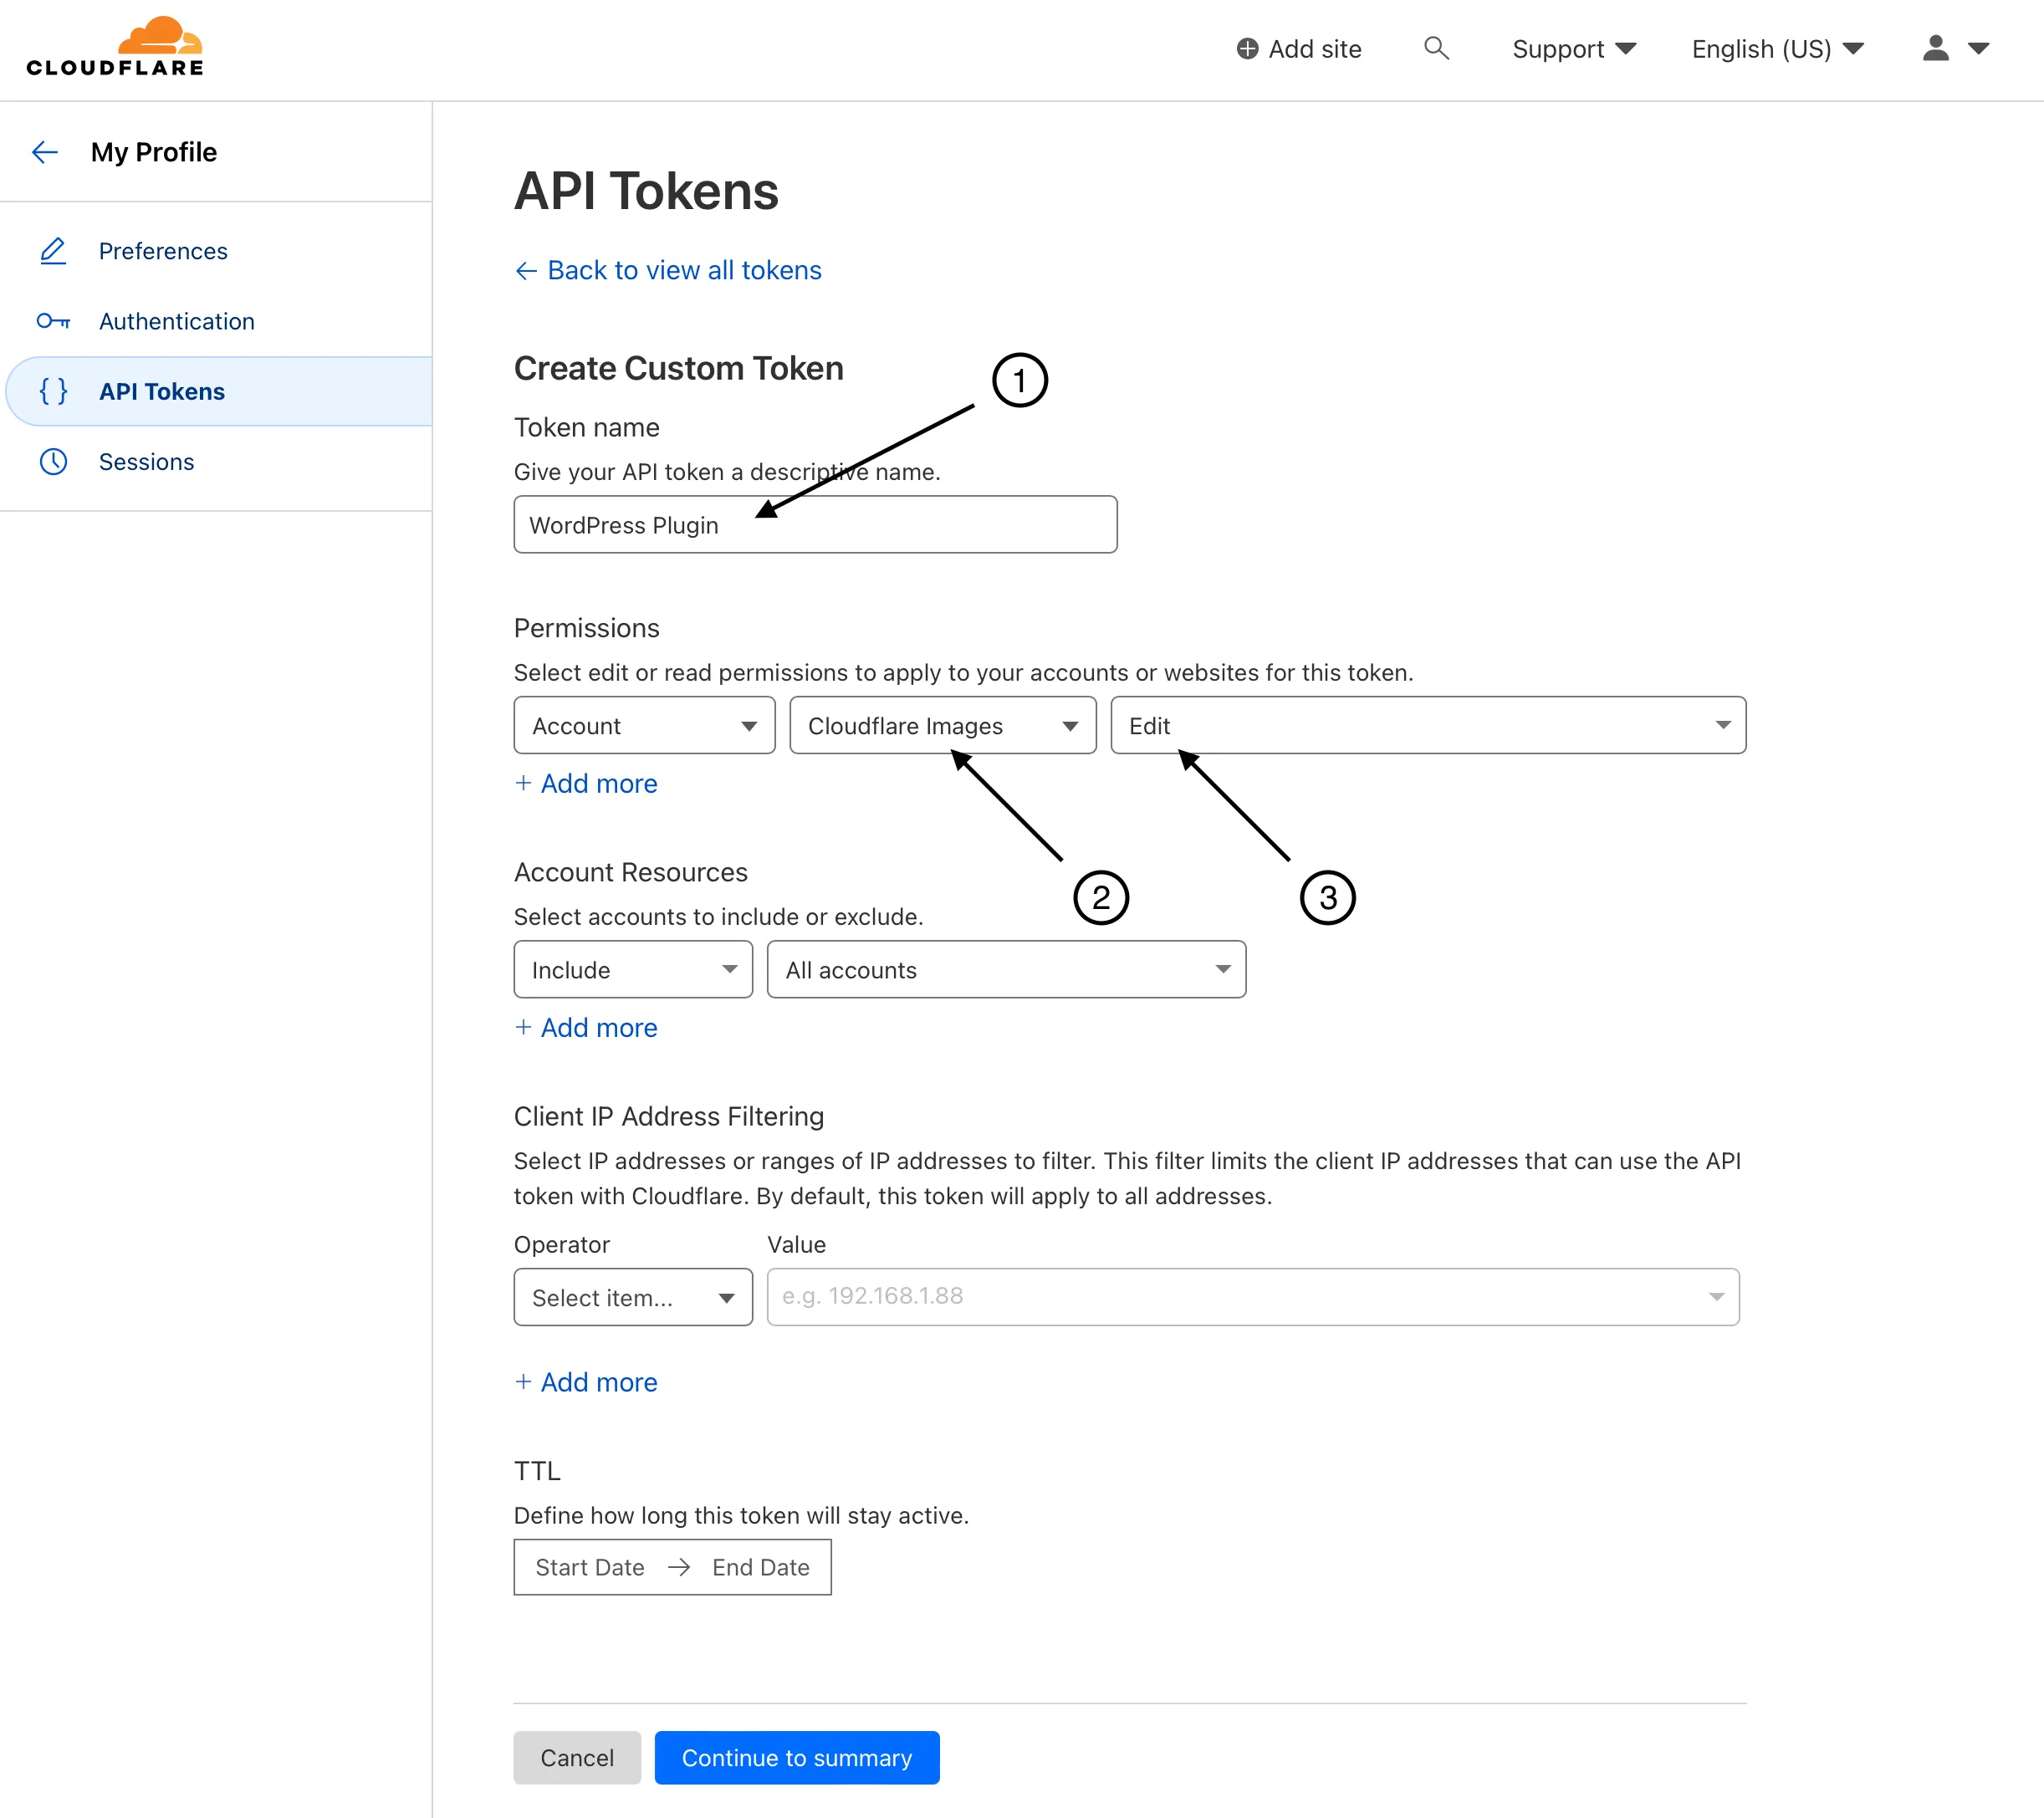
Fill out the token name (1), which can be anything, for example, WordPress plugin. Set the correct permissions to allow Edits (3) on the Cloudflare Images (2) service. I’d recommend leaving all other fields in their default values. But, you can, of course, set this up in more details, if required.
Once you’re finished with the setup, click “Continue to summary”, which will take you to one last final confirmation step:
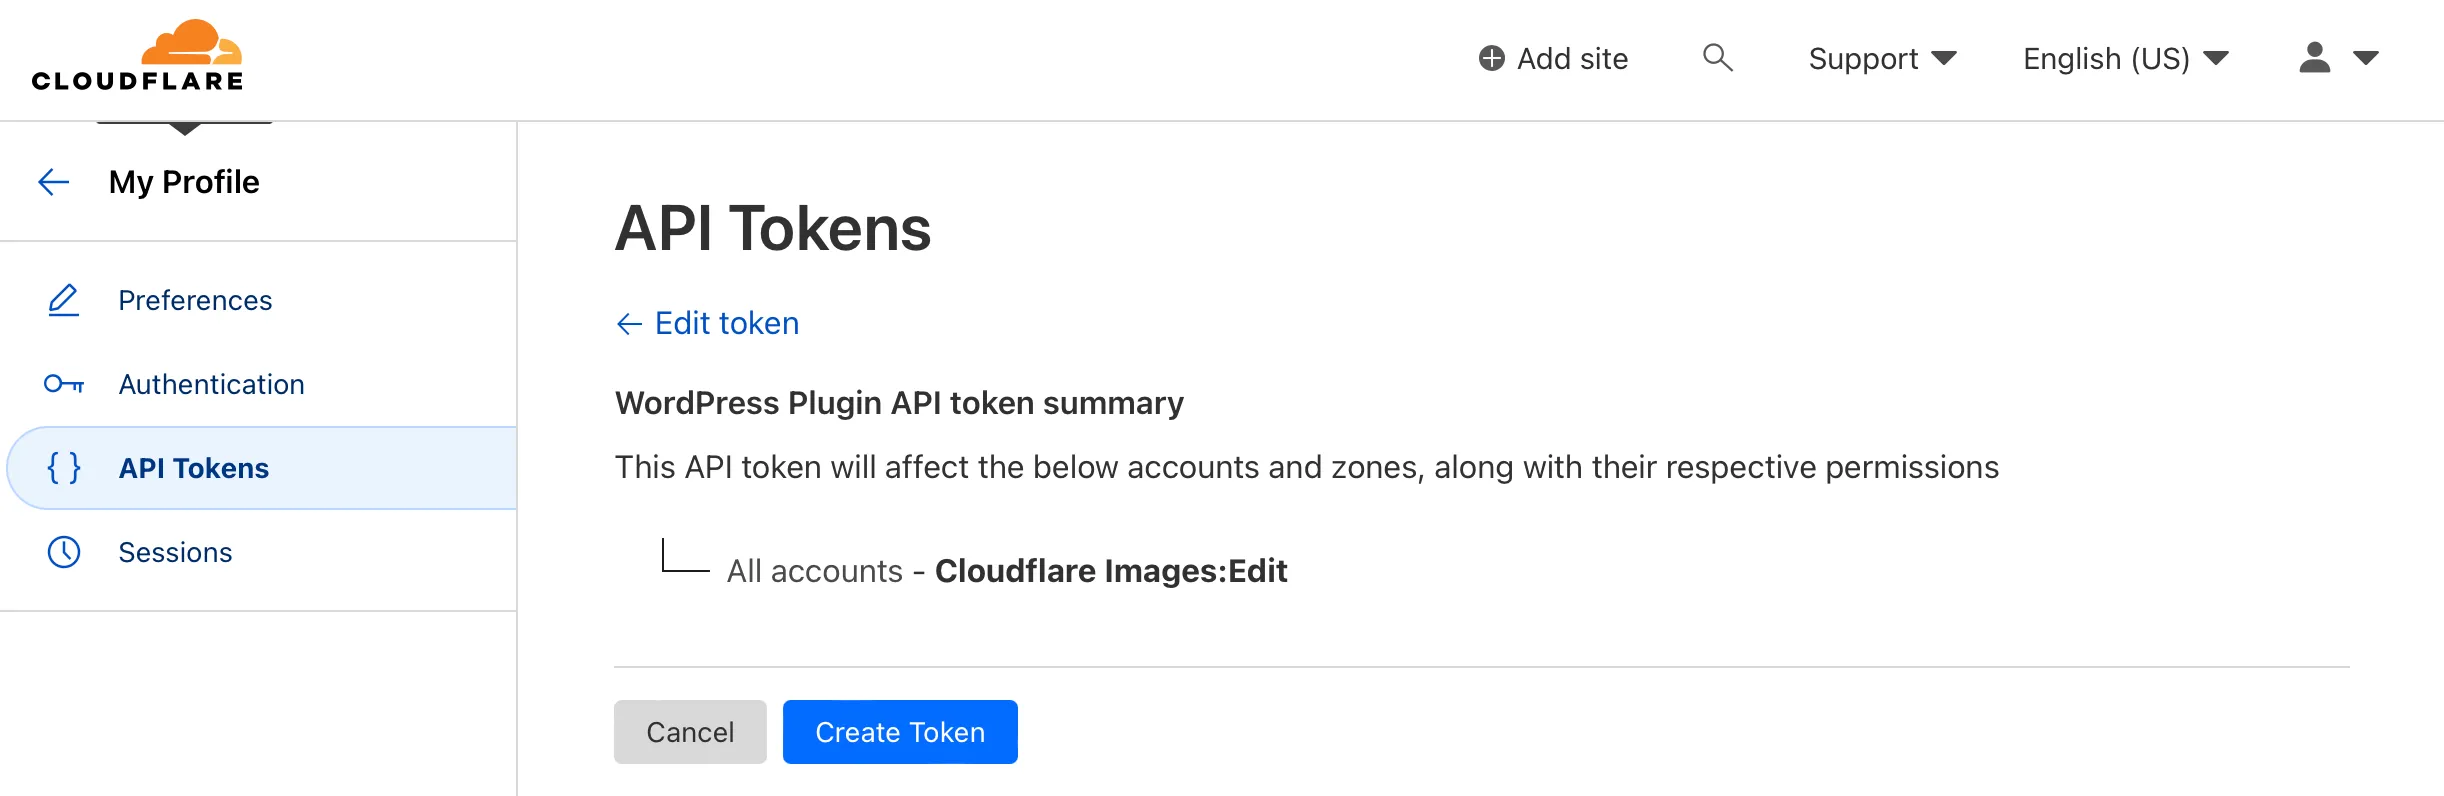
Click on “Create Token”:
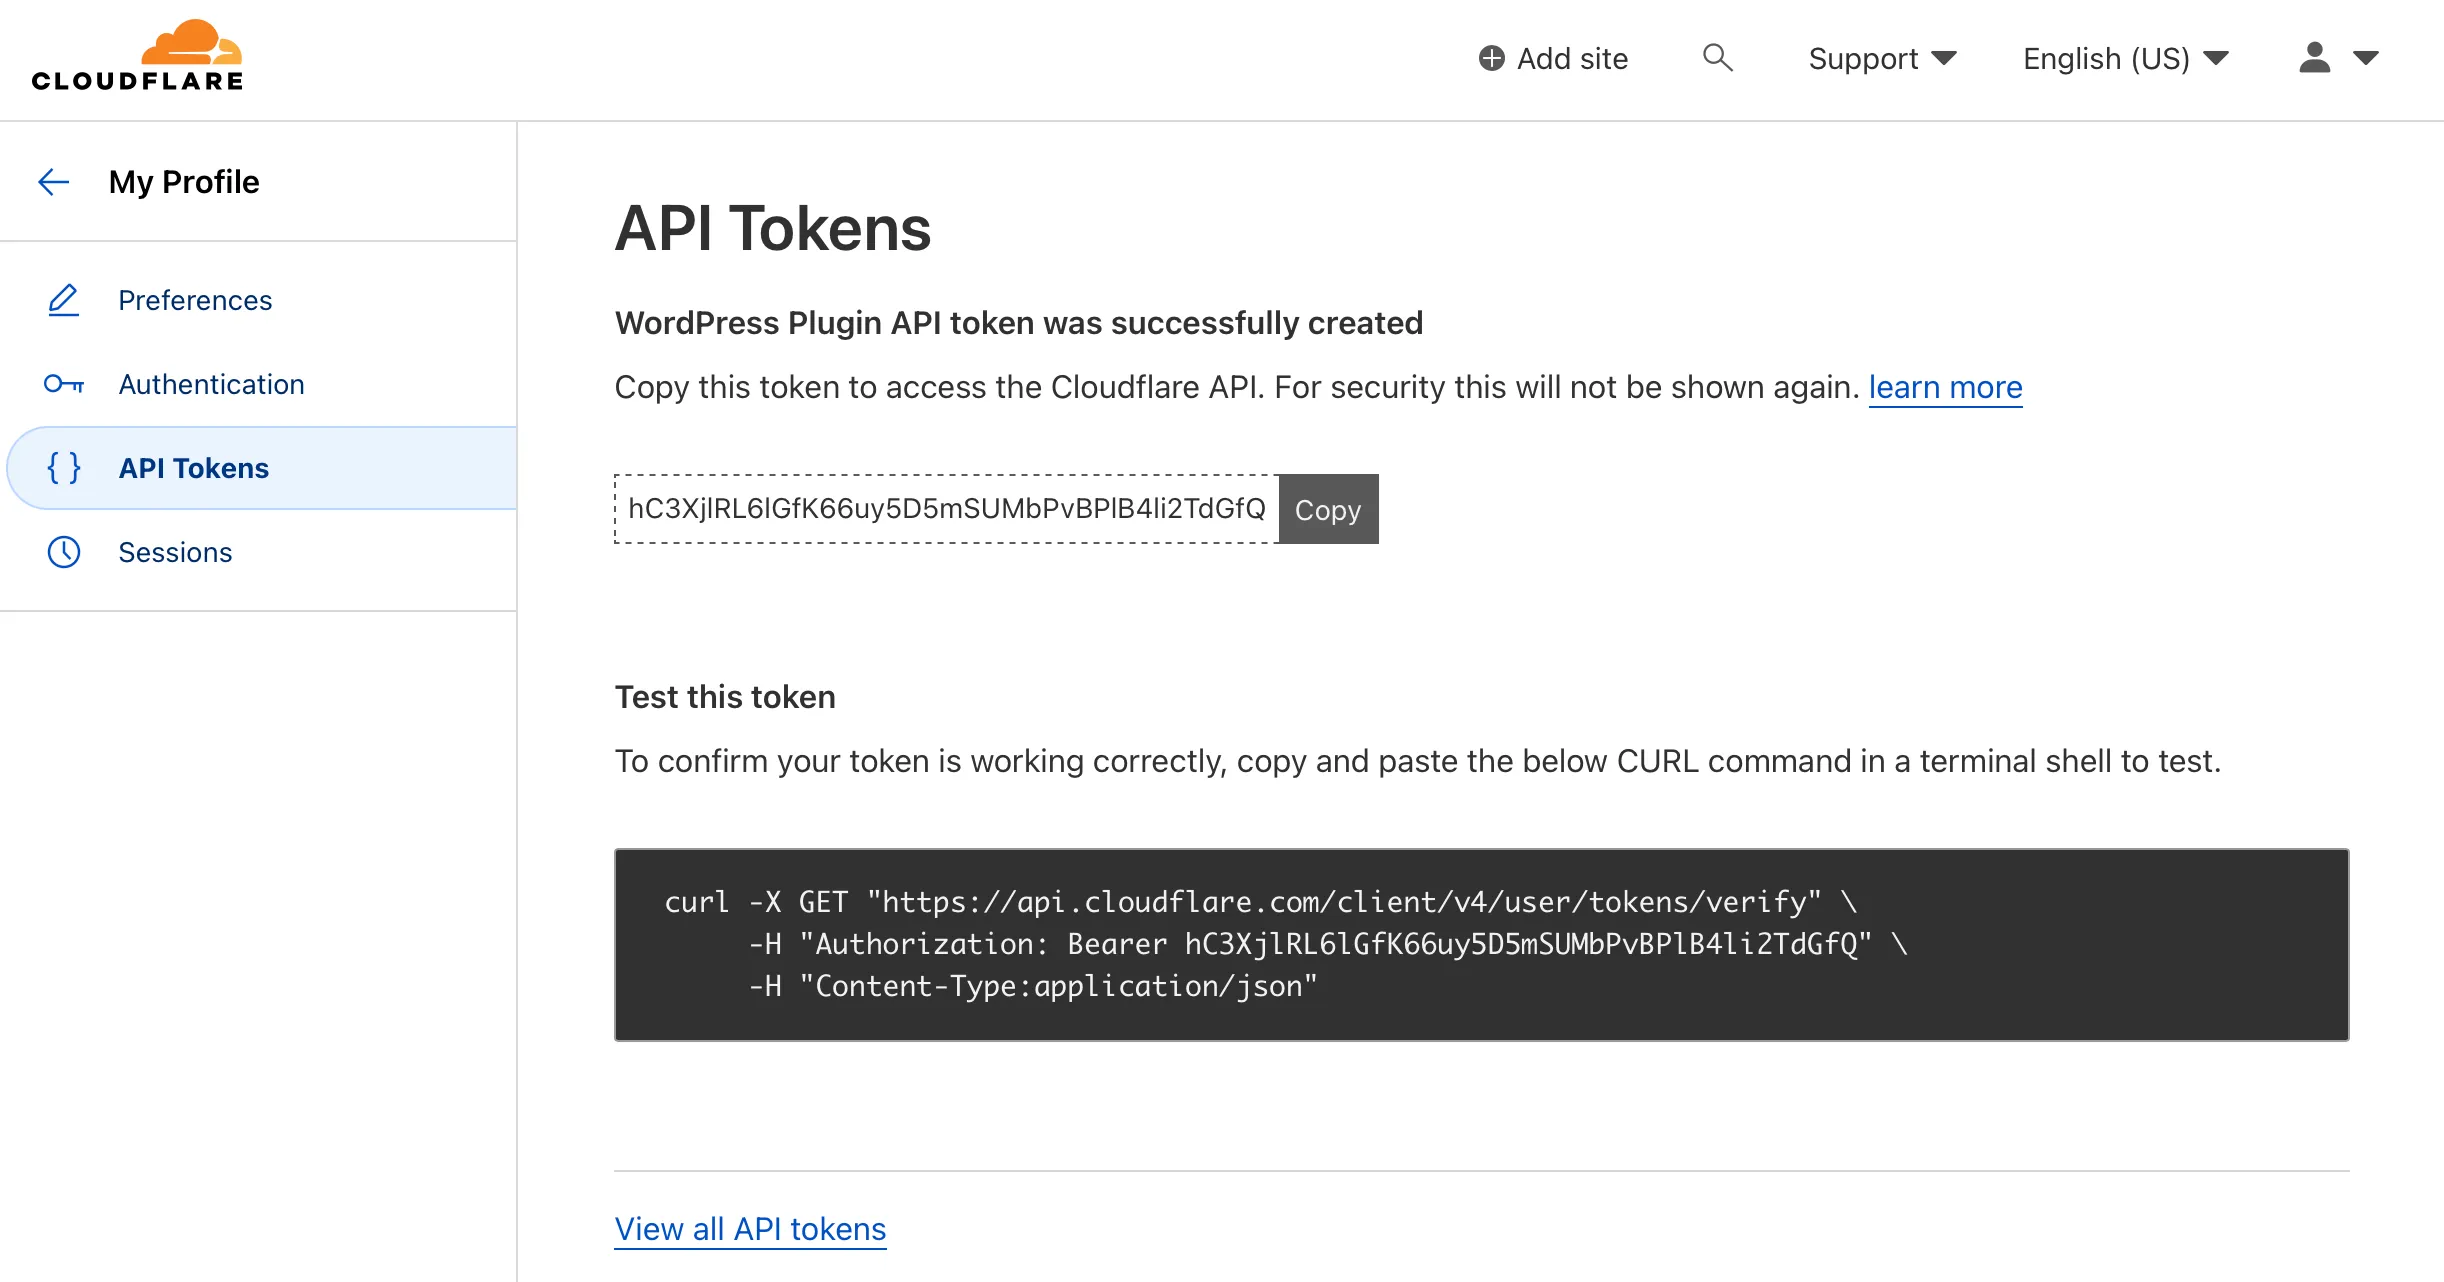
Copy and save the generated token, which we will need in the next step, when setting up the plugin on the website. The above one will not work, it’s a test token I’ve created just for the sake of this article, I’ve already removed it.
Plugin setup
First of all, you will need to install and activate the Offload, Store, Resize & Optimize with Cloudflare Images plugin on your website.
After the plugin is activated, you will need to make sure the plugin is connected with your Cloudflare account and is able to upload images to the Cloudflare Images service.
For this to work, you will need to store the Cloudflare Account ID and API Token in the wp-config.php file. Unless, your host does not allow editing this file directly, the plugin will handle all this for you.
Go to “Media” – “Offload Settings”:
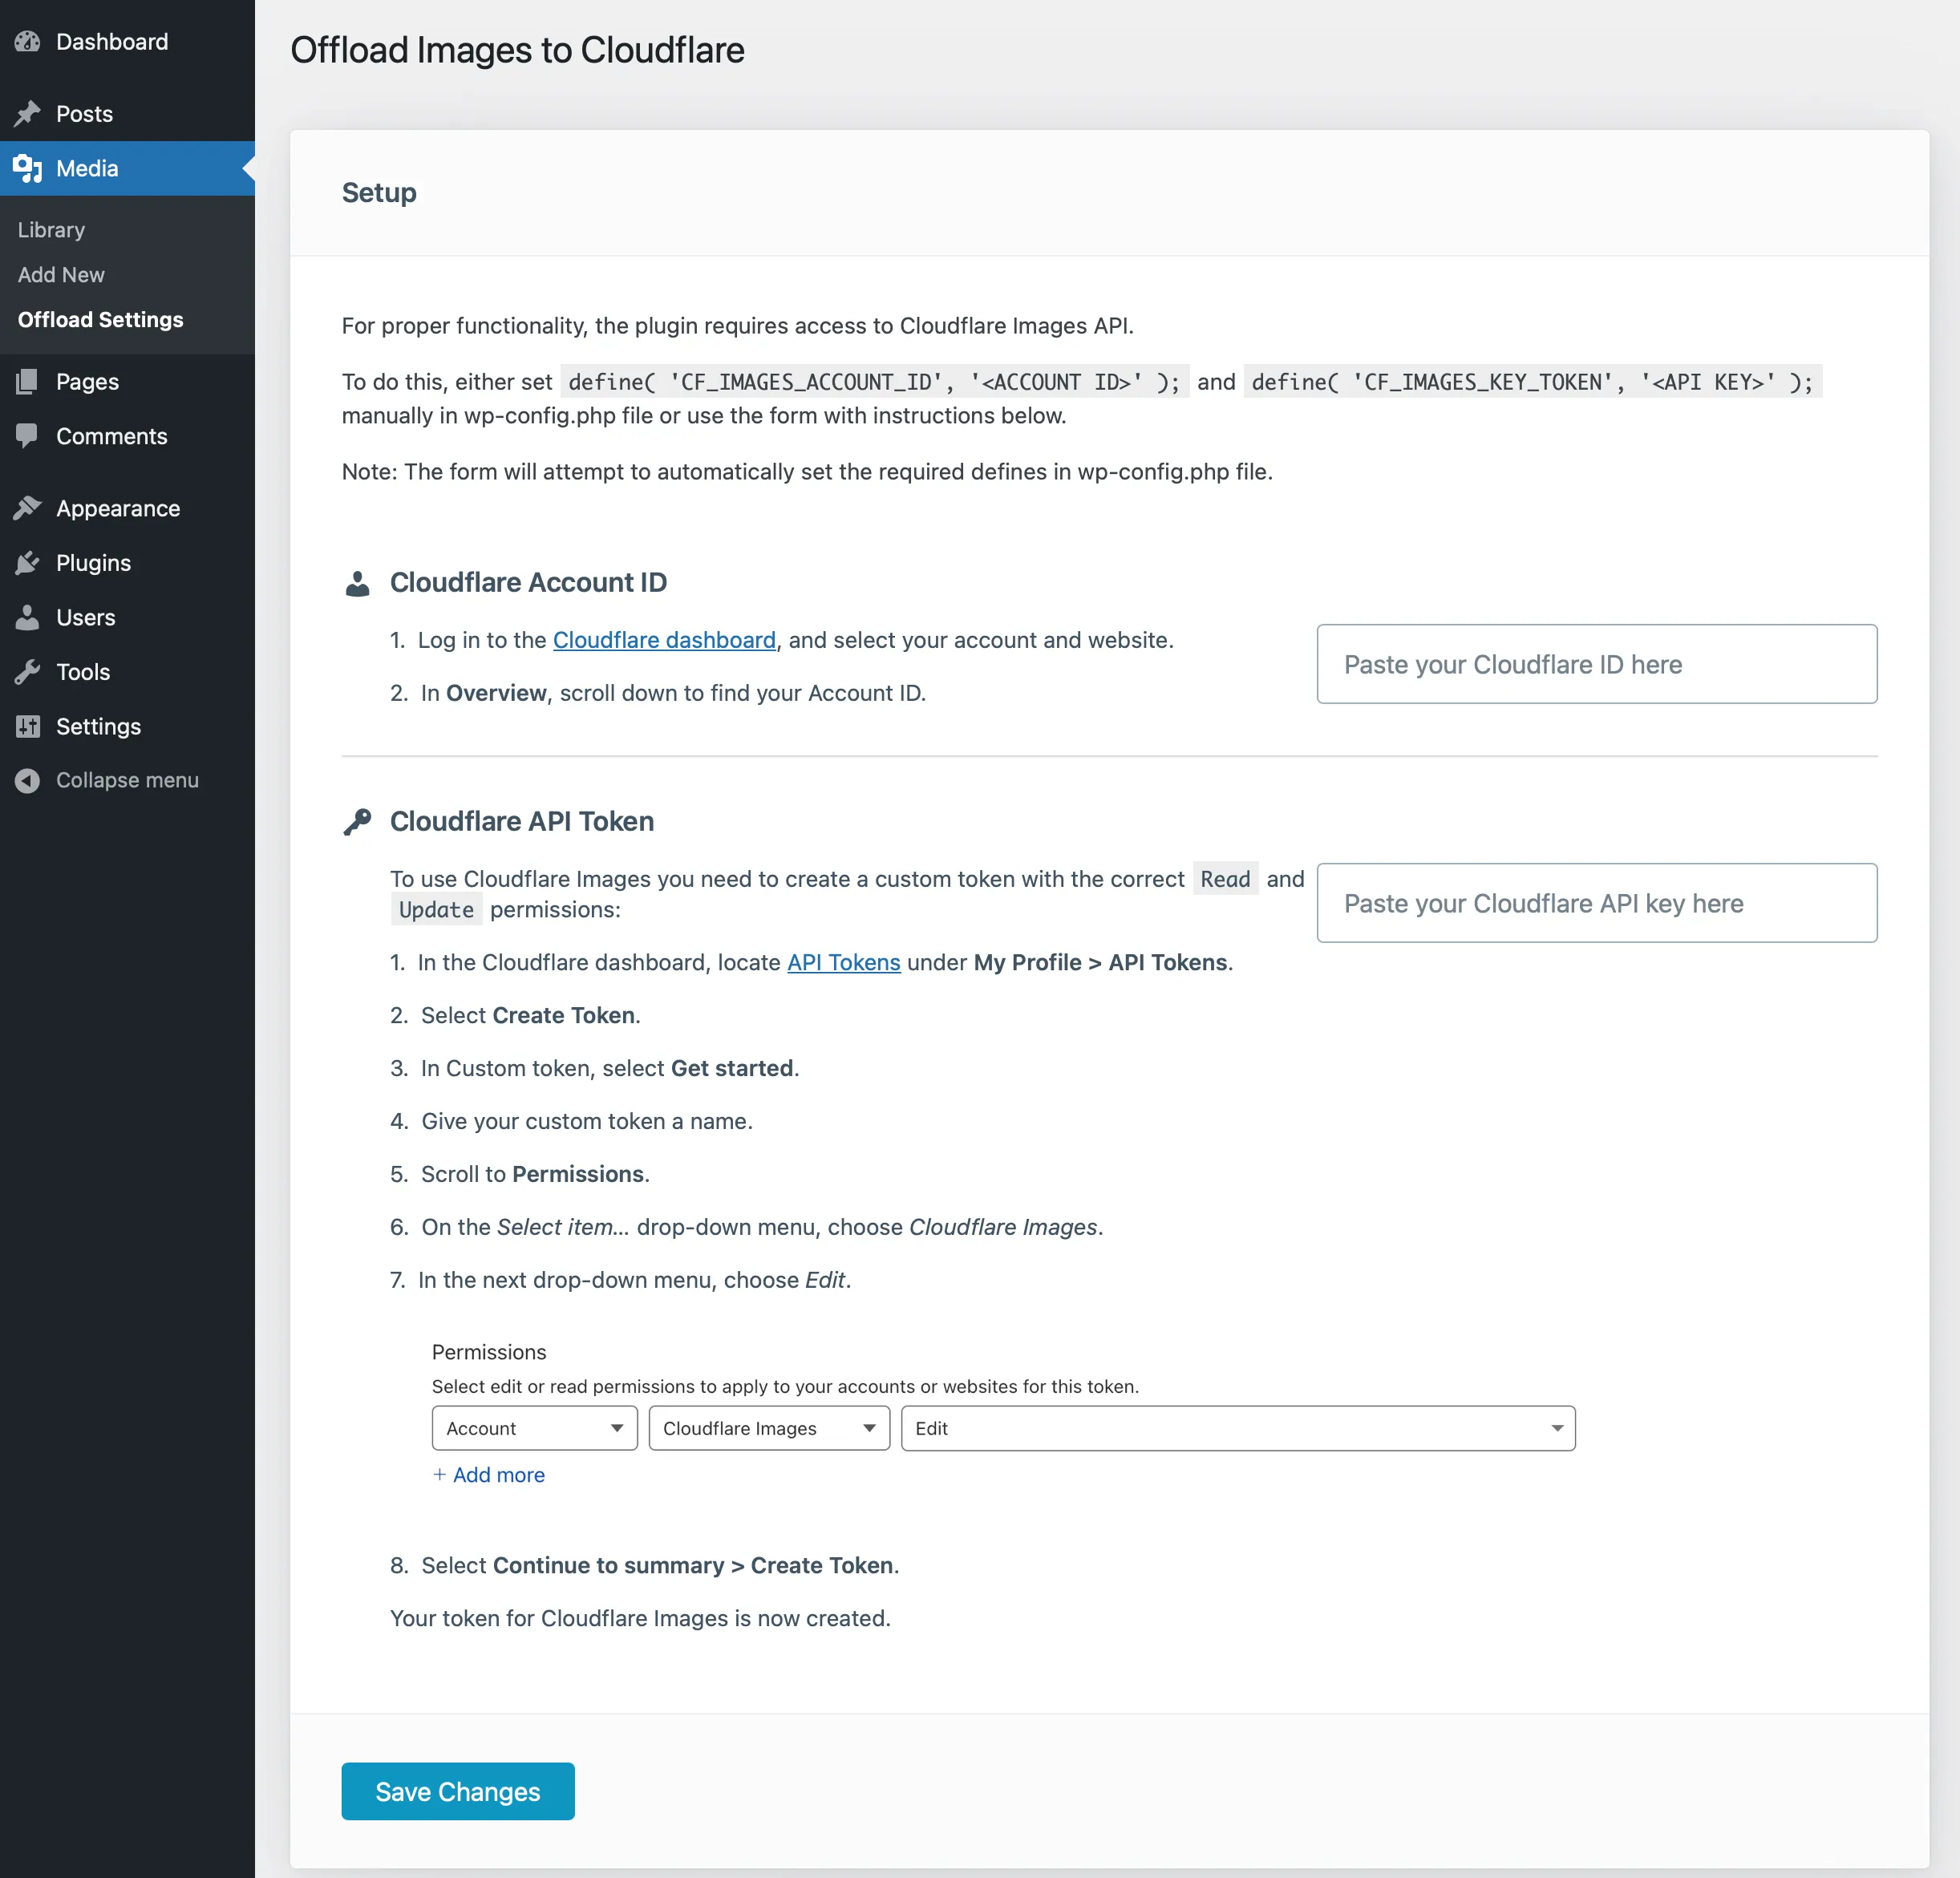
Paste the Account ID and API token, which we’ve obtained from the steps above. And click on the “Save Changes” button.
Depending on your host and how fast the changes are applied to the wp-config.php file, you can either be redirected to this page:
Or you might see some errors. The most common one – the plugin was not able to validate the API. Most likely, this is due to the fact that it takes a couple of seconds for the wp-config.php settings to be seen by the plugin, refreshing the page should take you to the settings screen above.
Some hosts prevent direct writes to the wp-config.php file, for example, Flywheel hosting. However, contacting their support over chat and asking to add the following defines to your wp-config.php:
define( 'CF_IMAGES_ACCOUNT_ID', '<Account ID>' );
define( 'CF_IMAGES_KEY_TOKEN', '<API Token>' );
I tried this with their support, and it takes just a few minutes.
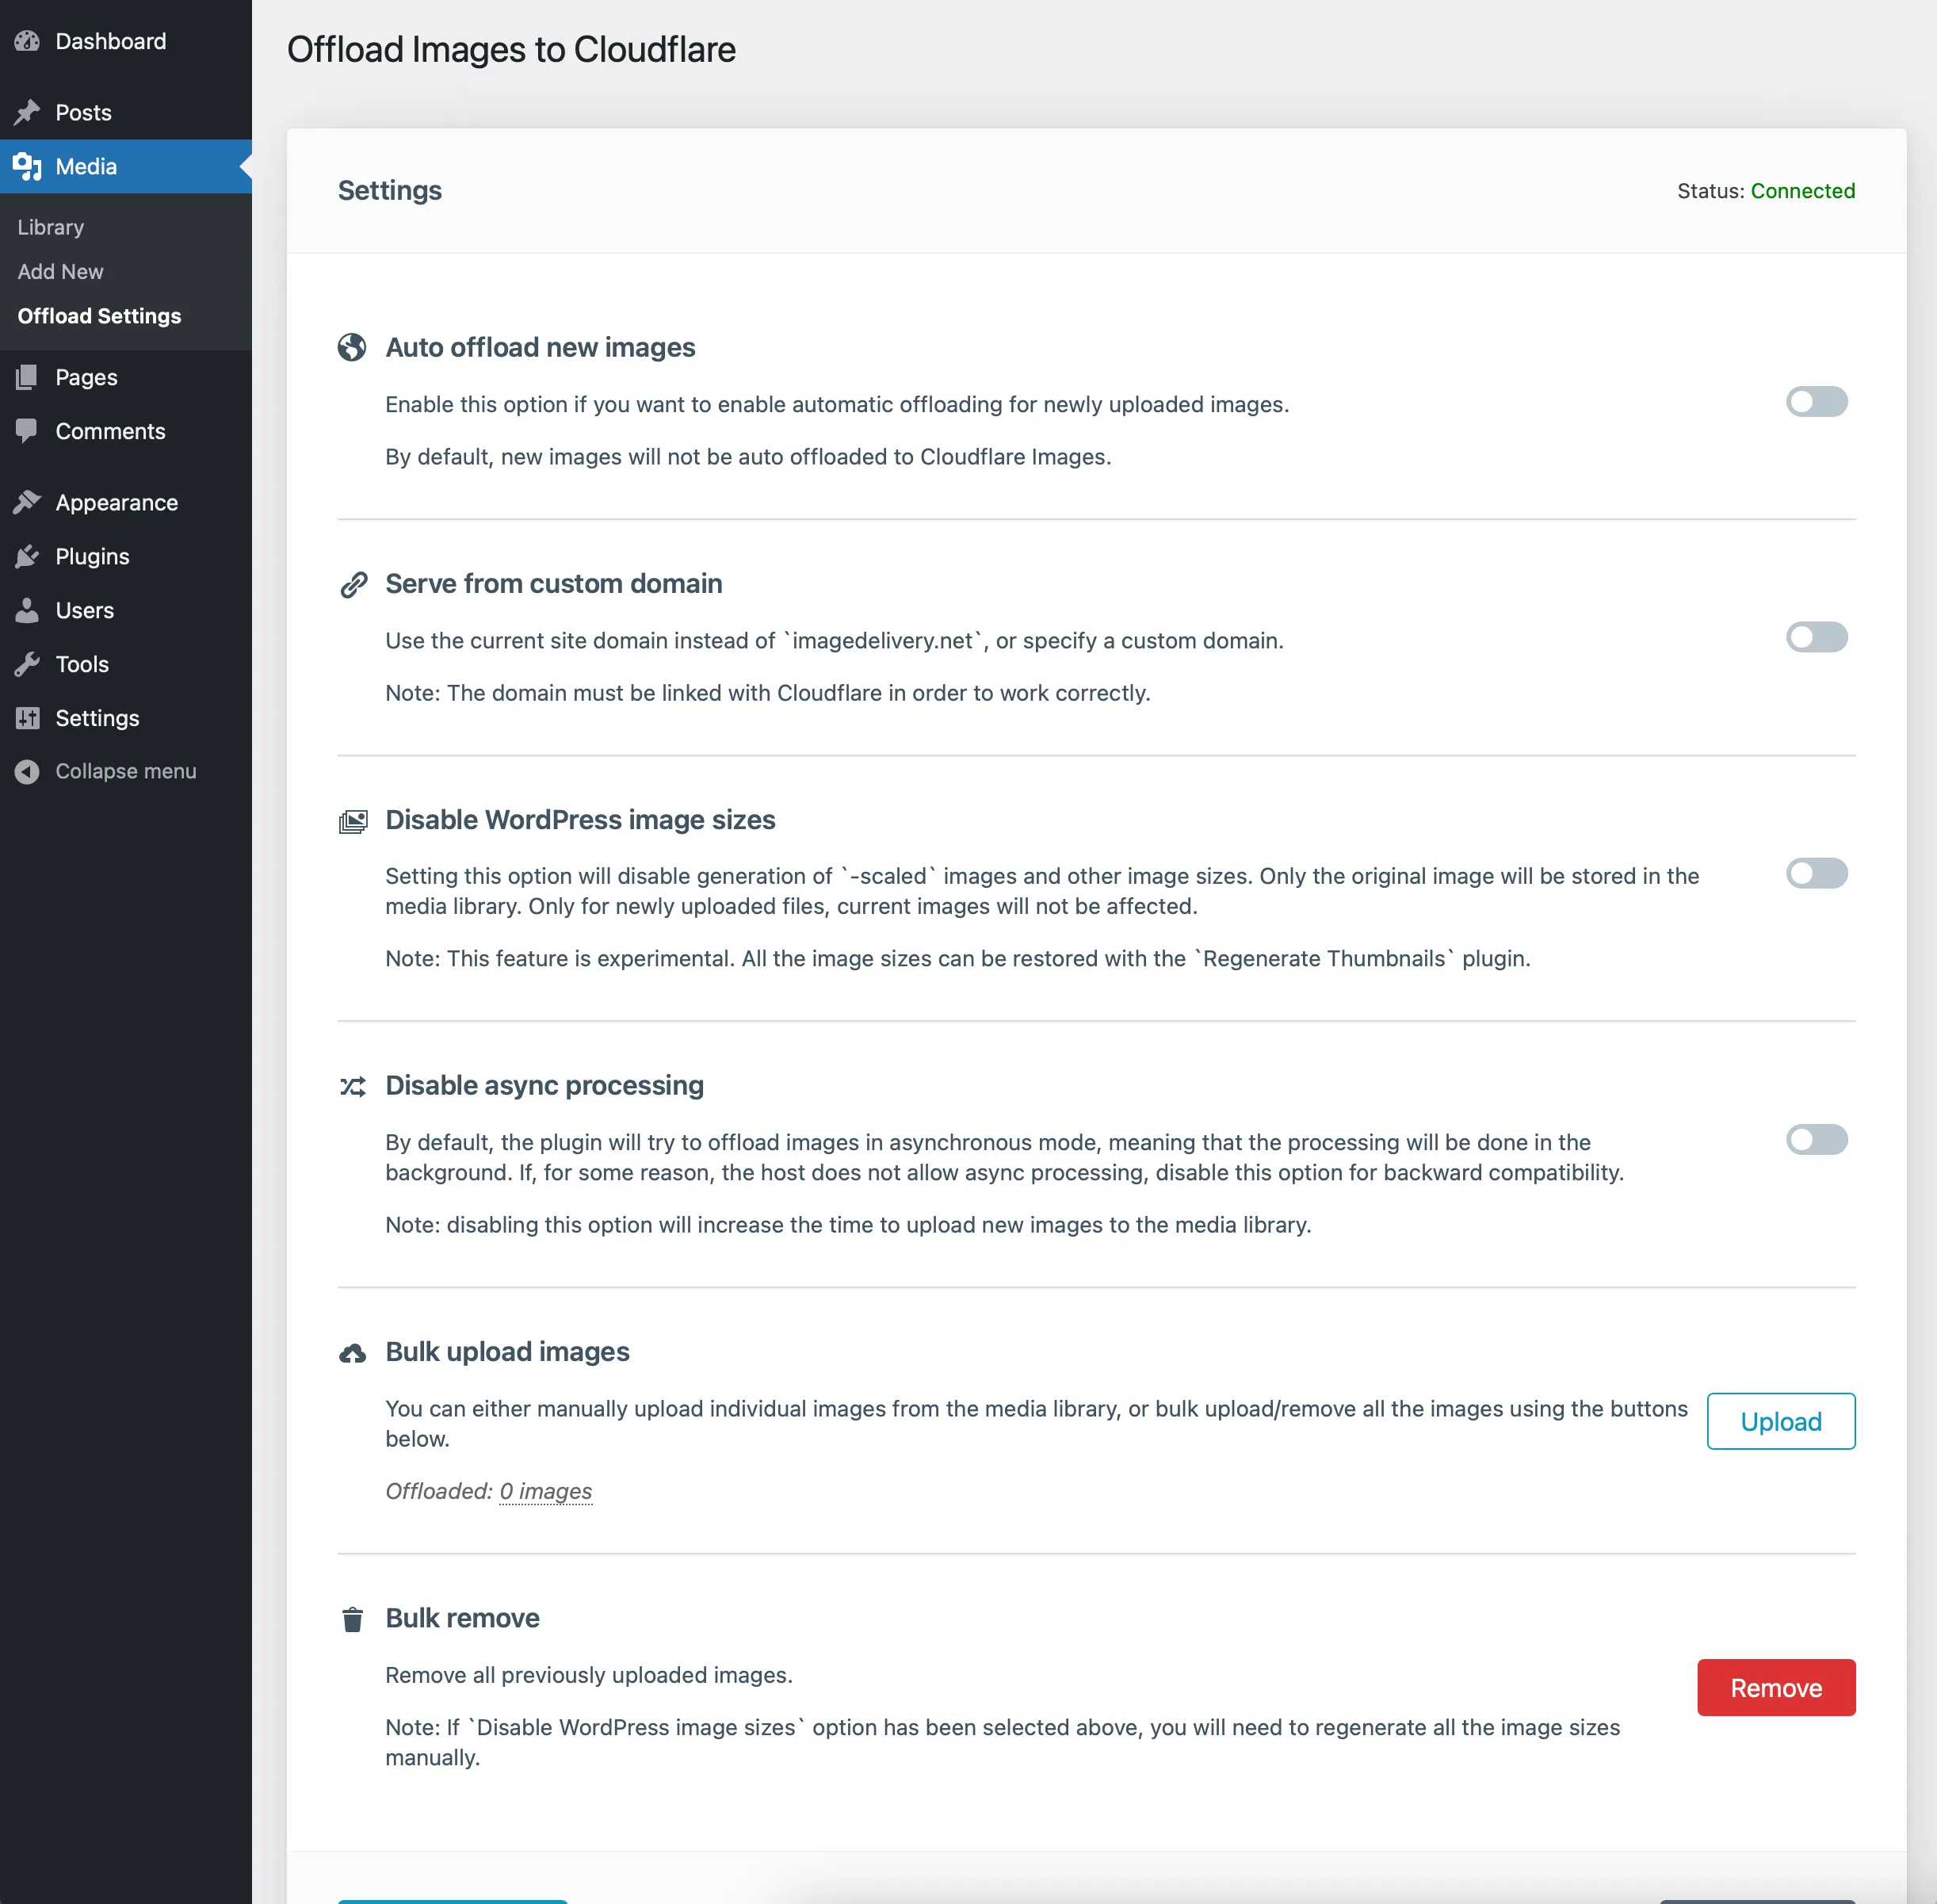
Once this is done, your site is setup and ready to serve images from the Cloudflare Images service. You can either bulk upload all your media library images, by clicking the “Upload” button, or you can upload individual images from the media library:
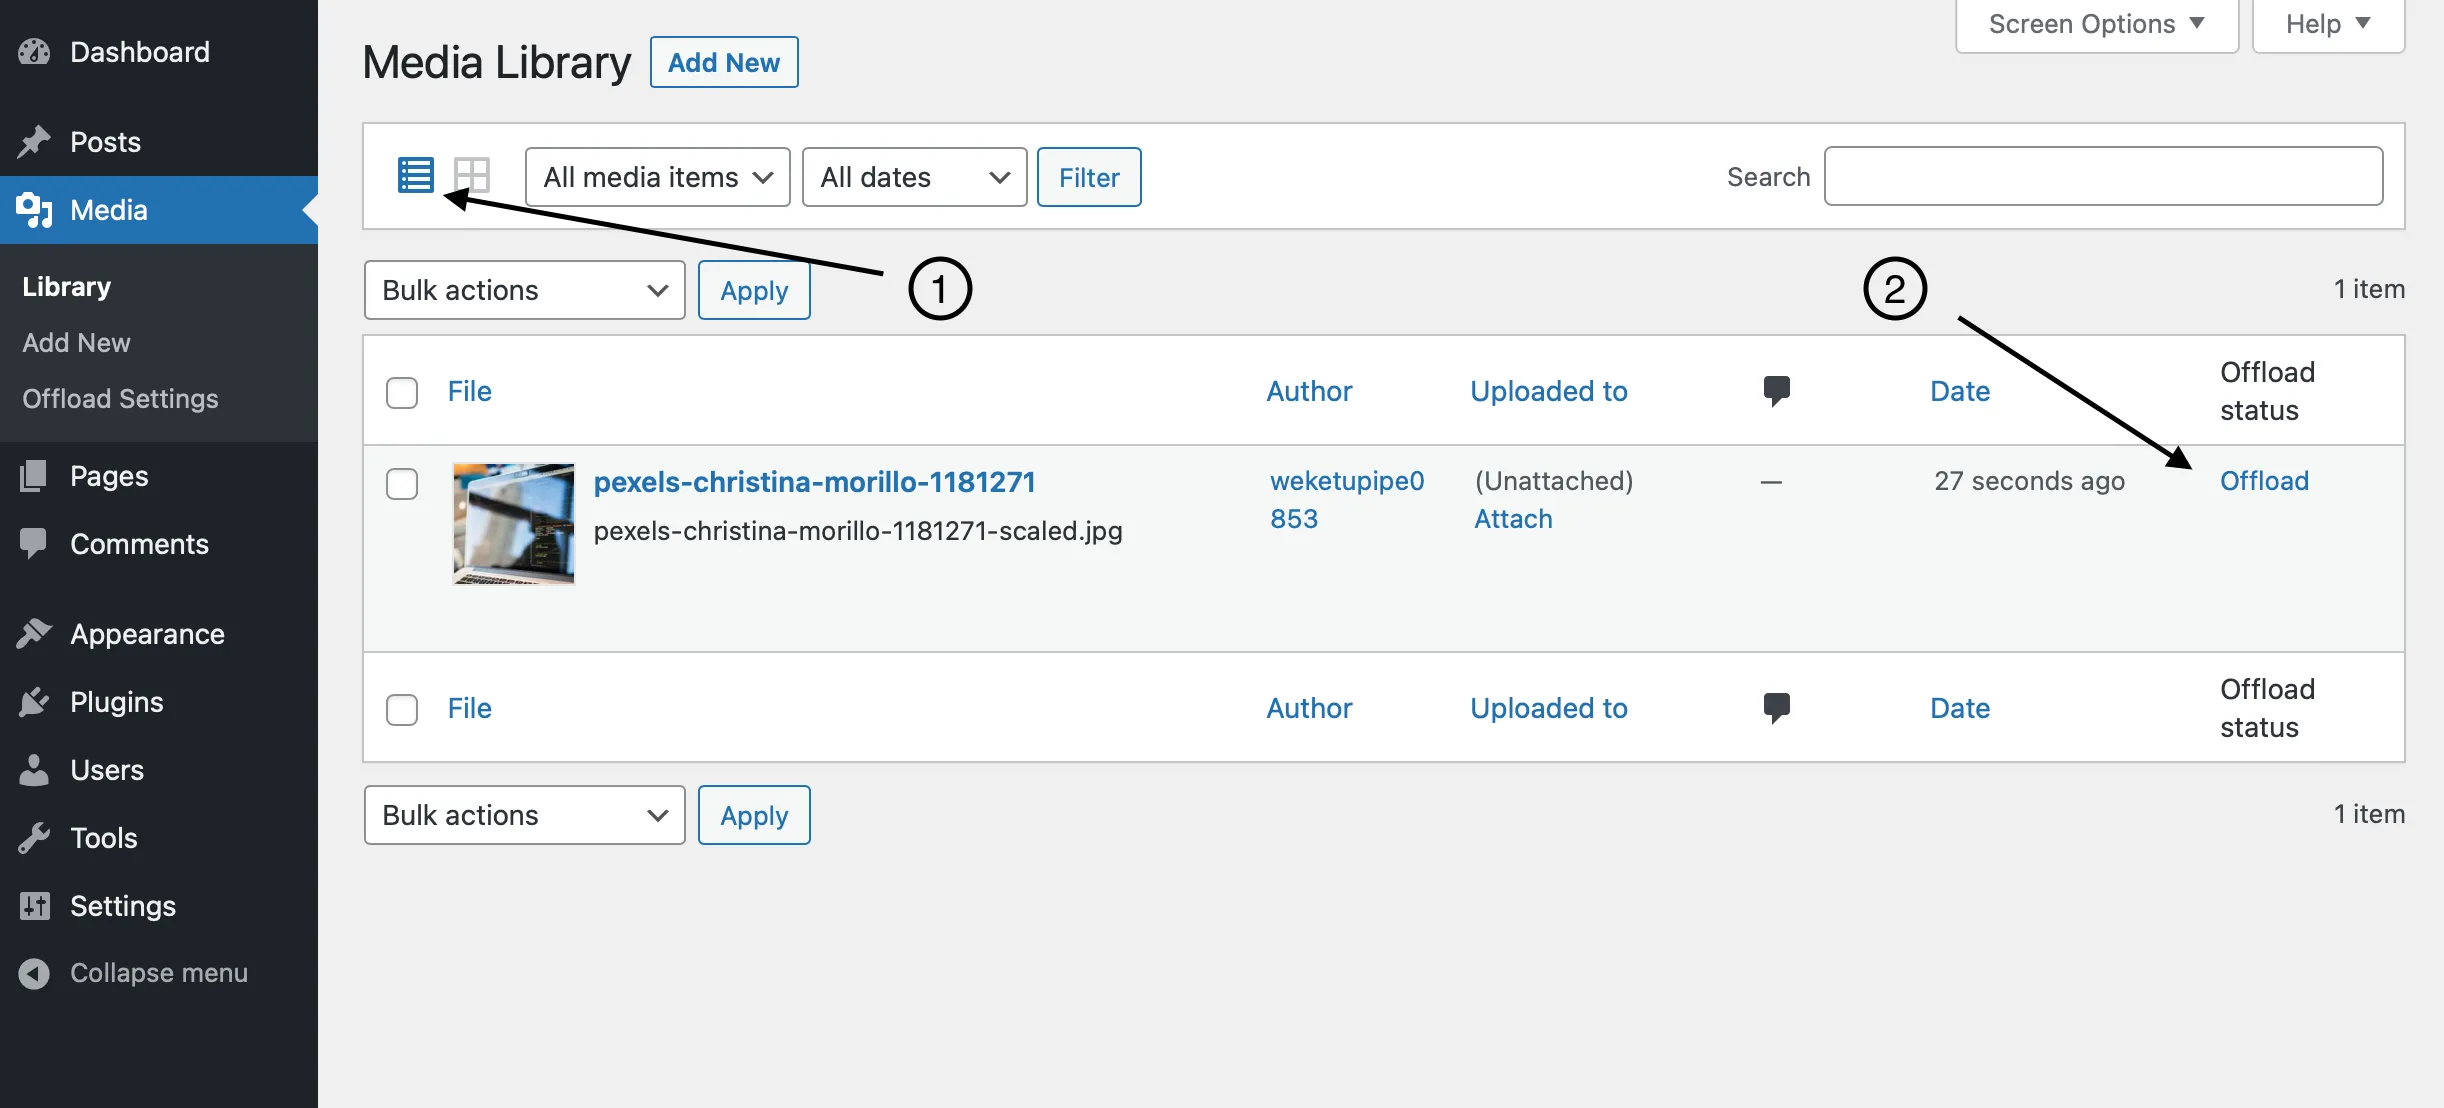
Make sure that the media library is set to “List mode” (1), each image will have an “Offload status” (2). Clicking the “Offload” (2) link, will save the image to the Cloudflare Images service and link your current media library image to the Cloudflare image entity.
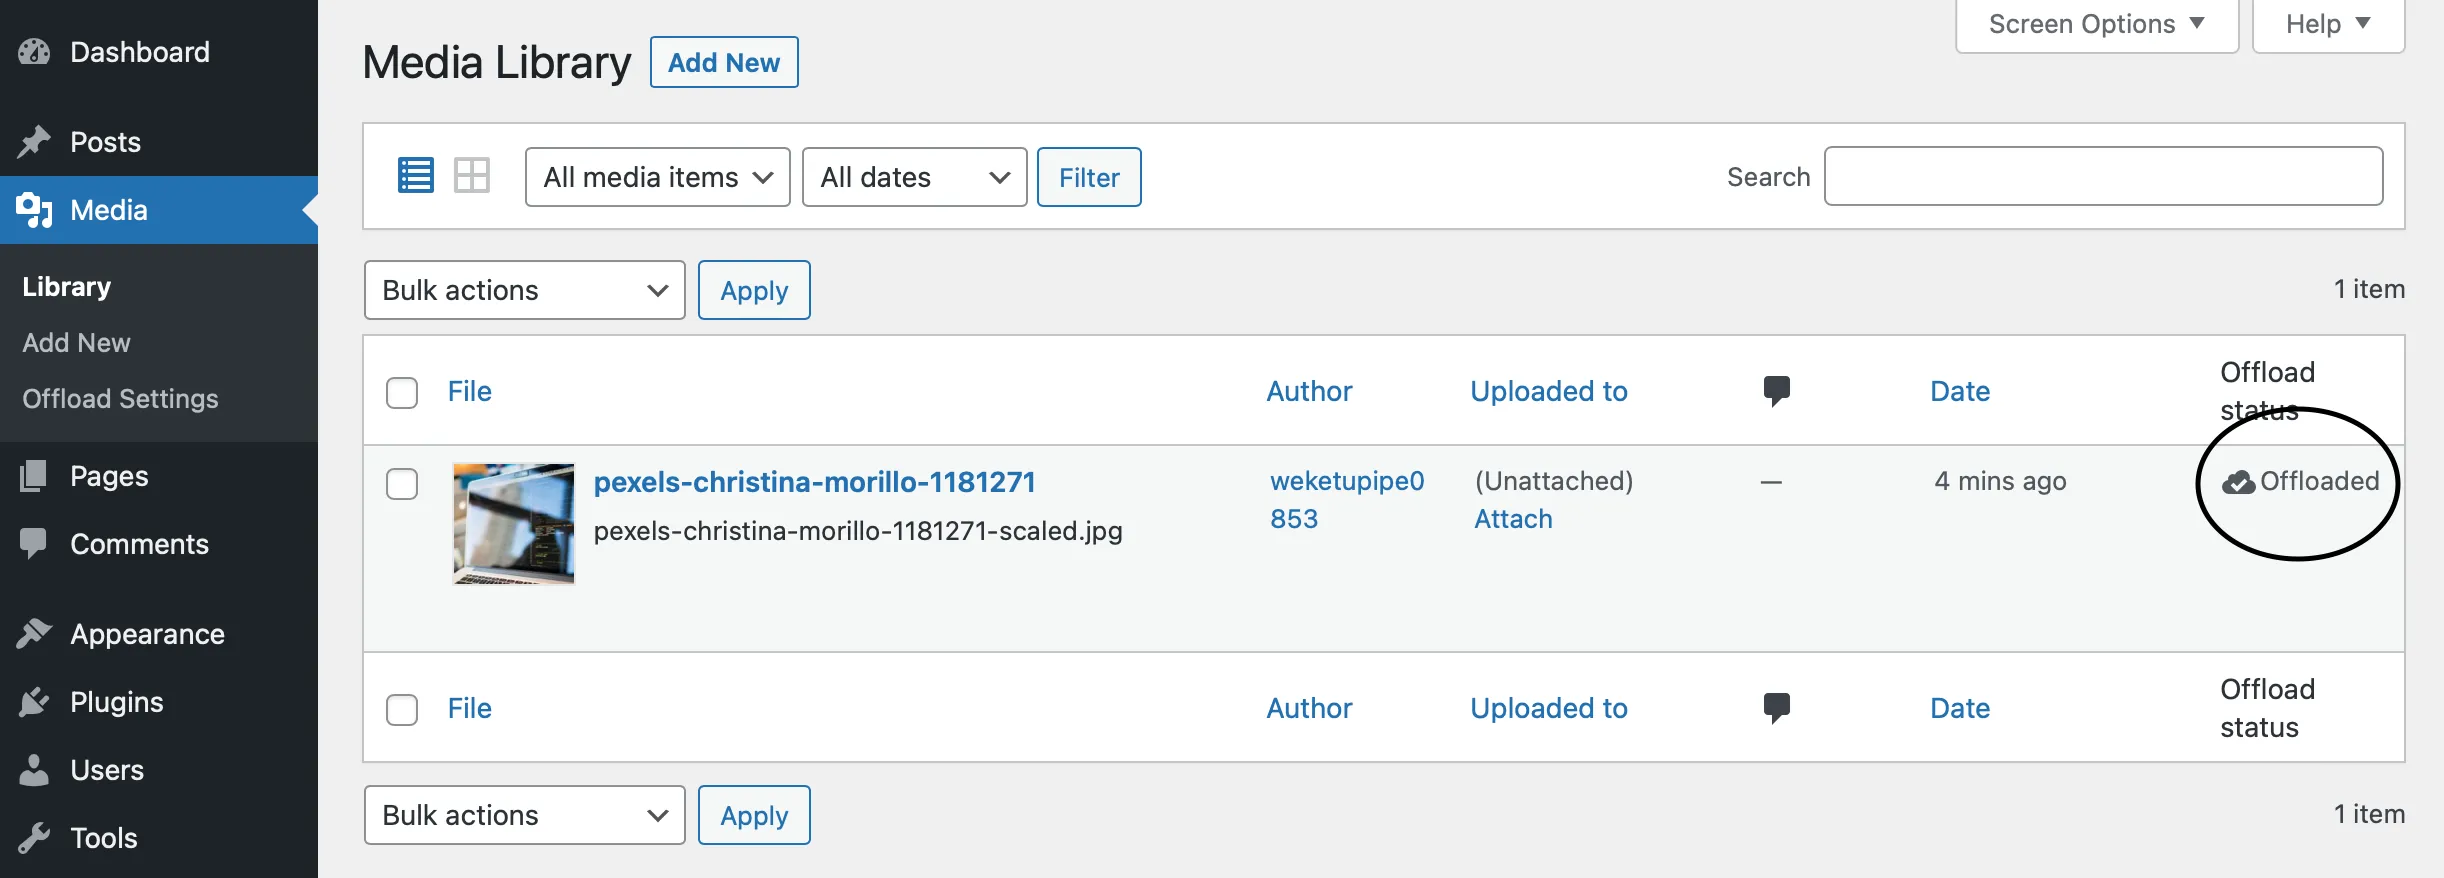
How to verify it’s working?
To verify that all of this is working, first of all, make sure that the images have an “Offloaded” status in the media library:
Next, verify that the image is actually present on Cloudflare:
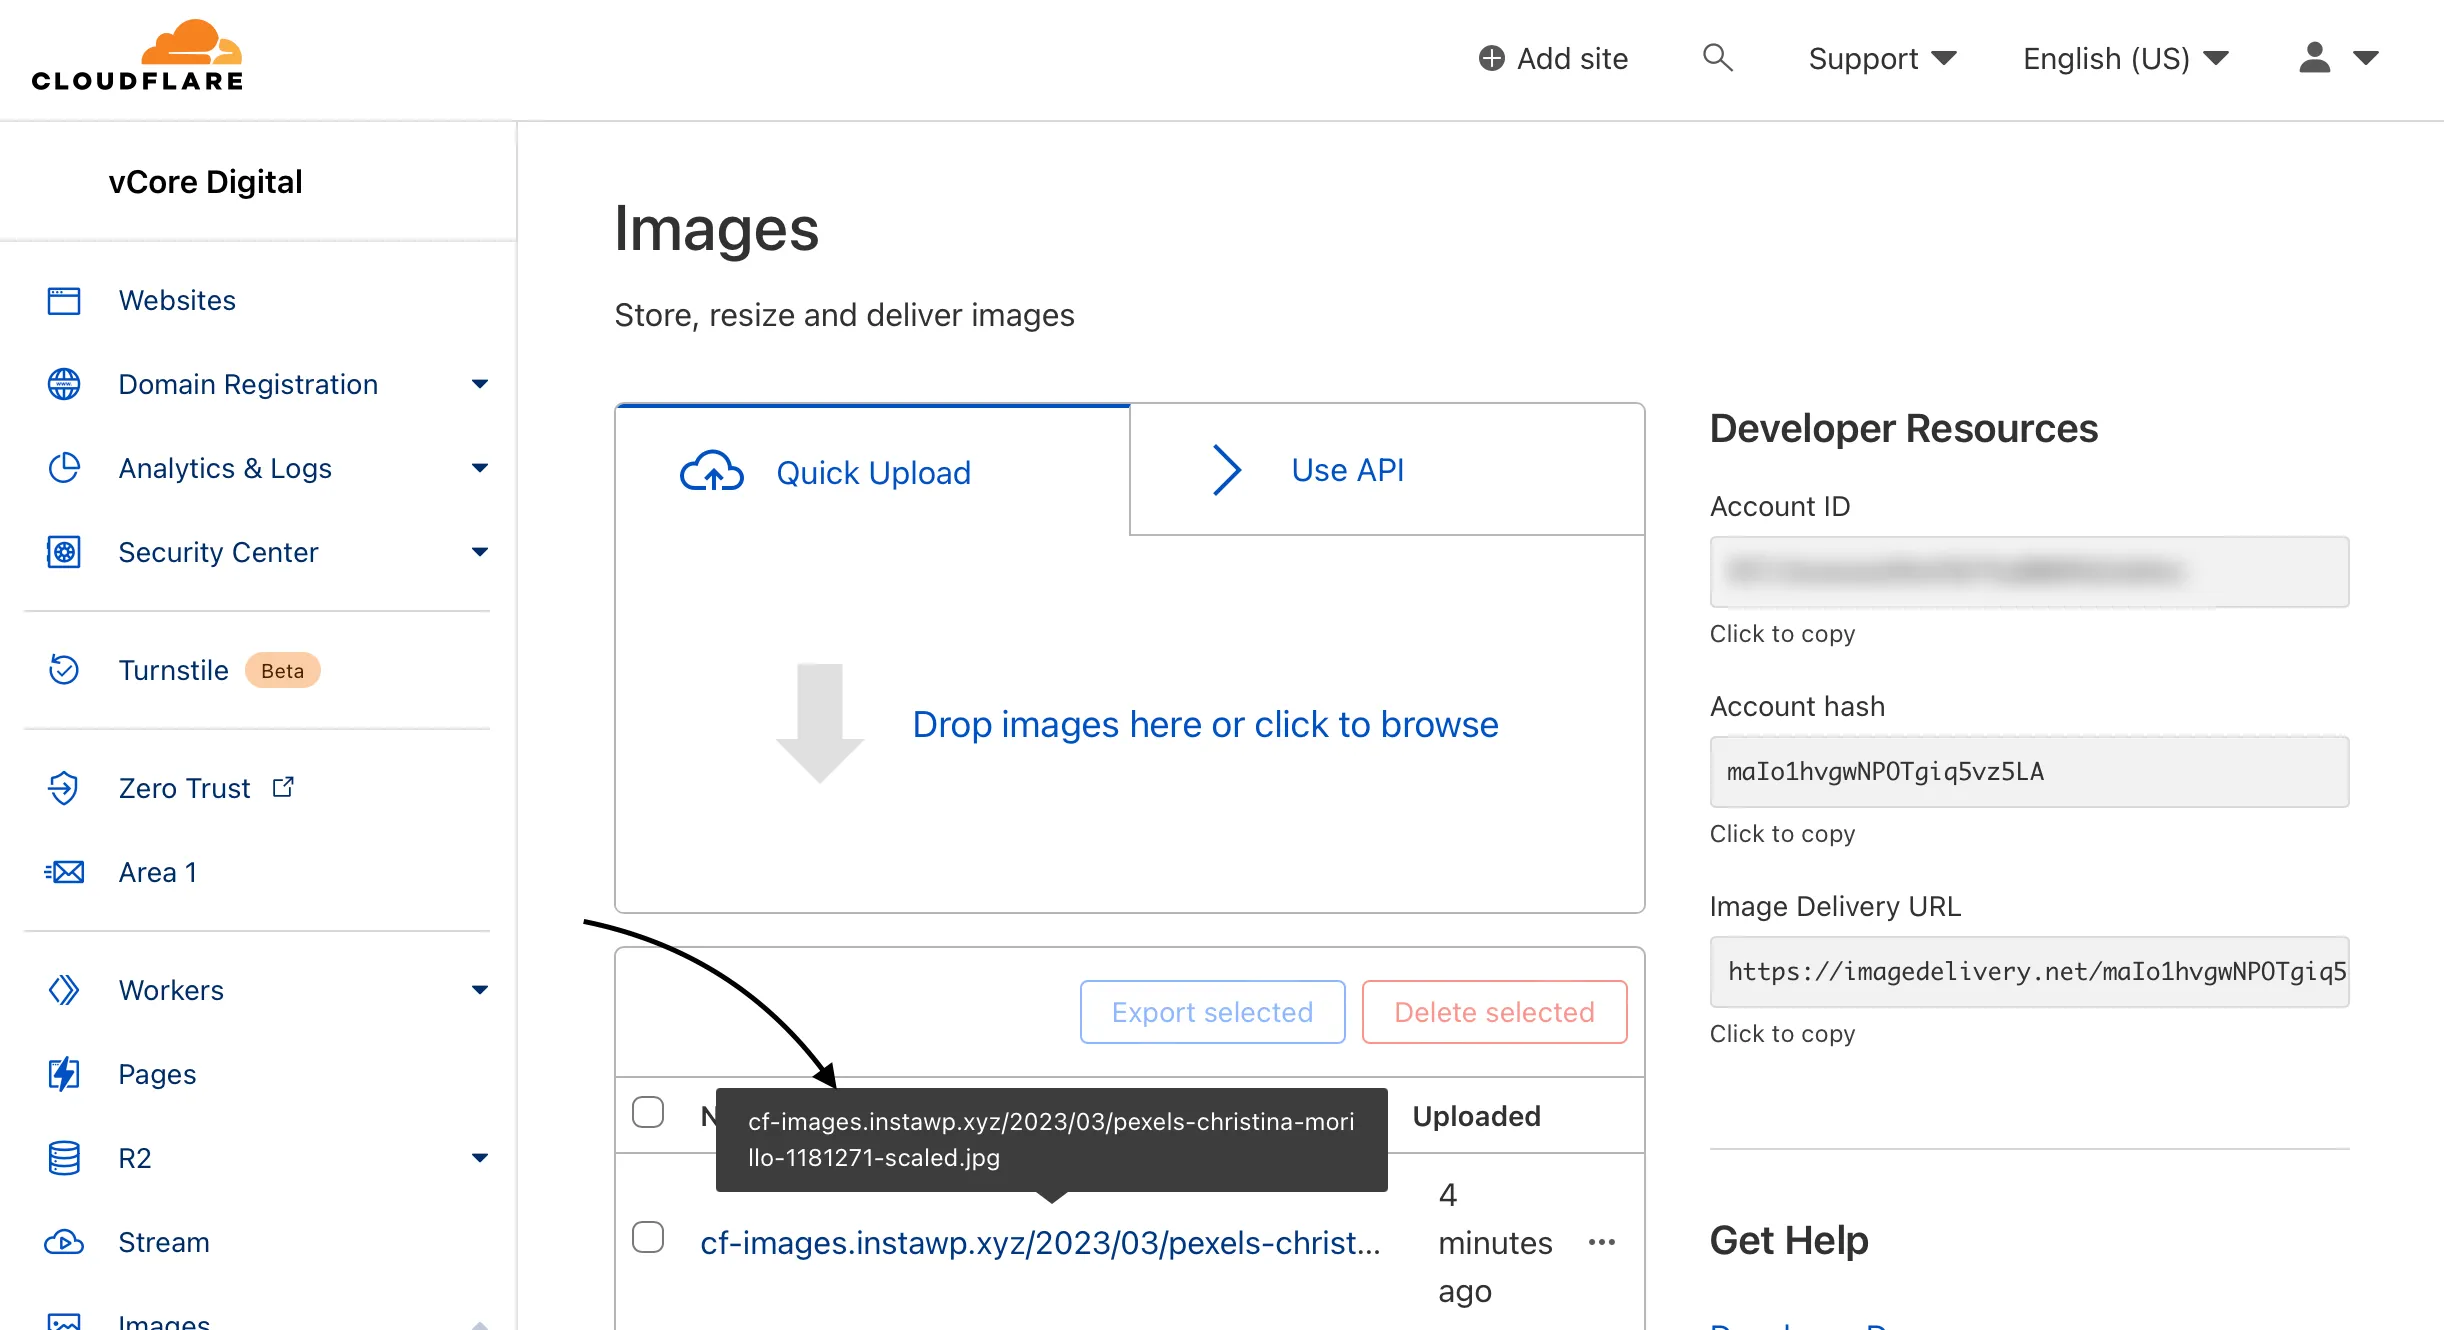
The images have the following name: <site domain>/<media library path>. This allows for easier tracking if you have multiple sites using the same account.
Now, let’s make sure the image is actually served from Cloudflare. Add an offloaded image to any page, and using web inspector, look at the page code:
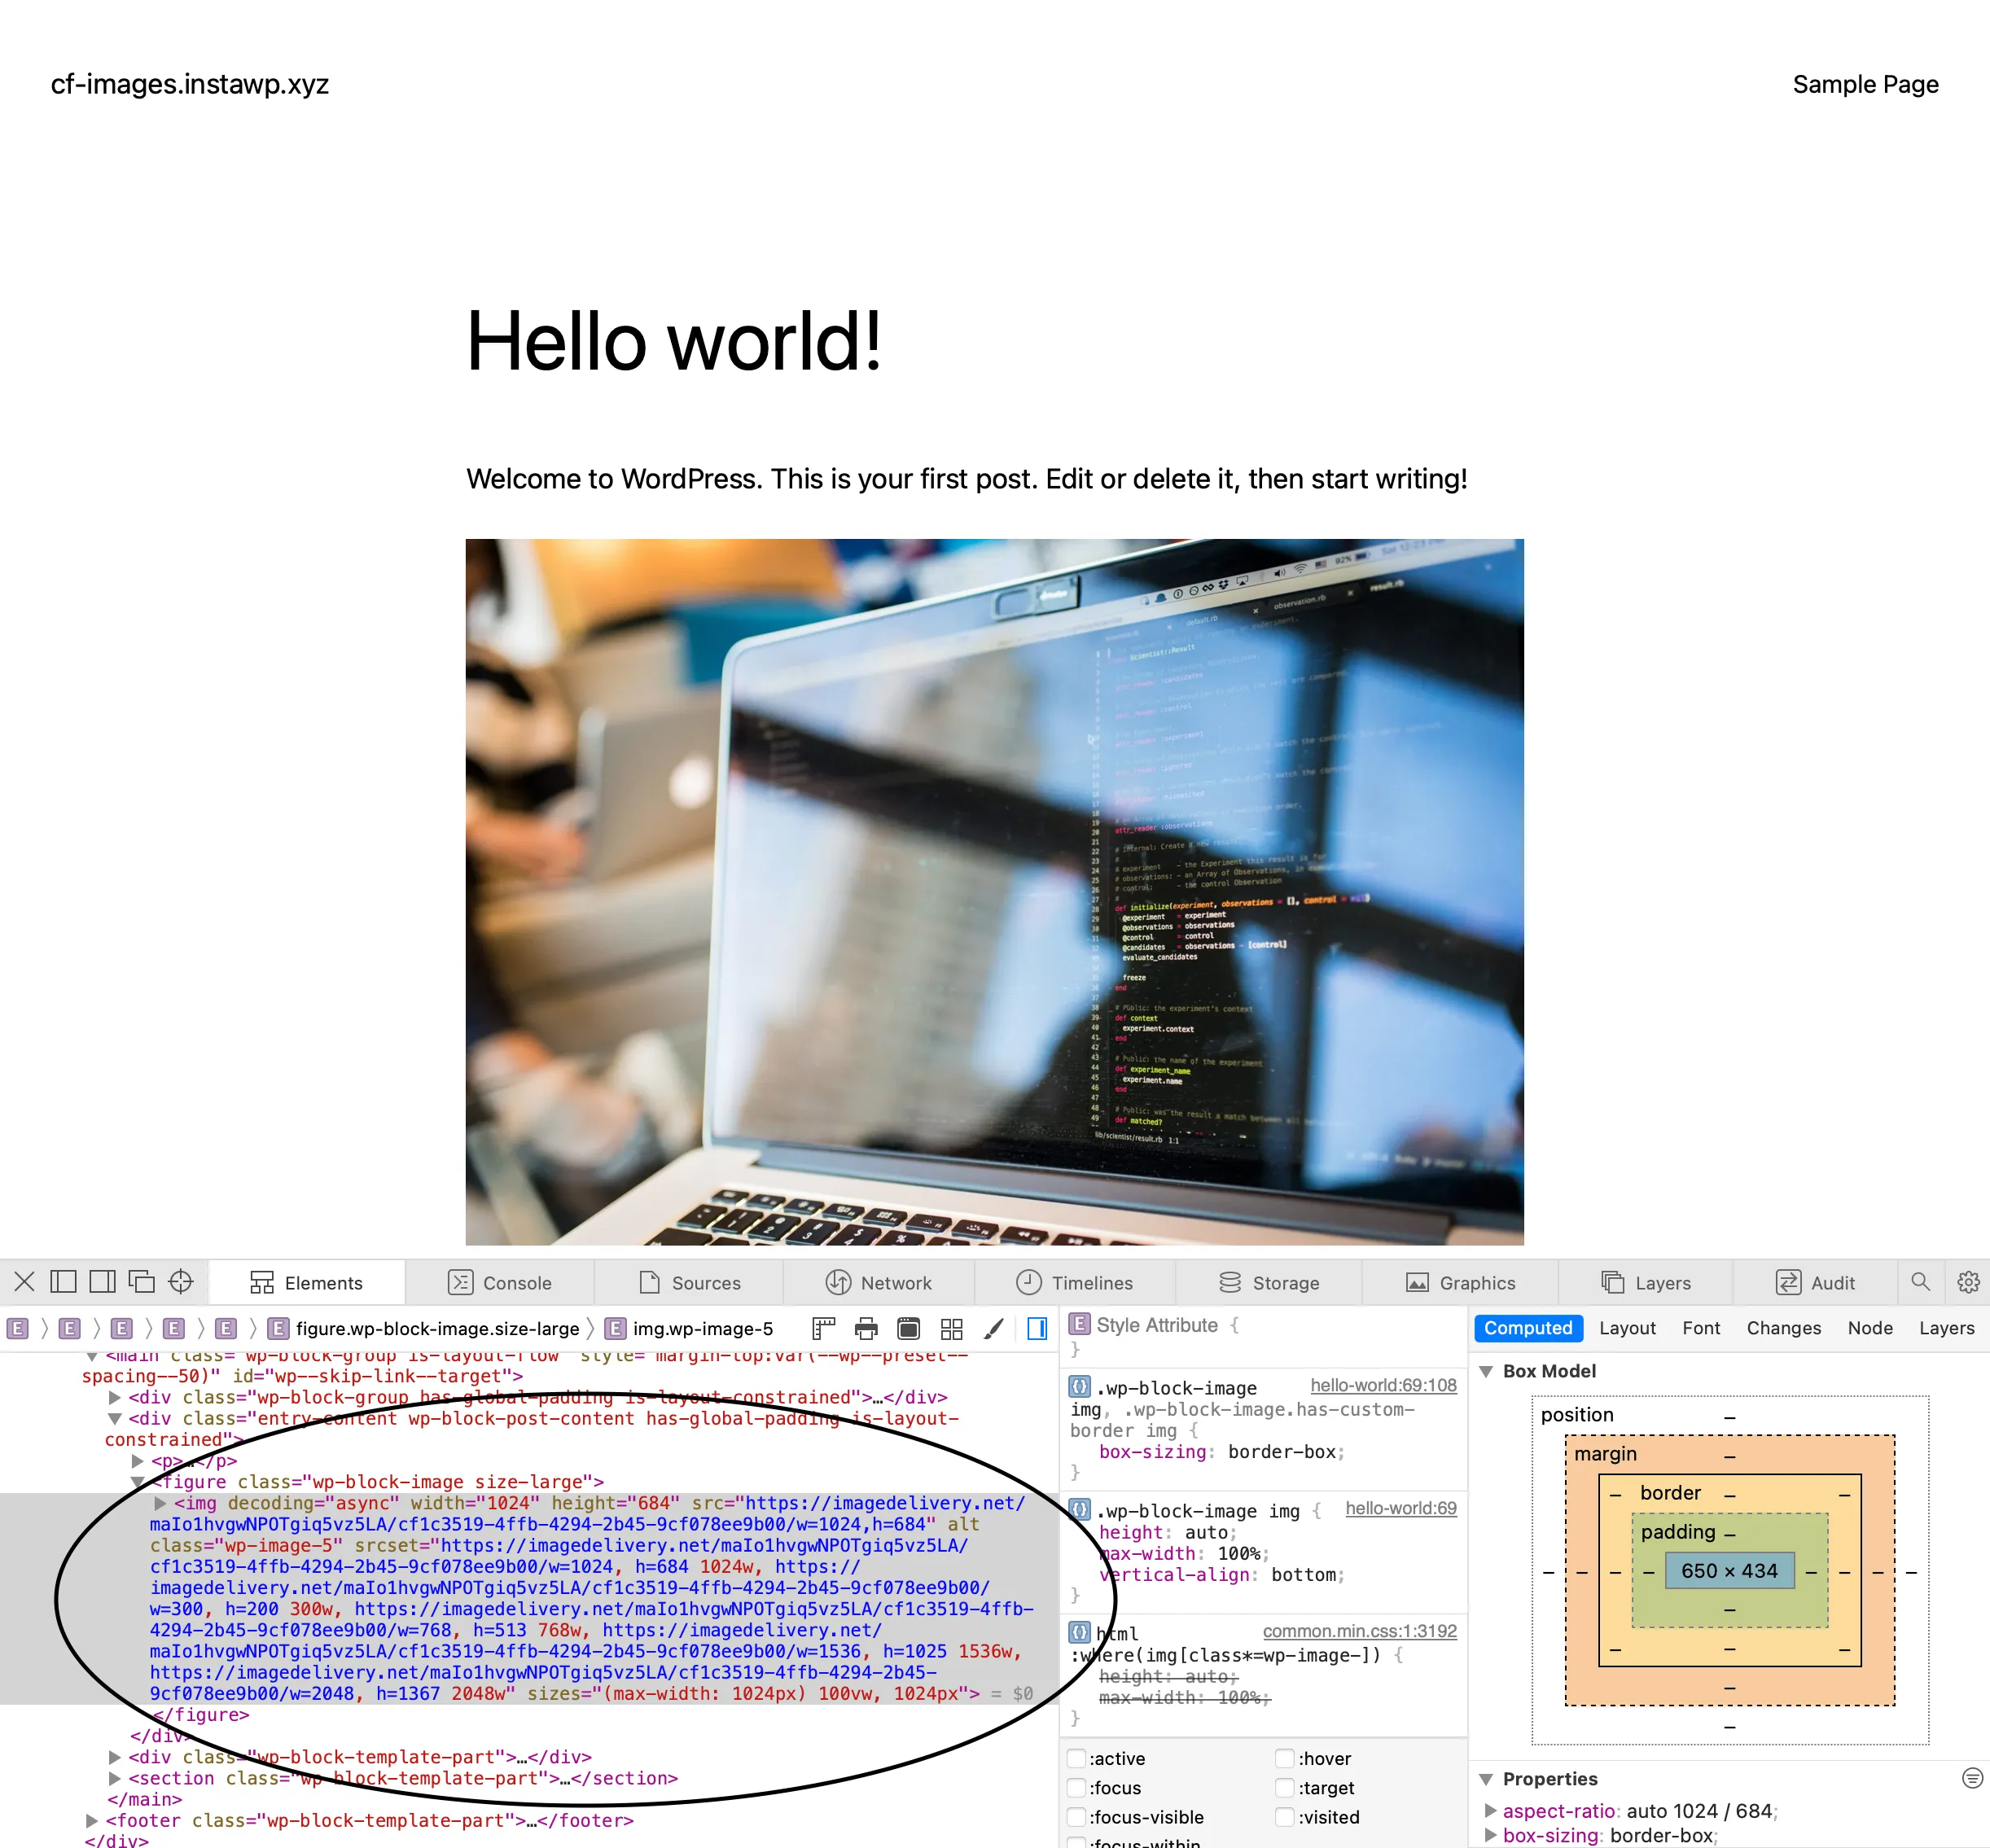
The images should be served from the imagedelivery.net domain with URLs that look something like the links in the above screenshot.
This could also be seen in the Network tab:

If you’ve set up the plugin to use custom domains, the imagedelivery.net domain will be replaced with the custom domain + /cdn-cgi/imagedelivery, for example, https://cf-images.cf/cdn-cgi/imagedelivery/....
Conclusion
This sums up the steps required to set up Cloudflare Images on your website. I hope this helped you out. If you have any questions regarding the plugin, you can leave a support request on the WordPress support forum for the plugin or contact me via the site contact form.
Back to blog